Friday, October 31, 2014

Boot inserts

Didn't think I'd have a finish today, but the weather predictions aren't great, so I pulled out my new boots this afternoon and decided they needed some inserts to keep them from flopping over when I'm not wearing them. (Also, I'm procrastinating on basting a quilt). 


It didn't take long to make these at all--it took longest to pick out a fabric. After sorting (and sorting), I just couldn't cut into some of my newer, cuter stuff (sad, but true). I came across a piece that I bought and then rejected for a quilt last year. I'm not crazy about it, but it was big enough so it made the cut, literally, for my inserts. I cut four pieces about 21 inches long, 5 inches at one end and about 6 1/2 on the other. I seamed the sides and narrower end, pinched and stitched triangles to make the bottom shaped like a paper bag, turned them right side out, and stuffed all my old skinny batting scraps in each one. It's amazing how much room those scraps took in the closet and how little they take in the inserts! After putting the inserts in the boots, I folded in the top edges of the fabric until they seemed the right height. 

I made a ribbon from a piece of fabric (about 2 by 18 inches) by folding the long edges to the middle, folding in half and topstitching all around. I made sort of a pleat by folding the top hems in from the side seams about an inch on each side of the seams and inserted the ribbon between at the mid point of the hems. Then I topstitched them together. It was kind of hard to sew them with all that batting in the way, but I didn't want to waste time with hand sewing. I should have taken some pictures to show--but that would have taken time and I was on a mission. 

Oops--blurry
The ribbon keeps the inserts together and can hang from a door knob. I got the idea for that part from this blog post--which has way cuter inserts. But they're done, and I just saw a snowflake so I'm all set for whatever happens next weatherwise.  

Now that I have a prototype, maybe I should make some (neater) ones for Christmas gifts.

I'm linking up with crazy mom quilts for Finish It Up Friday, because I'm proud to have cleaned out one fabric scrap and a whole bunch of batting scraps from my closet. 

Thursday, October 30, 2014

Throwback Thursday--Baby G's Quilt

This is a new post in a series about quilts I completed before I started blogging. It is my effort to document past quilts with pictures and as many details as I can remember (often not many) about how I constructed them. I'll be posting these indefinitely on Throwback Thursday. 

Today's quilt is one I made for my new grand-nephew G in the fall of 2008. (He just turned 6 last week, and I still can't believe he's that old already. Where did the time go?) I showed his twin sister's quilt here last week. When I found the fabrics with their ribbons and confetti prints, I thought a baby celebration was in order, complete with black tie, so I made a bow tie quilt. The blocks are 8 inches square, which I guess makes the quilt about 40 by 48 inches before washing. It's a pretty bright quilt, but you can get away with that with babies, right?


The quilt is machine pieced. At the time that I made it, I was a hand quilter. But I was also working full time and did not have time to hand quilt items that were needed quickly. So my baby quilts were almost always tied. I tied this one with yellow no. 5 perle cotton. The batting is Mountain Mist polyester. The backing is simple, but I wasn't messing around with pieced backs at the time. (I sure hope those wrinkles washed out.)


I'm linking up today with My Quilt Infatuation for Needle and Thread Thursday.

Oh, and if you read my post yesterday, you might like to know that I spent my day mindlessly unsewing and watching lots of home improvement shows, but I replaced all the blocks that bothered me and we're all good now. I'm happy again. 

Wednesday, October 29, 2014

Epic fail

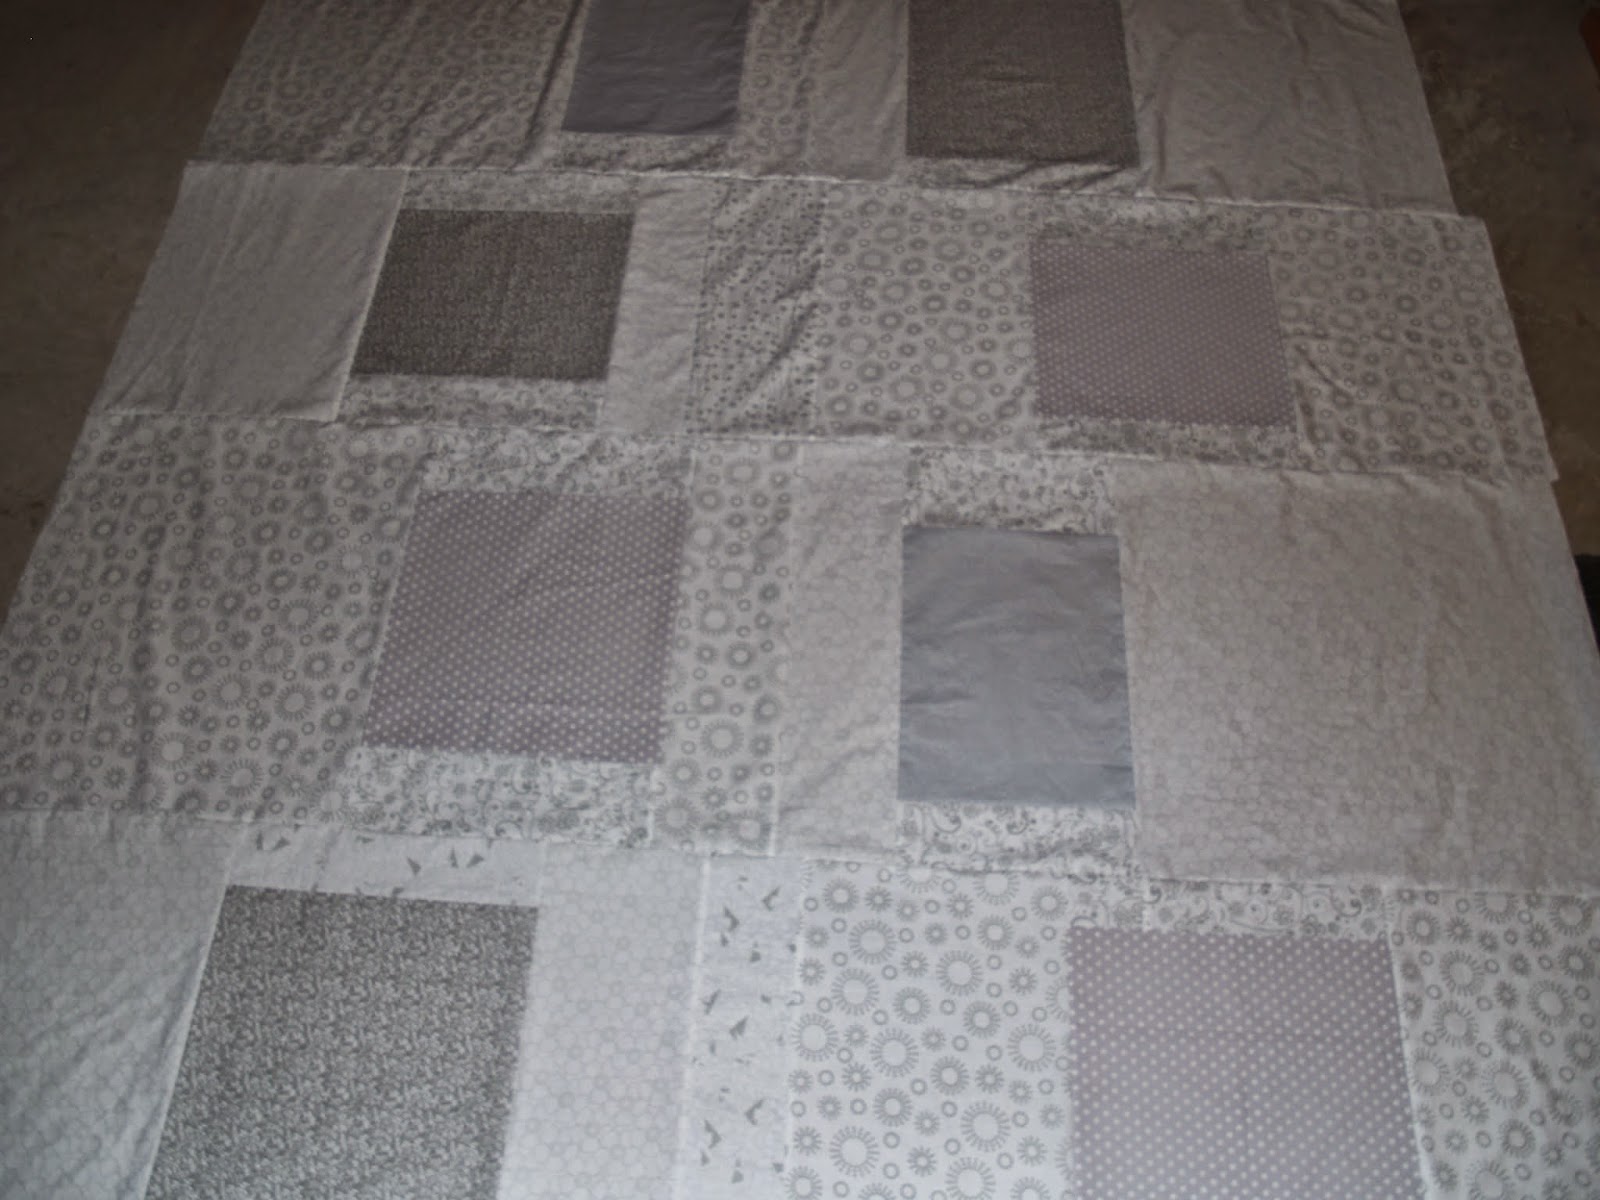
So, my little task this week was to put together the back for the Quilt for a Big Girl Bed. I like to make pieced backs, and even though I had enough fabric to make a really simple back with just TWO pieces of fabric, I had to go and cut it all up to sew back together again. I was planning to include some of the bright fabrics from the front and add some gray prints to the white/gray prints. In my mind it was beautiful. Then I discovered that the bright fabrics would make some shadows through the batting, and the (lightweight) white print fabrics on the front would look kind of muddy, so I decided to eliminate them and go for a low volume back with some "pops" (HUH??) of gray. I just went at it, piecing some pretty big blocks together. I finished it last night, and it was UG. LY. The low volume was so low it was pretty much silent, and the gray blocks screamed MEH (if that makes any sense). 

I can't believe I'm posting pictures of it. But live and learn. Oh, and the pictures are beauts, too, because the thing was too big to lay out on my living room floor and I had to take pictures with a flash in my dark basement. And to add to the misery, I hadn't pressed all the seams, either.


So, what to do? This quilt really needs to get done because I need to make another quilt really soon for Little Brother who will be making an appearance shortly after the holidays. I've decided to make yardage with all the leftover white prints, cut new blocks, unsew all those gray blocks and replace them with the whites. Then the back will just be low, low volume, which is probably appropriate for a quilt that should make a little girl want to go nigh-night. I'm hoping the quilting will pull it all together, or at least disguise a pretty poor attempt at free spirited piecing. 

I'm linking up today with Freshly Pieced for WIP Wednesday, because it's probably not a bad idea to sometimes share a work that's not exactly in progress. 

Time to find the seam ripper. 

Sunday, October 26, 2014

Blogger's Quilt Festival Entry 2

When I saw that there was a category for ROYGBIV quilts in the Blogger's Quilt Festival by Amy's Creative Side, I suddenly realized that I had a quilt to share. Let's call this my ROYGBIV Calendar Quilt--with Chickens! (previously unnamed, as usual.)


I think I made this quilt in the summer of 1994 (or perhaps one year earlier). The idea for the pattern is based on a series of quilts Pepper Cory made. She spent time one year making a simple block each day of the week, and then on Sunday she made one of a different design. I think she might have had 4 different quilts--one for each season. For my quilt, I decided to make a simple nine-patch for each week day, a Puss in the Corner block for Saturday and a Shoo-fly for Sunday. If you start in the upper left hand corner and read left to right you'll see the pattern--but it's purposely pretty subtle. You have to kind of look for it. 


I made my quilt with bright rainbow colors to brighten up my windowless office at work. It hung there until the year before I retired, when the local fire marshal "outlawed" fabric hangings in our building. Now that I'm retired, it hangs in a hallway in my home.

The quilt is cotton with polyester batting. I originally planned to bind it in black, but that was too strong a contrast, so I used a black with a little orange design in it (probably Halloween fabric), and it reads as a rich brown. I used the same fabric for the back. The blocks are 5 1/2 inches square, and the whole quilt is 66 3/4 inches by 28 3/4 inches. And yes, there is chicken fabric in there!
Chickens!
I apologize for the haphazard setting of the main picture. I rushed outside to set up for my husband to take pictures after church this morning and this was the only place there weren't shadows. There was a stiff breeze, too. Not the best for picture taking. Oh well, it is a step up from my usual "quilts with legs" pictures. (And you can see the reflection of my beautiful maple tree in the glass doors.)

So, I'm linking up with the ROYGBIV category for the festival.  If you want to see my other entry, it's here in the Art Quilt category. Now I'll sit back and enjoy everyone else's quilts. Thanks to Amy's Creative Side for setting up this festival. 

Blogger's Quilt Festival Entry 1

I'm linking up today with Blogger's Quilt Festival from Amy's Creative Side. I wrote a post about this quilt a few days ago. I guess I could have updated that one, but I'll do a quick one here to make sure I don't do something wrong with my entry. I don't usually name my quilts, but I've decided to call this one Reminiscence.


I started this quilt in February 2013. It's based on a video clip I made on a mild, snowless day in January 2012. I was impressed with the dramatic clouds, lighting and spare landscape and wanted to interpret the scene and preserve the memory in fabric. I machine-pieced the top using freezer paper piecing techniques I had learned from Ruth B. Mc Dowell's book Piecing Workshop. Since that time, I've been hand quilting it, mostly while on vacations away from my sewing machine. I just finished it. It seemed neverending for awhile, but now I kind of miss working on it. The quilt is cotton with a polyester batting. It's 24 by 41 inches. I added ceramic buttons made by Sandra Lance for some embellishment and a touch of reminiscence of another time. 


My quilt is small, hand quilted, an original design and scrappy (made entirely from leftovers in my stash), but I've decided to enter it in the art quilt category. That label makes me squirm (fraught with controversy), but the quilt is a not-easily-duplicated design from my own photo and it's not something you'd think of snuggling under, so for me, it's an art quilt. 

I'm entering another quilt in the ROYGBIV category. I'll do a separate post about that one. 

Now I'll spend the rest of the week enjoying everyone else's quilts.


Friday, October 24, 2014

Neverending WIP is finished

Yippee! Thanks to three short vacations this fall, when I spent each evening quilting in my motel room, my Neverending WIP is finally finished. (I suppose I should give it a different name, but what?) This week, I finished it up with some last quilting, binding and embellishment. 


The idea for this quilt started with a video I took in early January 2012 while on a walk in Hawk Island Park. We had mild temperatures and very little snow that winter, and I was struck by the dramatic clouds, lighting and spare landscape. When I finally decided to make the quilt in February 2013, I had no idea how to transfer the photo to a full-size pattern, and now I don't remember the details of how I actually did it. I do remember looking around on the internet to find out how to posterize a clip from my video (to simplify the colors) and to make it into a sketch, which I then made into tiles to print onto 8 1/2 by 11 inch pages. I taped the pages together and drew over prominent lines with a marker, eliminating many of the tree branches. (I'm sure there is a very simple procedure for all of this, but I just went at it in my usual clueless, intuitive way.) I still have the various versions of the photo:

Original video clip

Posterized version
Sketch version
I traced the pattern in reverse onto freezer paper and then used techniques from Ruth B. Mc Dowell's Piecing Workshop to construct the quilt. 

All of the fabric is from my stash. The ceramic buttons I used for embellishment are from a collection I purchased last year from Sandra Lance. I sorted through them on impulse this week and found three that were a perfect match. The batting is a scrap of Mountain Mist polyester, probably Quilt-Light. I used various cotton and cotton/polyester hand quilting threads. The binding is made from random lengths of three different navy prints. (I used my new even feed foot to sew the binding on. I had never really had trouble sewing binding with a regular foot (except for one on the bias--see yesterday's post), but I could not believe how smoothly it went on with the new foot. I didn't even need any pins to hold it in place while I was sewing. Amazing!) I stitched the binding to the back by hand and then added my initials/date and a sleeve for hanging. 

The finished size of the quilt is 24 by 41 inches. I didn't wash it, and don't plan to since it's a wall hanging. (And I'm afraid washing could mess it up. I am thrilled that after so much quilting, it is hanging straight and flat!!) 

I finished this quilt at just the right time. The leaves are starting to fall now, and I think this quilt will be just right for my living room for the rest of the fall season--and probably during the coming winter to remember that mild winter of 2012.

Over my sewing table
Now that I'm learning to machine quilt, I don't hand quilt as much, but it is still my first love and my favorite activity while watching TV in the evenings or just spending time on my own or with family. I miss the contemplative nature of hand quilting, and really need to do it more often. Time to come up with another project to hand quilt. 

I'm linking up today with crazy mom quilts for Finish It Up Friday and with Confessions of a Fabric Addict for Whoop Whoop Friday.

Thursday, October 23, 2014

Throwback Thursday--D's baby quilt

This is a new post in a series about quilts I completed before I started blogging. It is my effort to document past quilts with pictures and as many details as I can remember (often not many) about how I constructed them. I'll be posting these indefinitely on Throwback Thursday. 

Today's quilt is a baby quilt I made for my new grandniece D in the fall of 2008. (Maybe I'll show her twin brother's quilt next week.) The pattern is Log Cabin Squared by Beth Hayes that I found in the Fall 2008 issue of America Makes Fast Quilts by McCall's Quilting. The original pattern called for 25 fat quarters and was made of 12-inch by 12-inch White House Steps blocks set in 5 rows of 5 blocks. I think I re-sized the pattern to make 8-inch blocks, and I added an extra row. The finished center square of each block was 2 inches and the finished strips were 1 inch wide. 


The quilt is machine pieced. At the time that I made it, I was a hand quilter. But I was also working full time and did not have time to hand quilt items that were needed quickly. So my baby quilts were almost always tied. I tied this one with no. 5 perle cotton. The batting is Mountain Mist polyester.


I found a cute plaid fabric to use for the binding and decided to cut it on the bias. I had done few bias bindings in the past (I think only on some quilts that had scallops), and I had never attached one by machine, so I struggled with this one, probably pulling it too taut as I was sewing. So the edge ruffled a bit. It was fairly evenly ruffled, and so I let it be. I figured it added to the feminine nature of the quilt. (Well that seemed like a good excuse to not tear it all off, anyway.) Now that I just bought an even feed foot, I have a feeling that if I do another bias binding, I'll be more successful.  

The finished quilt was about 40 by 48 inches before washing. 

I'm linking up today with My Quilt Infatuation for Needle and Thread Thursday and possibly Quiltin' Jenny for Throwback Thursday, if she posts. 

And...come back tomorrow. I have a finish to post, and I'm so happy!

Thursday, October 16, 2014

Throwback Thursday--Sewing Machine Cover

In the summer of 2013, I received a surprise (and much appreciated) thank-you gift of a Tonga Treats Mini (40 charm squares) in Coastal from Timeless Treasures for participating in a quilt drive for victims of Hurricane Sandy the previous fall. I wanted to do something special with the fabric, and last October I settled on making a sewing machine cover. 


I sewed 36 charms in six rows of six and then layered the whole piece with some left over batting and a piece blue/navy print from my stash. I free-motion quilted it with meandering stitches on my Singer treadle machine using Superior King Tut cotton thread in papyrus. (This was my first FMQ project on the treadle machine--and my first FMQ project ever--other than little practice squares.) 

After quilting, I folded the piece in half wrong sides together with the fold at the top and stitched down each side. Then I turned it right sides in and sewed the seams again to make french seams. I hemmed the bottom edge, and topstitched it a couple of times.  

Next, I pinched triangles of fabric at the corners where the fold was to make the same kind of flaps that you see on the inside of a paper grocery bag, except I made them on the outside of the cover. I stitched across the widest part of each flap. I also pinched and topstitched around edges of the cover (where you would see the creases on a grocery bag) to give it a little more definition and strength. It's a little hard to explain all of this--I hope you can see what I did from the picture. 

To finish off the cover, I folded the flaps down over the sides, sewed ceramic buttons to secure them, and added one button as a decoration on the front. The buttons are part of a handmade collection that I bought from Sandra Lance last year. 

The completed cover measures approximately 18 1/2 inches wide, 7 inches deep and 9 inches high. I use it to keep the dust off my treadle machine when I want to leave it out during a long-term project. The cover also fits perfectly over my Singer Featherweight when the bed extension is down. Lately I'm thinking I might need to make a second cover, so they don't have to share. If I do, I might quilt the top to a piece of muslin and then put on a separate lining. That would reduce some bulky seams. I'll try to remember to take pictures as I go to show better how it is made. 

My sewing machine cover reminds me daily that it is important to make quilts that I can donate to give hope and comfort to others. 

I'm linking up today with Quiltin' Jenny for Throwback Thursday and to My Quilt Infatuation for Needle and Thread Thursday.

Wednesday, October 15, 2014

Bits of Progess

At first I thought I wouldn't have anything to share today. We went on a leaf peeping vacation to northern Michigan last week, so I was away from my sewing machine. It was beautiful even though the color in Michigan has been surprisingly slow after a promising start this year. We did a lot of bicycle riding on rail trails and spent some time on the shores of Lake Michigan and Lake Huron in Mackinaw City


There was a quilt store a block away from our motel, and another a few miles away, so I built my stash of blue fabric (my stash has a lot of 70's and 80's gray-blues, and I needed some brighter fabric for the background of a leaf quilt that is still in my mind. And, on impulse, I bought a walking foot. There may be less meandering in my quilting in the near future! I could have bought so much more, but I restrained myself.

I took my Neverending WIP project with me and finished the road portion of it in the motel room in the evenings. Only one more section to quilt and it will be a finish...

Now that I'm back home, I've been working on adding to the Quilt for a Big Girl Bed. I was going to add half-blocks to the outside edge, but after talking with my daughter about the size and style of the bed my granddaughter is going to have, I added two rows of full blocks to the sides and three to the length. Whew! There may be some wrestling with it at the sewing machine. Next up is laying out the backing with leftovers and other treasures. 

So even though I was on vacation, I did get quite a bit done on my projects.

I'm linking up today with Freshly Pieced for WIP Wednesday. 
Check back tomorrow, and I'll have another Throwback Thursday project to share. 


Thursday, October 9, 2014

Throwback Thursday--J's City Quilt

For 18 years, I've been having fun making baby quilts for my great-nephews and great-nieces. Today, I'm sharing one I made for J, who was born in March 2012. 

My plan was to make something car related that could be used as a play mat. My first thought was to buy yardage with a roadway printed on it--you know the kind I mean. But the fabrics I found weren't big enough to suit me and I didn't want to piece a repeating pattern. So I made my own design instead. 

I used graph paper and planned how wide the roads should be so that common toy cars would fit on them and then planned city blocks to fit between them. A quilt like this could be pieced any number of ways, but I chose to use a freezer paper technique. I made a master pattern and traced it in reverse on the freezer paper. Then I searched for a car print fabric to use for the backing and used that fabric for the color scheme of the buildings. Alexander Henry "Beep Beep" was just the right fit for my project. 

I cut the freezer paper apart and ironed the pieces on the wrong side of the fabrics I chose, added 1/4 inch seam allowance, and then pieced the quilt puzzle style. That was probably more work than the design needed, but I had just finished a different quilt using that technique, so I stuck with it. The good thing is that because of the way I planned it, I still have the master pattern if I ever want to make another similar quilt.

Here's the finished quilt:


The quilt was about 40 1/2 by 48 inches before washing, with roadways 2 3/4 inches wide and blocks just over 16 inches by 8 1/2 inches. I hand quilted with cotton thread, following the lines of the roads, windows, and edges of buildings. I don't remember what batting I used, but I'm thinking Warm and White. (This was made in pre-documenting, pre-blogging days. At least I did remember to take photos and keep the master pattern.) It was one of the last baby quilts I made with hand quilting or tying. Now I do free motion quilting on most of the quilts I make for kids. The binding is the same pattern as the backing fabric. 

J is about 2 1/2 years old now, and he uses the quilt just the way I imagined he would. 

I'm linking up today with Quiltin' Jenny for Throwback Thursday. 

Friday, October 3, 2014

Lighthouse Finish

Another project finished using just my stash. Problem is, with something this small, the decrease in the stash is not noticeable at all. Or is that a problem?


I forgot to mention in my last post that after embroidering, I added some quilting, just to hold things together (sky, rivet lines on the cladding of the lighthouse and a few lines along the water and dune pieces). 

To finish the block, I added the white border. I wanted the material to be thick enough to support the whole picture in the frame, so I doubled the width of the border strips, sewed down the center of each one when attaching it and then folded it back toward the edge. Then I attached the binding, bringing it all the way over to the back, so it doesn't show on the front. This gives a clean finish and  allows the quilt to be displayed without the frame if desired. It also makes the piece neater unlike other ones I've made that are a total mess under the frame. 

The picture is 4 by 6 inches (6 by 8 with the border). All of the fabrics are cotton, with a scrap of cotton batting. If you'd like to see how it got to this point, you can read about it here and here.

My finished lighthouse quilt picture will be a birthday present for my sister-in-law, who grew up not far from the lighthouse and still visits it each year for family pictures. (Shhh. It's a secret. She doesn't know about my blog yet.) It will join another quilt picture that I made for my brother a couple of years ago, representing the two lights by Muskegon, Michigan, where he likes to sail. 

I'm linking up with Crazy Mom Quilts today. 

Thursday, October 2, 2014

Throwback Thursday Quilt Edition

I've only been writing this blog for a short time, but I have so many quilts I want to somehow document, so I've decided to do just that on Thursdays whenever time allows. I found a blog link-up for just that purpose, so here goes...

I have always loved reading about old building restorations or watching TV shows that follow the process, and I especially enjoy it when beautiful architectural details are discovered that have been hidden away for years under ugly remodels or modern facades. So I was intrigued by an article that appeared in the Lansing (Michigan) State Journal on July 22, 2005 that told the story of the Ranney building in downtown Lansing that had been designed by a prominent Lansing architect (Darius Moon) and built in 1891. In 1927, the top two floors were sealed off (I have no idea why), preserving beautiful wood work and tiling as well as the medical offices that had been there until they were uncovered during a major restoration project in 2005. 

There was a particular tile pattern in a picture of some of the flooring that caught my eye, and I knew that one day I would make a quilt of that pattern. So when my sister-in-law asked if I would make her a wall quilt for her living room, I was ready to transform that pattern into fabric. 
This picture is grainy, but it's a scan of the newspaper clipping that I amazingly still have in my file cabinet. This was apparently the floor of a dentist's office, but those gorgeous tiles are also in other parts of the building. 

Here's the finished quilt:

And a detail:


I used marble-y patterns to try to reproduce the look of the tile. I remember that I tried to stencil the little leaf details with fabric paint before piecing but wasn't happy with the way they came out, so I embroidered them instead with variegated floss to give a feel of the designs on the tile. I was pretty much guessing at the motifs because they weren't really clear in the pictures I had, but they looked like oak leaves to me. 

The back of the quilt is a little peachy/off white vine print:

From the sketchy notes I found on a piece of graph paper with my old newspaper clipping, I think the quilt is about 40 inches square. I remember that planning it was a challenge because I had to figure out how to make the center medallion, outer triangles and borders fit together without too many crazy measurements. I pieced it by machine and hand quilted it with off-white cotton thread, probably with Mountain Mist polyester batting (maybe Quilt Light) because that was what I usually used at the time. 

I finished the quilt in April, 2006. So there you go. My first TBT quilt post. I have enough pre-blog projects to fill many future Thursdays.

If you'd like to read more about the Ranney building, here is a blog post with the link to the original article in the State Journal in 2005. It's fascinating. There used to be pictures online of the tile floors and other details, but I can't find them in the archives. There are also current pictures of some of the rooms and hallways on a rental site here.

I'm linking up with Quiltin' Jenny today, with gratitude to her for setting up a link party that meets my need to share overshare about my past projects. 


Wednesday, October 1, 2014

Lighthouse block progress

I've been working on my little lighthouse quilt. I started with just the lighthouse, and my plan was to add a smaller block of a sand dune below it with sashing between. I used Karen Eckmeier's Layered Curves and Accidental Landscapes techniques. It was a simple and fun process, and of course, once again I didn't take pictures because I was so busy working playing with fabric. Basically, all I needed to do was take a few strips of fabric in dune-y colors, cut a graceful curve along one long edge of each one, fold the edge over and press, layer the strips up on a foundation piece of fabric, and topstitch them. Before I did the stitching, I laid out the dune block below the light house with paper sashing (substituting for the fabric I would use) between them and a frame around it to see how it would all look. I showed it to my husband, and he seemed confused. Why did I have a white strip cutting the picture in two?


So I laid out the blocks again, without the paper. 

Hmmm. I liked that better. (Sorry for the bad lighting.) So I stitched it all up, and added lots of details with embroidery thread--much more than I usually do, but the details of the real lighthouse are so distinctive that I got carried away. Don't look too closely at the embroidery. It's not precise--I'm a little rusty with detailed work. (Probably need new glasses.)

I think if I ever make this pattern again, I'll do the windows with sewing thread instead of embroidery so that they show but don't stand out so much. Oh well. I learn something with everything I make. 

I'm glad I followed my husband's advice to combine the blocks into one. Now to make the fabric border and frame the piece. I'll be back Friday with the finished project. 

I'm linking up today with Freshly Pieced for WIP Wednesday.