Wednesday, December 30, 2020

Summing Up, Pressing On

Well, you know what kind of year we've had. That makes it all the more fitting to sum up our quilting projects--all those things that brought creativity, color, comfort and light to our lives. I'm joining in with Cheryl of Meadow Mist Designs for the Best of 2020 Linky Party


I think we are supposed to link up the best 5 posts by whatever criteria we wish to use, but since this also is a wrap-up of the year for me, I've decided to link up all my finishes. Don't worry, there aren't that many. It just so happens that there were 5 months when I posted finishes, so I'll divide them up that way. 

My year started really slowly, but little by little I did make progress. Finishes didn't happen until July!! But then they came pretty fast. So let's take a quick look. If you'd like to read more about them, you can click on the links, or for all of them at once, click on the Finishes for 2020 label either on the right side bar or at the bottom of this post. I'll include a few attributions here, but for full info, you can see the individual posts. 

July. Whew! I finally finished the quilts from the blocks I made throughout 2019 for the Rainbow Scrap Challenge hosted by Angela at So Scrappy. 

This Crumb block quilt had been a bit of a drag for me. I found out I didn't really like making crumb blocks, but I stuck with it, making blocks in colors to match the background fabric which I had purchased at the beginning of the year. I'm pleased with the end result, but that's probably the end of my crumb-making career. The quilt is destined for donation, but I'm holding on to it a bit longer while I gather together a few more quilts of similar size. 

The other RSC19 quilt was yet another Butterfly Quilt (I can't stop making them) made from Butterfly Dance Mini by Ellis and Higgs. I made it my own by doing the pattern 14 times and string piecing the butterfly wings. I recently gave this quilt to my Dad to give his neighbor for Christmas. She's been really watching out for him this year, bringing him meals and treats and getting his mail for him every day, and he wanted to thank her for her friendship and support. 

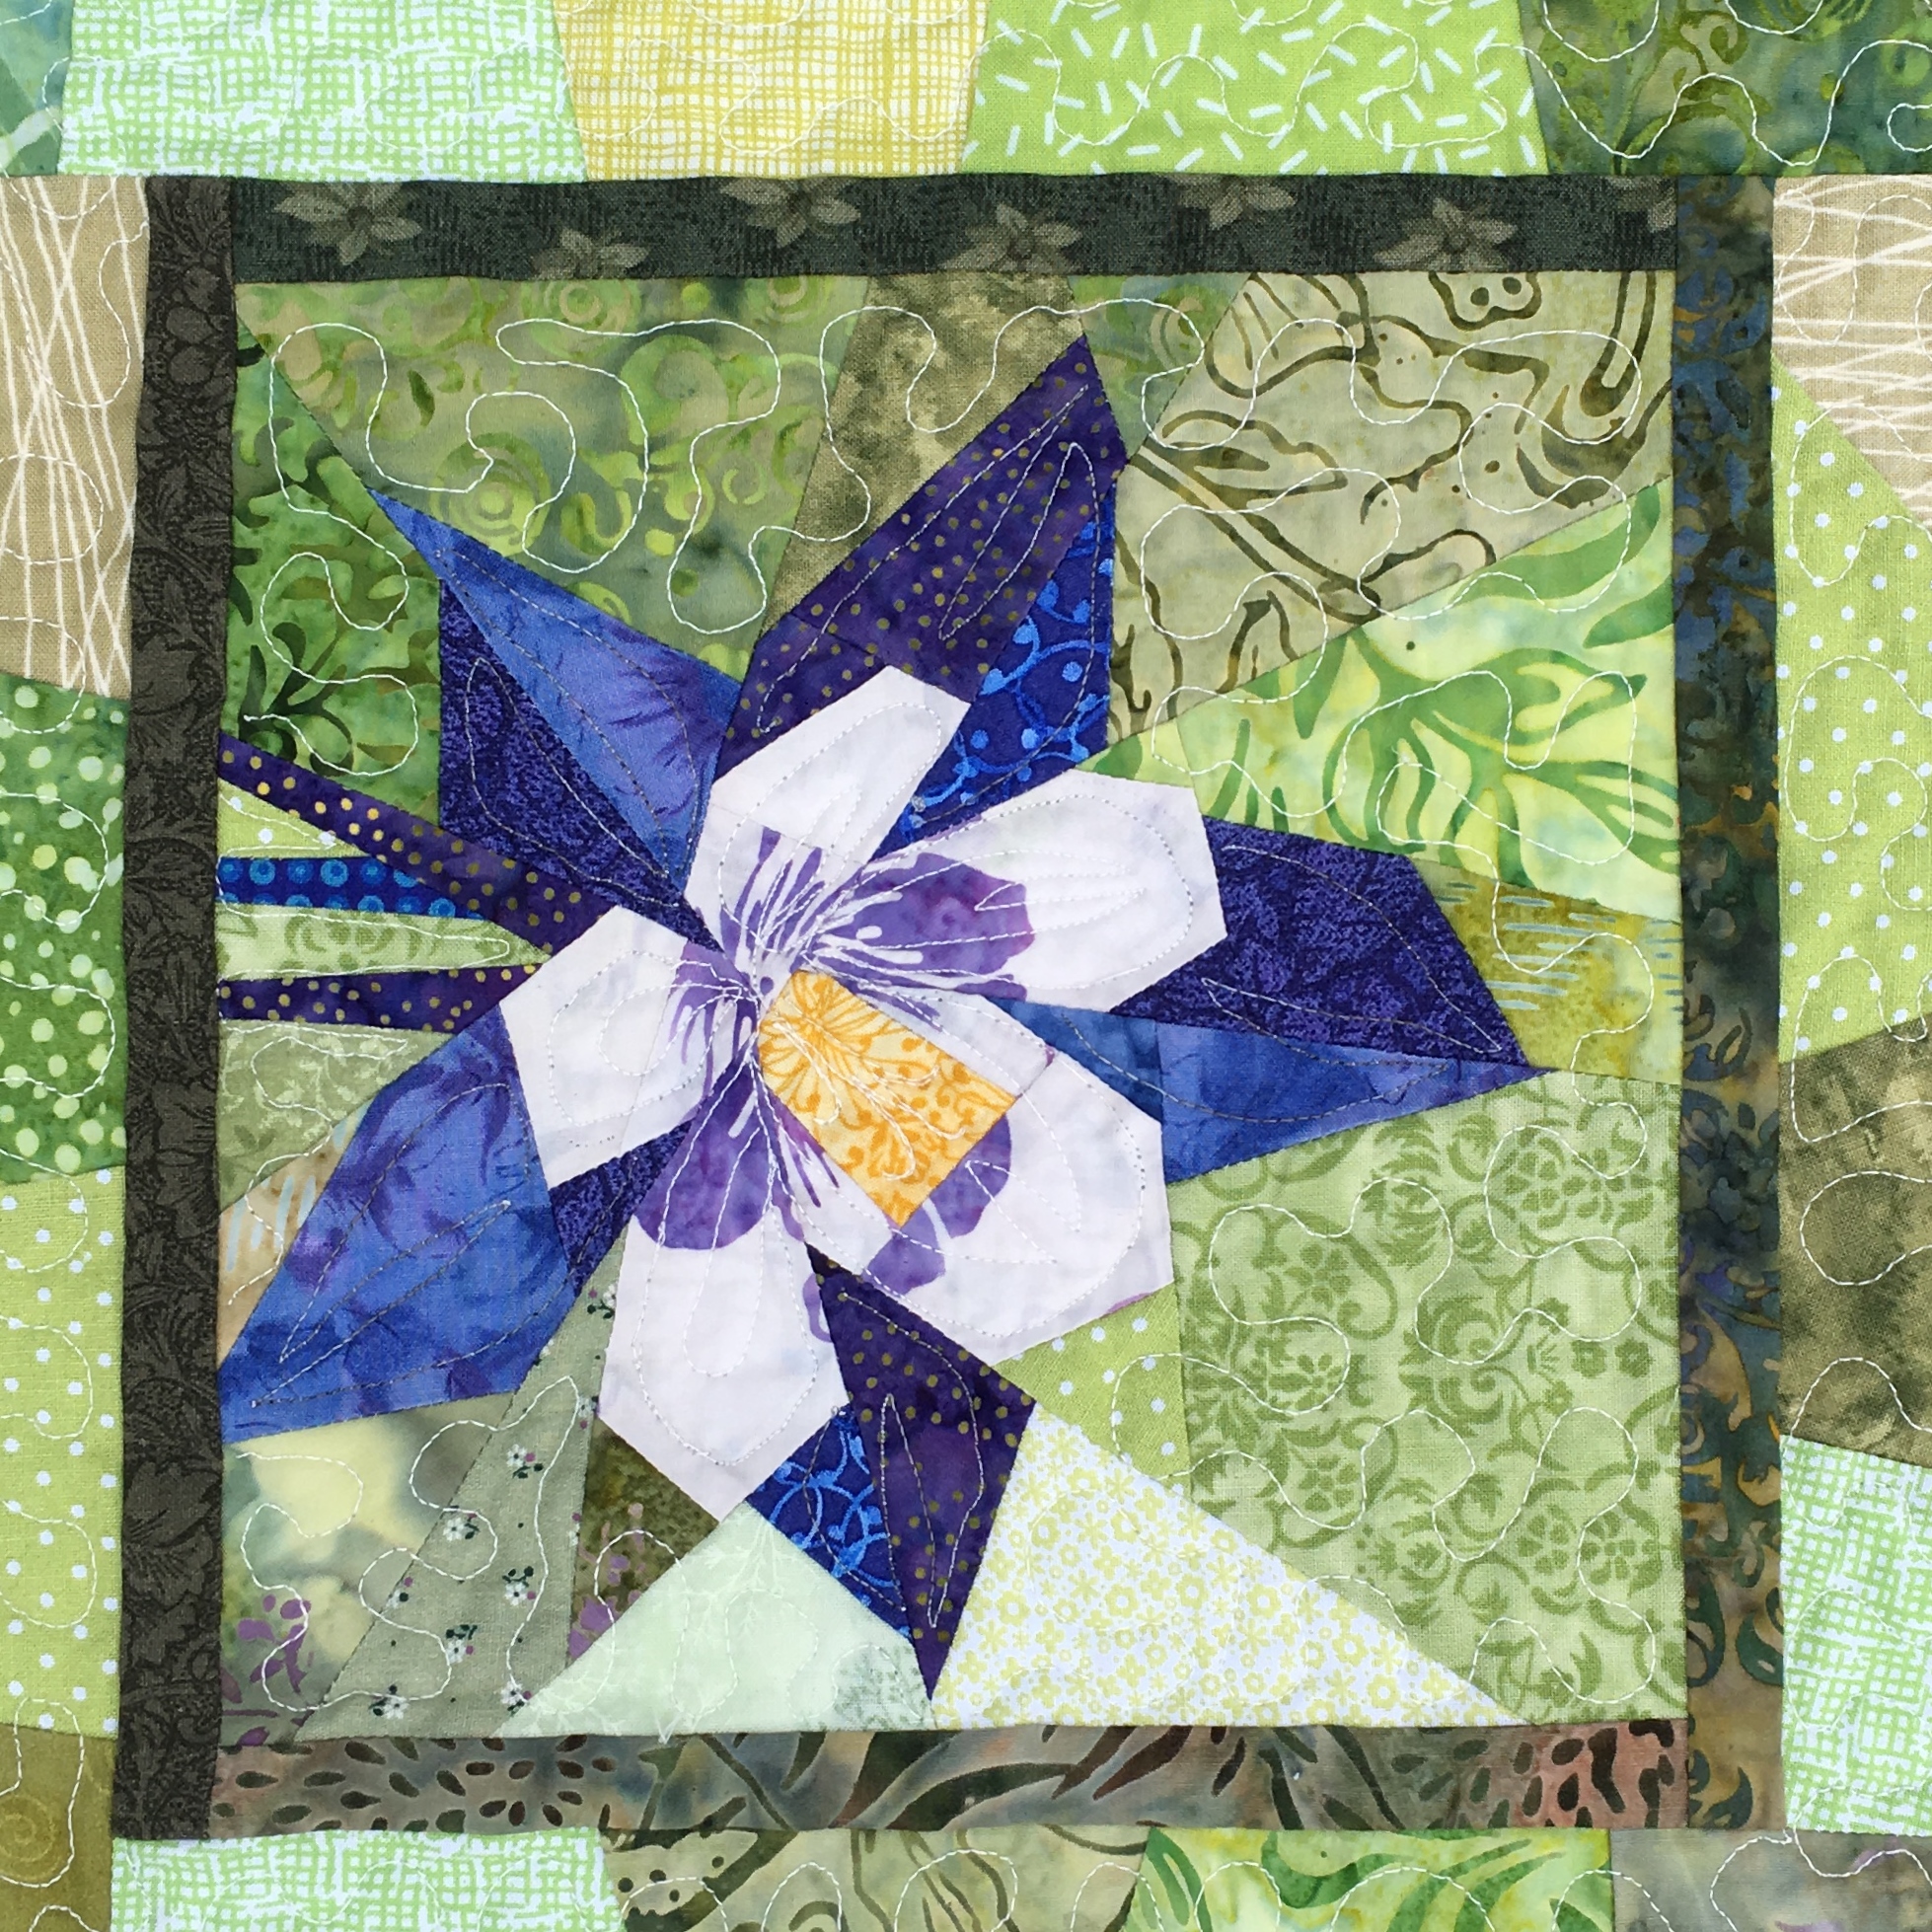
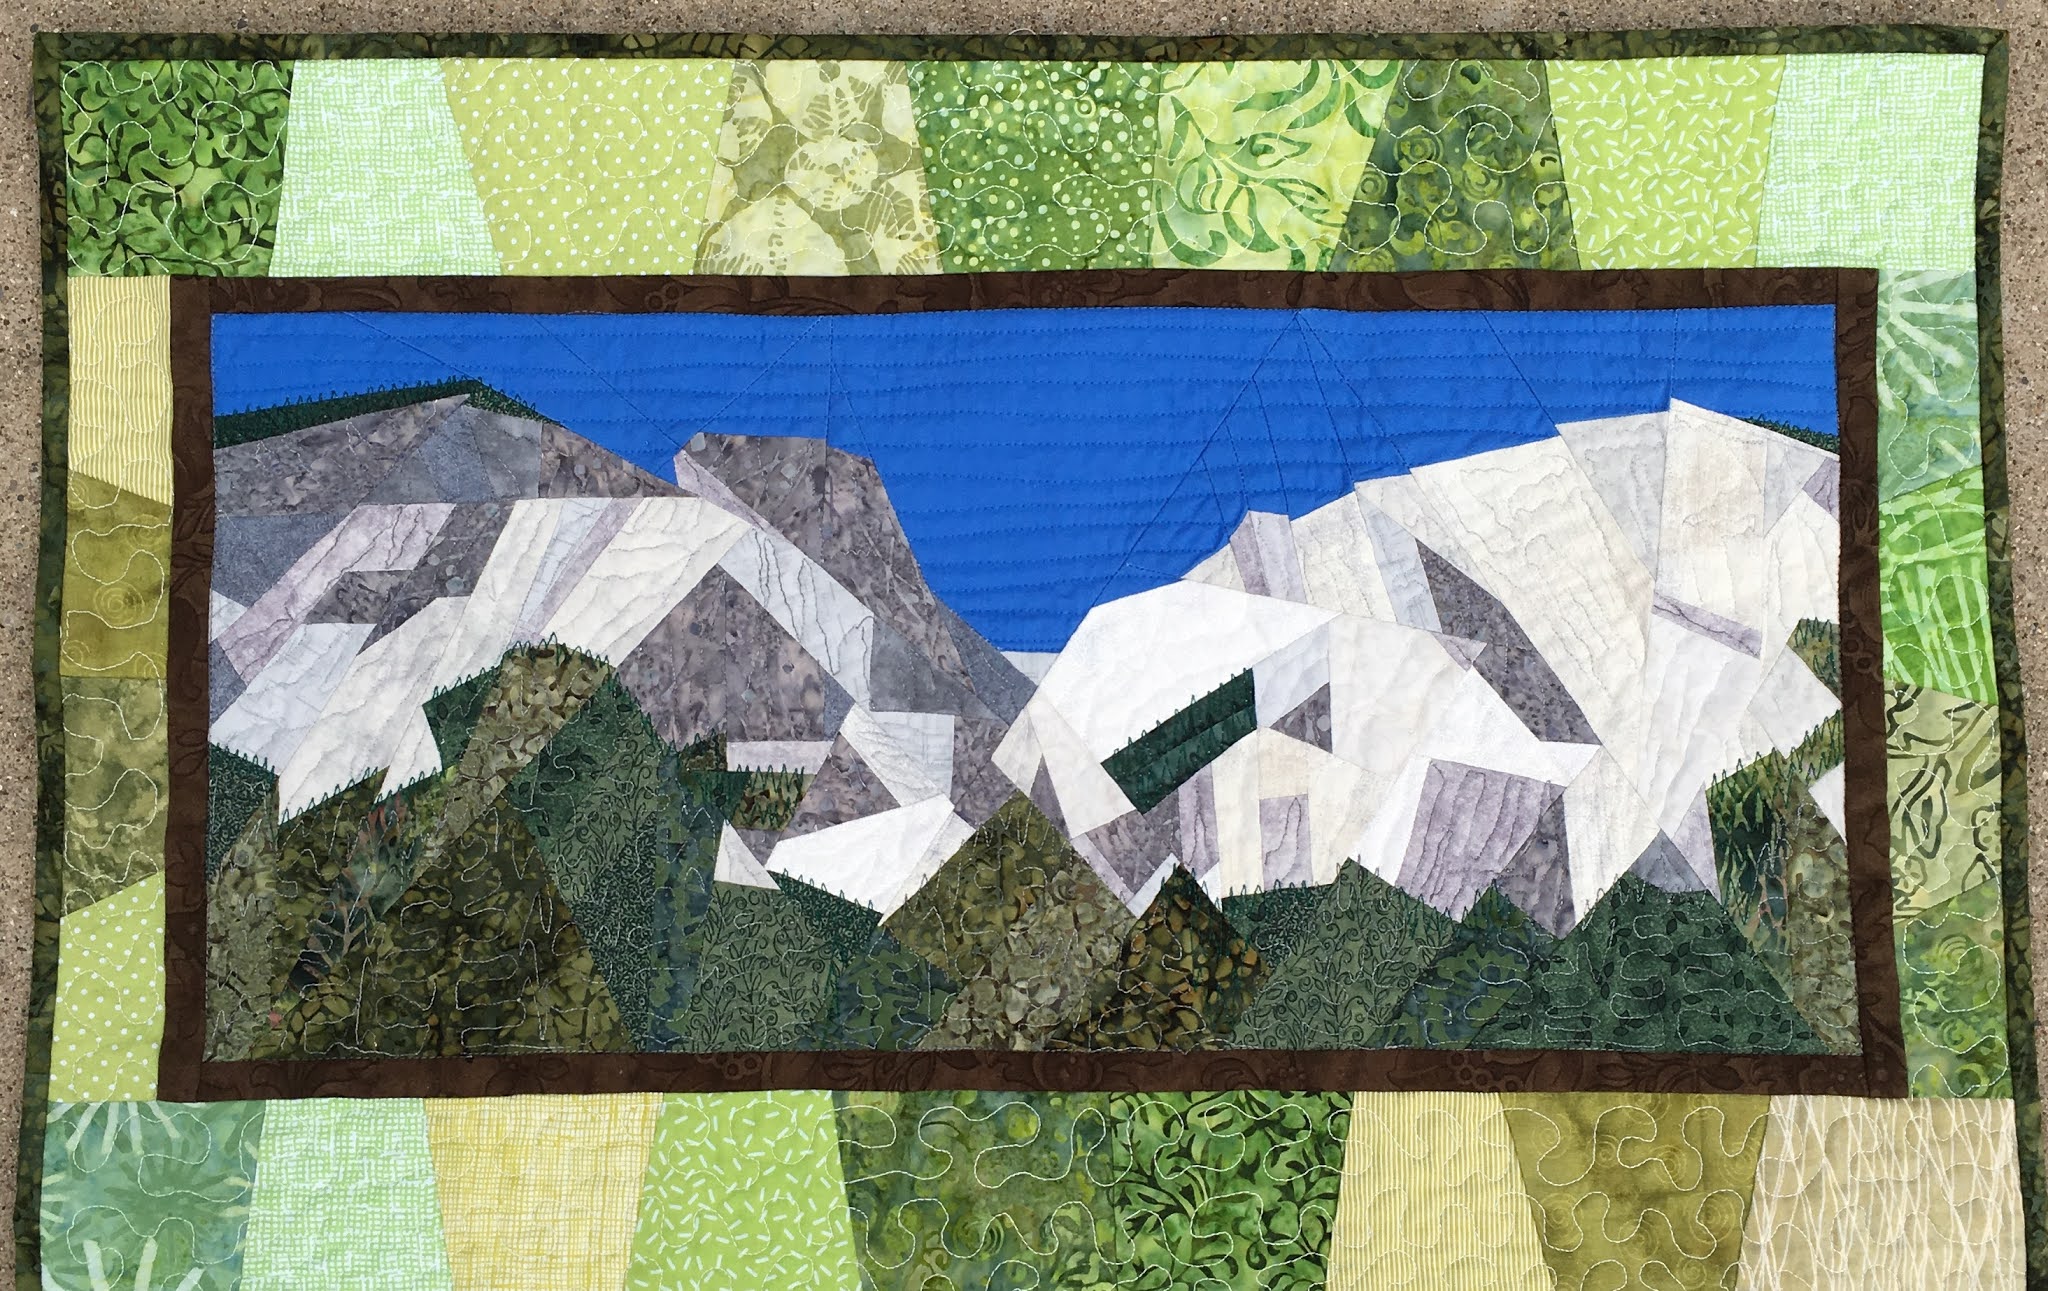
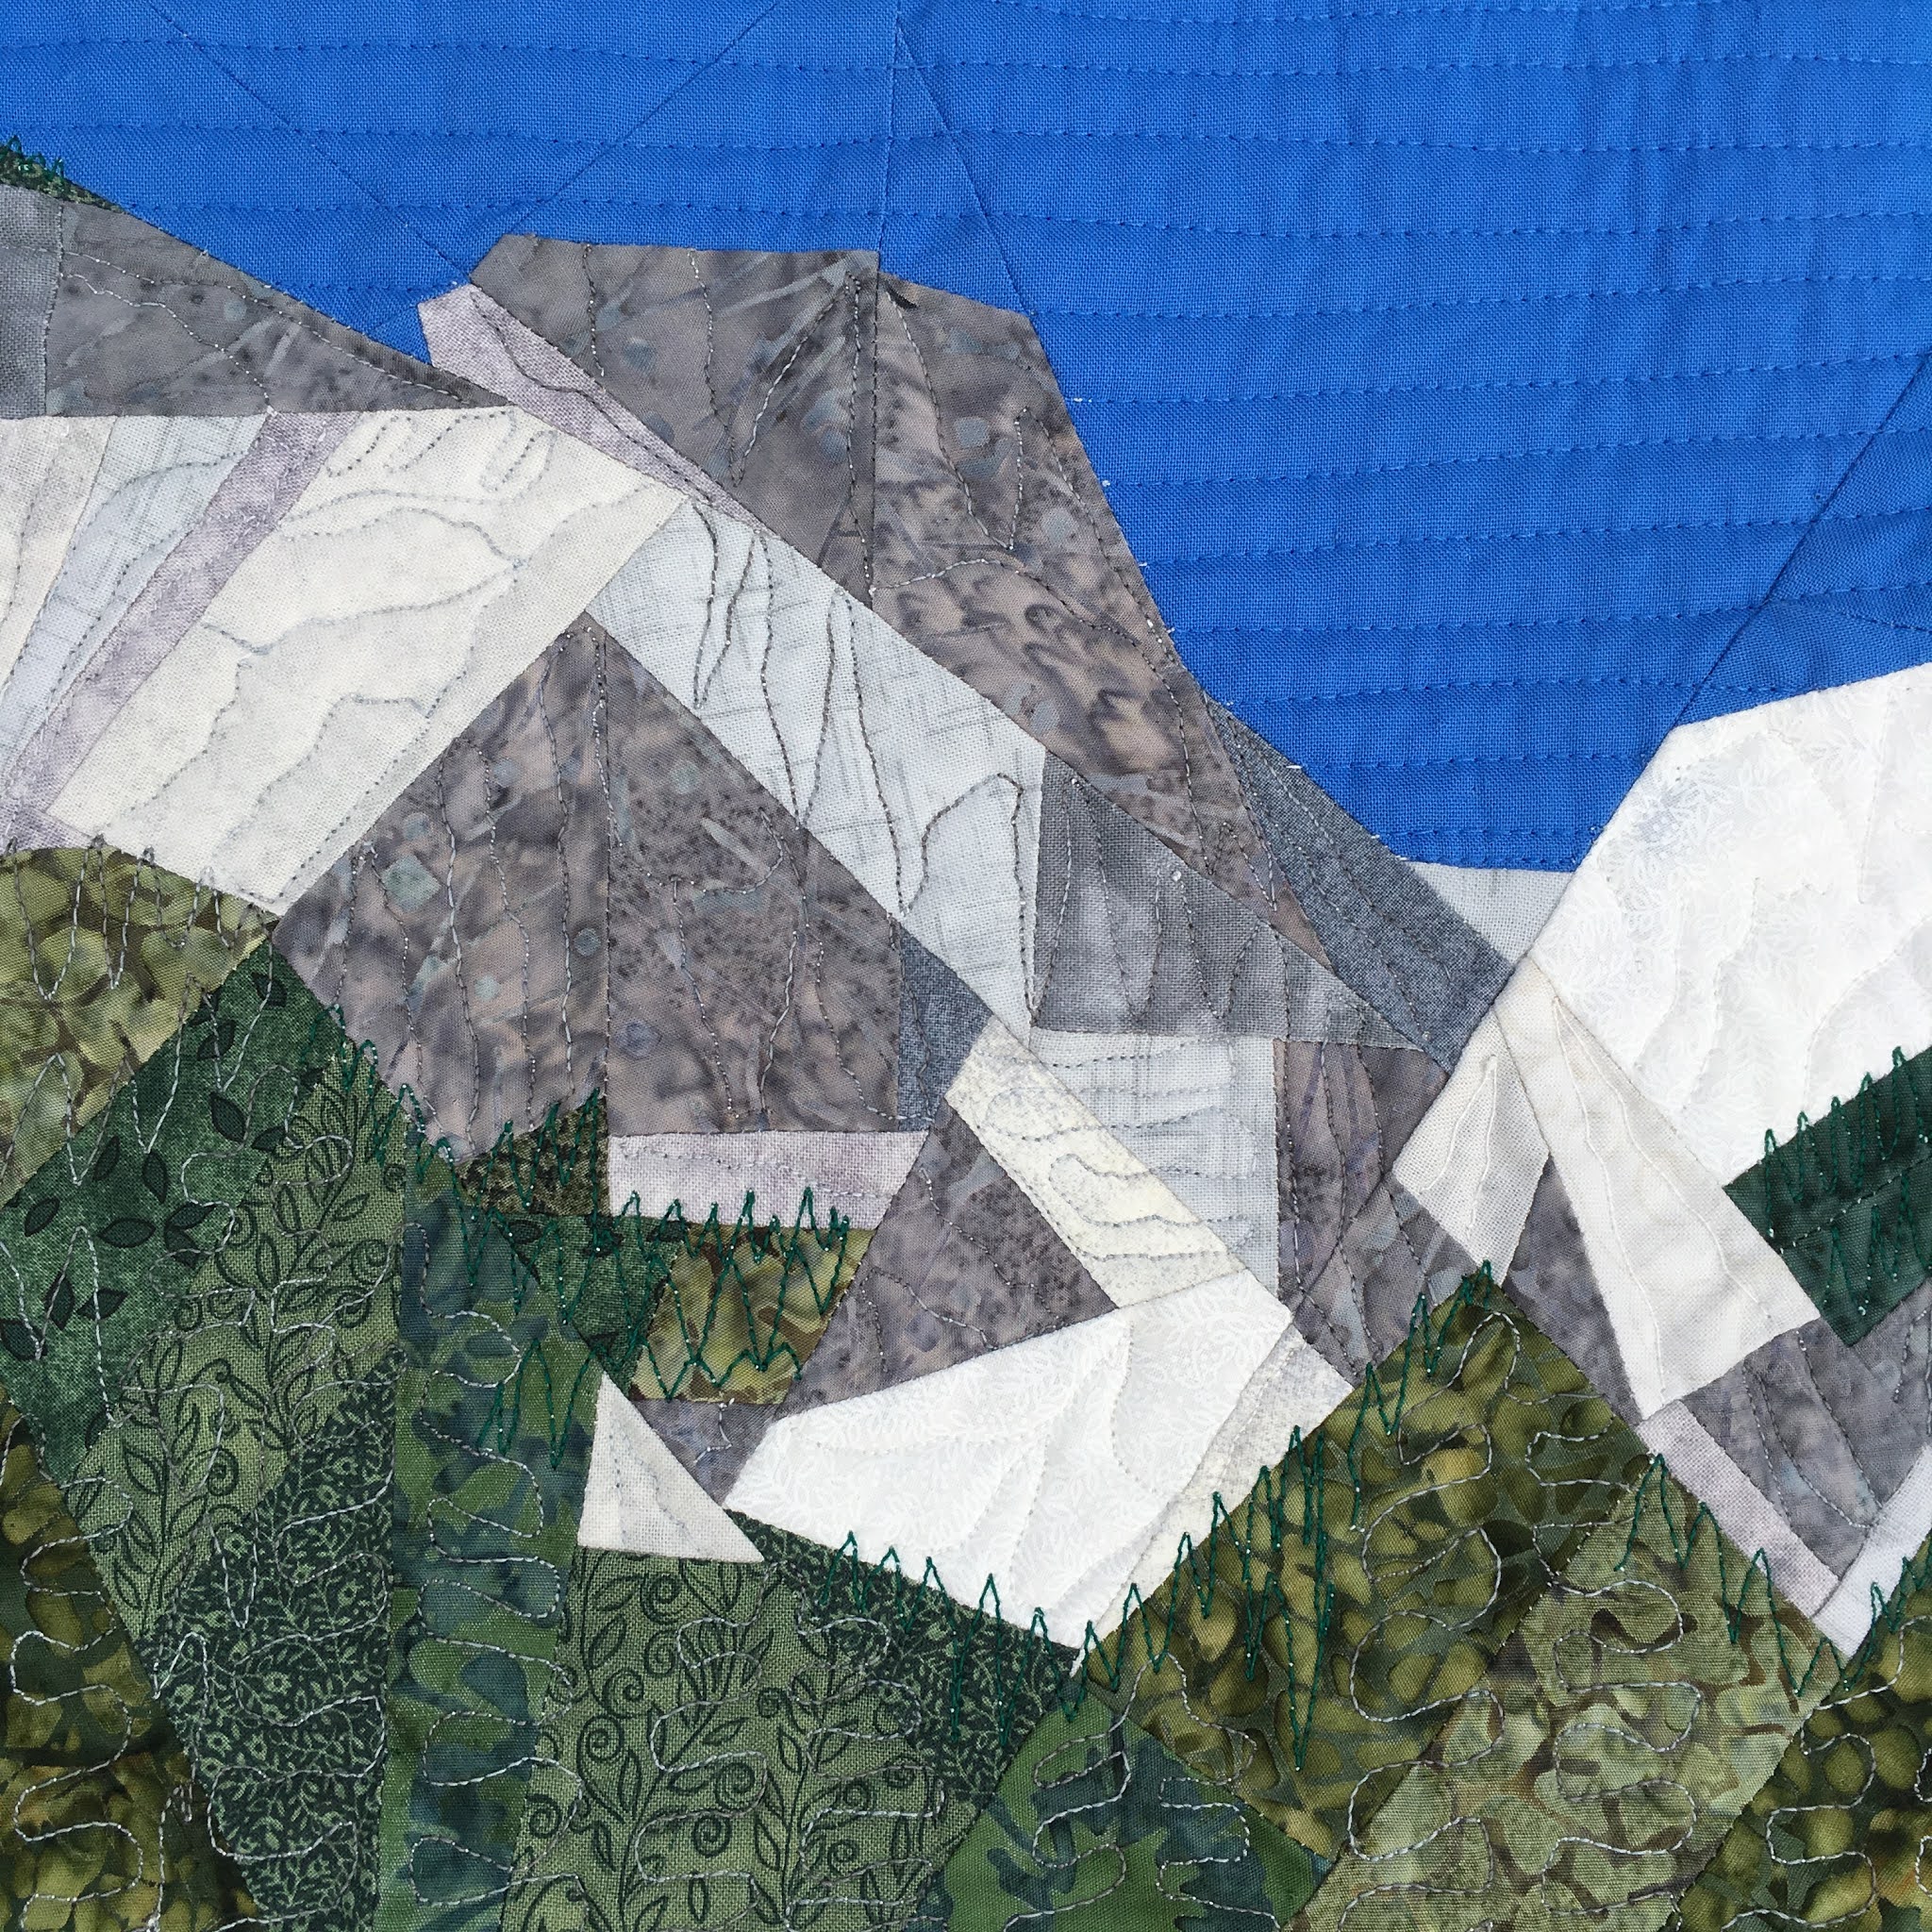
September I finished three quilts in September. Two were almost identical quilts. I had picked away at them for much of the year, making the blocks for each simultaneously. One was a very late wedding present, and the other was to be an entry to an art show at our church that was cancelled because of the pandemic.


For these Colorado quilts, I used a columbine pattern from Ruth B. Mc Dowell's Pieced Flowers book. The rest of the patterns were my own paper pieced designs.The wedding quilt  was gifted as a house-warming quilt. I still have the other quilt for now.

During the first part of the year, I participated in the Quilter's Color Quest online workshop by Rachel Hauser to follow her book the Quilter's Field Guide to Color. Each month we made Bear Paw blocks according to some aspect of color. One month we were to base our blocks on an inspiration piece of our own choosing. 

Mine was a photo of coleus plants I had potted in the spring. Before I knew it, my Bear Paw blocks became a squirrel, and I just had to make a wall quilt for my stairway. By the end of September, I had a new Bear Paw Coleus quilt. I like it so much that I still have it displayed (in a different part of my home, now that coleus season is past).

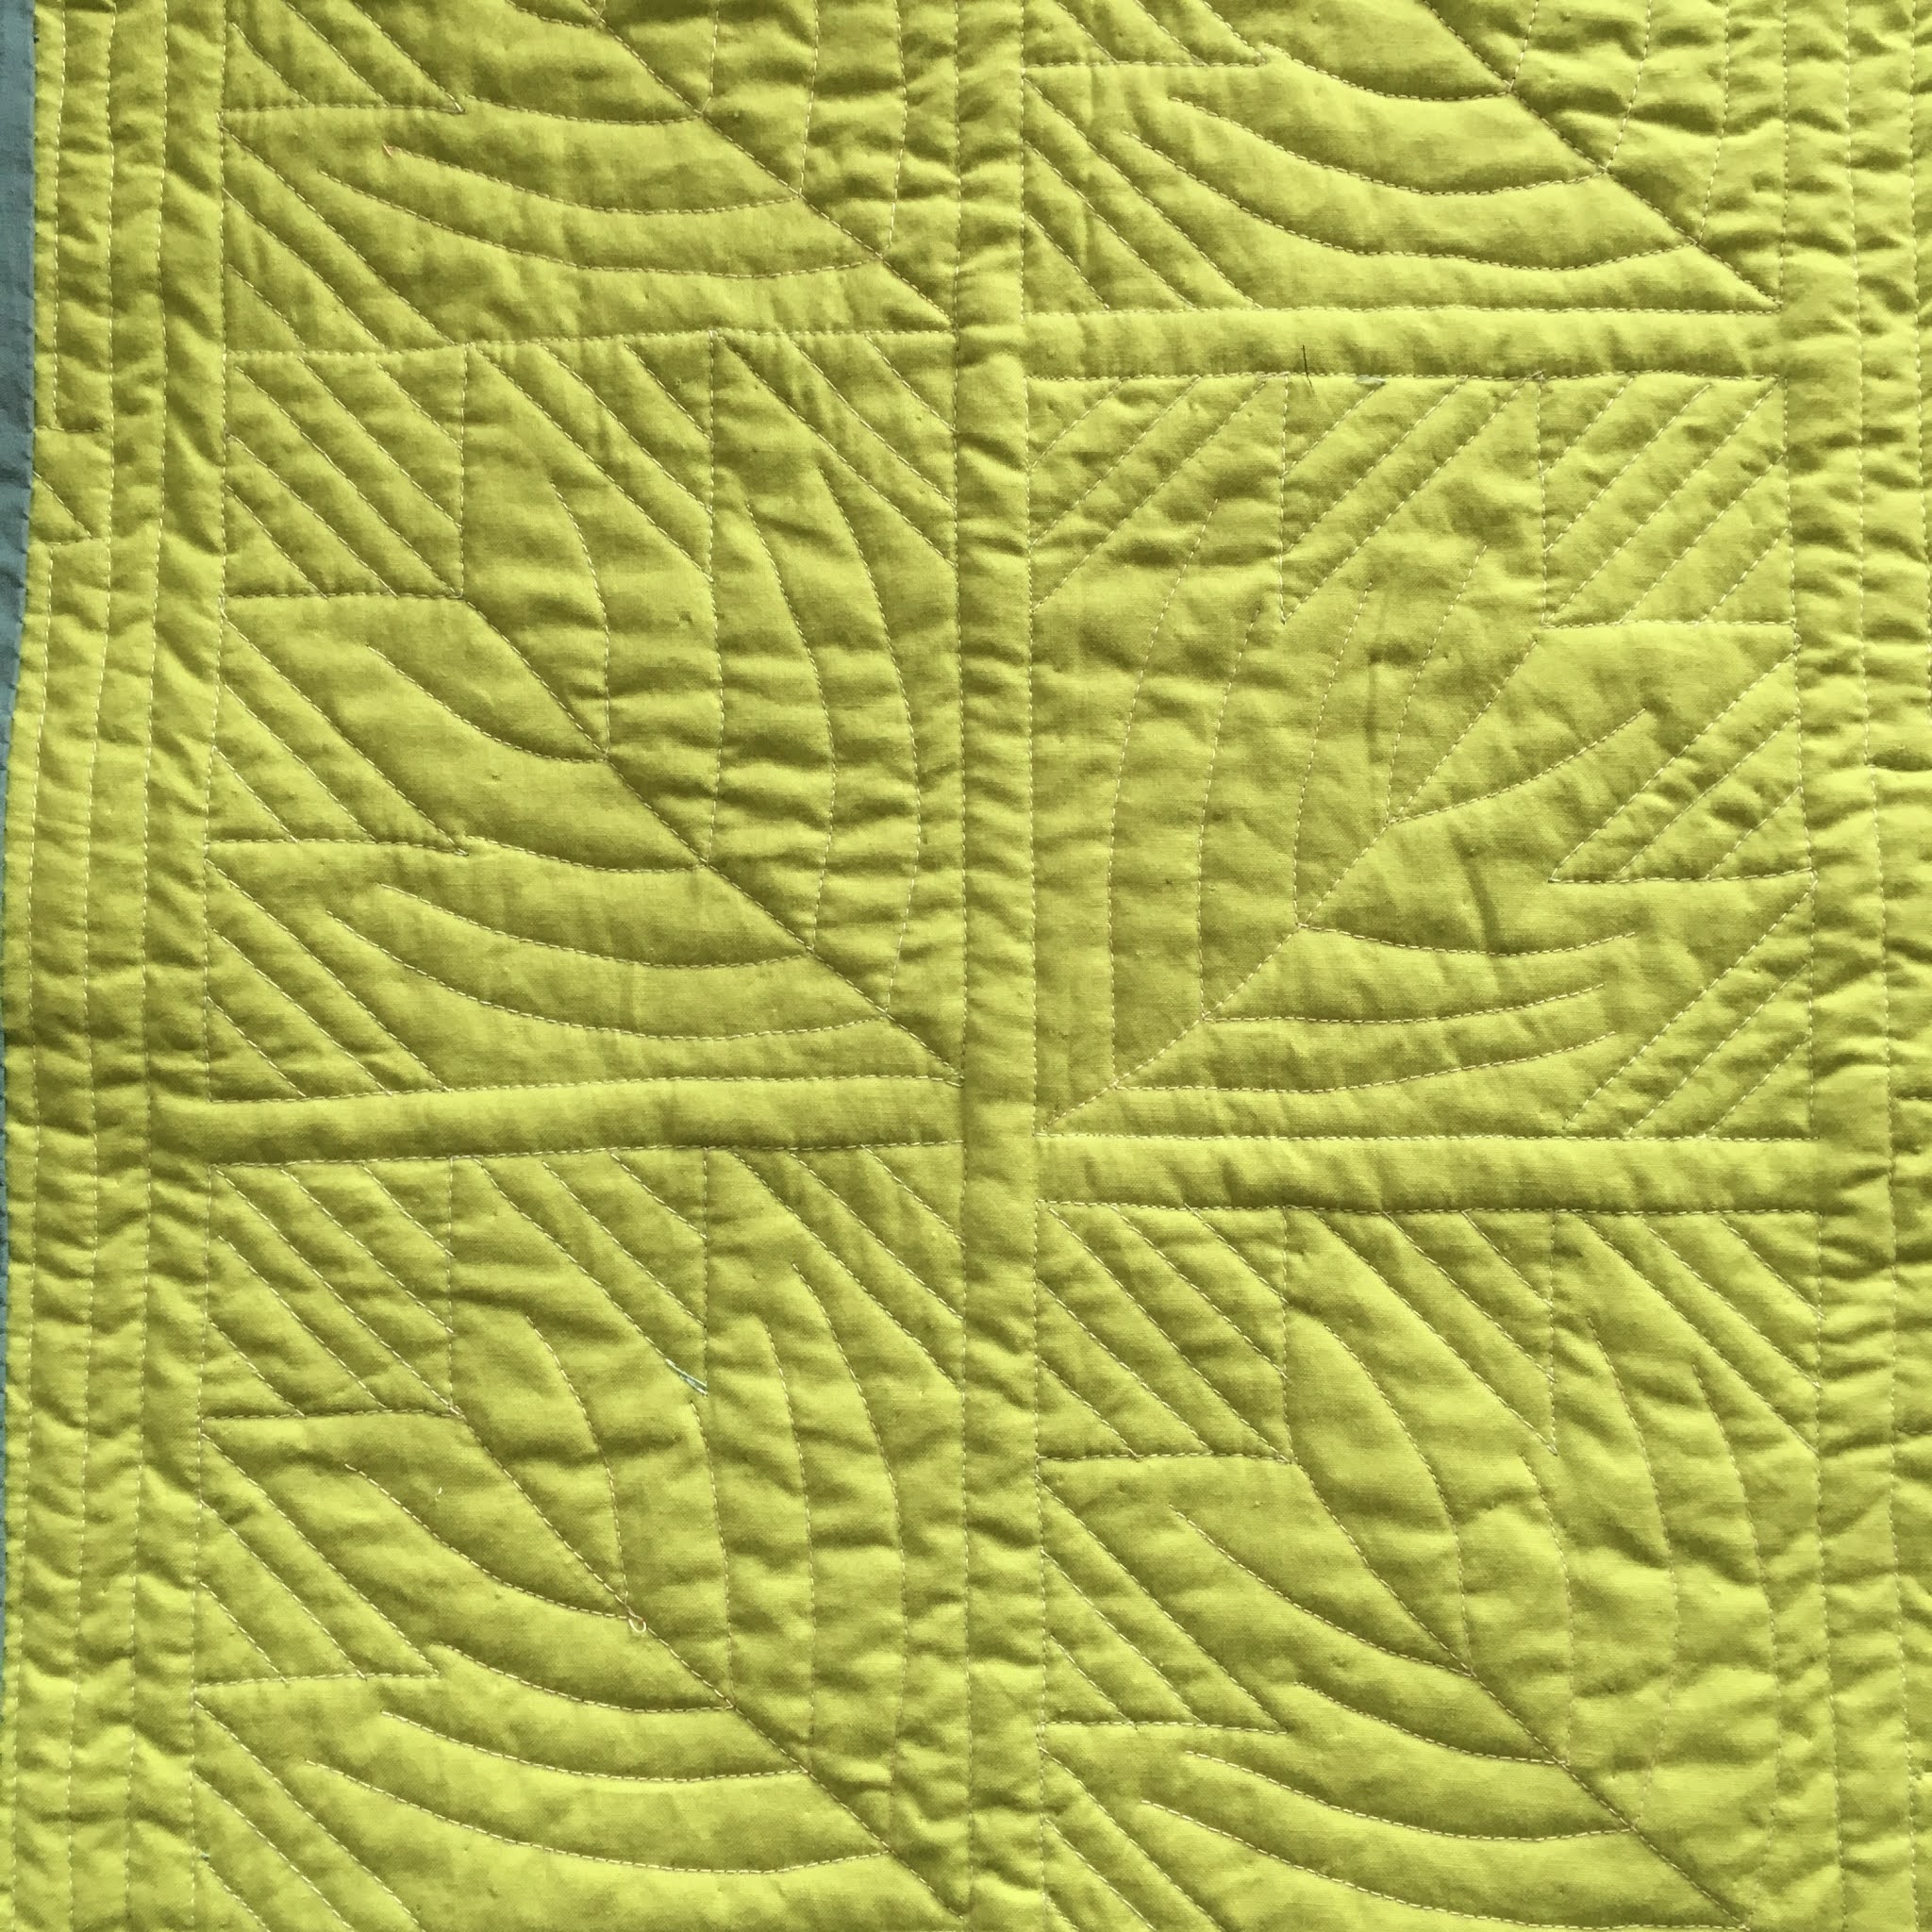
October I try to always have some kind of hand work around to work on. I pieced an old-fashioned hollyhock quilt in 2017 using a pattern from Ruth B. McDowell's Pieced Flowers, and then took it with me to hand quilt whenever I went out of town. 

This quilt has seen a lot of vacations. But not this year. So I made a goal to finish it during our unlimited at-home time. Most of the quilting is visible only as stippled texture. It was a relaxing project. I plan to hang it in my living room in the summer, but for now it is in my quilting room just because I like looking at it, and it didn't seem right to put it in storage after finally completing it.  

November Ah, the month of the wild Jelly Roll Stroll quilt.  

This quilt was a blast to make. I used gifted ombre fabric from Louise who quilts at My Quilt Odyssey and made a variation of the Nines in the Middle pattern by Doris Rice. It was just the infusion of colorful brightness needed near the end of the year no one expected. Due to my wayward disregard for pattern directions, this quilt also gave me just the amount of challenge I needed to keep me enthusiastic about sewing a jelly roll. This quilt is in the donation pile, waiting for a few more companion quilts before it goes on its way. 

December I thought I was done for the year, but a piece of fabric I bought on vacation a few years ago kept calling to me, and this afternoon it became a quilt finish! I'll just include one picture in this post, and give it its own post next week. I love this fabric!!


So, to sum up, 8 quilts finished in 2020. Not bad in a year we'd rather forget for so many reasons.There were other projects: a fun fleece pillow with my granddaughter before the year went all haywire, masks (ugh), a sail-making project for a family-made model sailboat, oodles of Bear Paw blocks during the Quilters Color Quest workshop, and Christmas stocking stuffer ornaments and pillowcases for my Grands. The two most important projects to keep me quilting during the first half of the year when I had little desire or energy for creative projects were the workshop and the two Colorado quilts. As it turned out, creative projects were just what I needed. 

If there's a silver lining to quilting during a pandemic (besides the therapeutic benefits), I did learn some new things. For example, I know now that I can order fabric online and be fairly certain it will look the way I envision it. (Many quilters are already experienced at online shopping, but I have a hard time buying fabric that I can't see and feel, so this was a time-consuming skill for me to learn.) I can also carefully shop online for fabrics that are available at the local big box store and make do even if they aren't exactly what I was looking for, so that I can pick them up curbside and not wait for a mail delivery. I can go into a fabric store, and instead of dithering for an hour or more, I can make up my mind in the 15 minutes I give myself to mix in with other shoppers (in masks). And, of course, I can always make use of what I have on hand. 

This bedroom here: this is what happens when no one sleeps in the guest/quilting room for a whole year. 

The punch bowl is my garbage bowl for tearing foundation papers out.

But there are lots of potential projects here. Some new fabrics acquired over the year, including a bunch of low volumes with perky prints; many, many more Bear Paws to coordinate with all the ones I made this year for scrap quilts; some patterns I've been mulling over. I do need to come up with a hand work project. (Right now I'm trying to knit slippers, but that will fizzle in its attractiveness if I can't make them fit.) I will probably need to make a quilt top to hand quilt at some point so I'll have something to work on if/when we feel safer to vacation again. I'll keep working with these to stay creative no matter what 2021 throws at us. Beyond that, my plans are mushy as usual.  

This was a lighthearted look-back, but really 2020 was heavy in so many ways. It was hard for the whole world, but in my very limited experience, I can only speak from my perspective in my country, which faced unimaginable health, political, social and economic devastation. I fear that we will not learn the right lessons from this year. I look ahead to 2021 with hope, but I think, given the circumstances, we may need to just press on. Things aren't going to be magically rosy simply because the calendar changes. So that's what I intend to do: press on, remembering that quilting is therapeutic, fulfilling and joyful and will make the pressing on doable. I hope you will be able to do the same. Blessings to you in the new year.

 (Just a reminder: I'm not affiliated with any company, so when I mention products, services, or stores, I'm just documenting what I used or liked.) 


Thursday, November 5, 2020

Jelly Roll Stroll

You know how people make those quilts from pre-cut strips and call them Jelly Roll Race? Those quilts that they make in a day or maybe a few hours? Yeah, well this is a post about one of those quilts. Except that this was a Jelly Roll Stroll, not a race. I started this quilt by playing with strips on September 19, then picked away at it little by little, and finished it on Election night (November 3) around midnight or maybe a bit after while nervously watching the returns on TV. As of this writing I have no idea who won our presidential election, and that's okay, as I will probably be too emotional to write at all by then, either celebrating or crying in my soup, and either way still very concerned for my country. So...here's a nice little story in the meantime.


This quilt started with a blog hop honoring the late Paula Budinger. who passed away in February. She was a delightful quilter/blogger who loved bright colors, learning new quilting techniques/styles, and donating quilts. Quilter friends Janice of Color, Creating and Quilting and Kate from Smiles from Kate quickly organized a Blog Hop to honor Paula's quilting legacy. Quilters who participated made quilts for their favorite charities.The hop happened from May 6 (Paula's birthday) to May 8. (I don't have a link to the actual hop here, but you can check their websites if you would like to see the quilts and posts of the quilters who participated.) I was not able to participate in the hop, but one of the quilters who did was Louise from My Quilt Odyssey. She made a fun Jelly Roll Race Quilt, and as part of her participation, she had a Boundless Fabrics Ombre Sunset Jelly Roll to give away. I was the giftee!!
Beautiful sunshine, persistent breeze

I have to admit these are not colors I usually gravitate to. Also, I have not worked with ombres before, and I was really uncertain how they would look in strip form for a quilt. But, remembering that Paula liked to learn new things, I jumped in to see what would happen. 

First I searched the internet for quilts that others have made using pre-cut strips. One that caught my eye was a pattern designed by Doris Rice for Moda a few years ago. She called it Nines in the Middle. The pattern makes a twin sized quilt and is really detailed, showing how long to cut strips and place them. I did not want to make a quilt that large, so I decided to wing it, using the general idea of the pattern but cutting my strips randomly and placing them for maximum use of my strips. 

I especially liked the nine-patches to break up the strips, and because I was just a bit intimidated by the bright colors, I decided to find a color from the opposite side of the color wheel to calm things down just a bit. I masked up and purchased a bit of turquoise fabric at my little local fabric store. It had a mottled look to it that I thought fit nicely with the ombres. I also purchased the remaining Kona Snow on a bolt for the nine-patches and "borders." The sales associate told me that they had been having a really hard time getting some basic solids (specifically, black, navy and white) in stock because everyone was using them for masks, so I was fortunate to get that bolt remainder (plus the bolt-end discount).

I was so happy with my purchases that I made my nine-patches first. Here's where following the pattern might have helped. After randomly cutting lengths of the strips and fitting them around the nine-patches, I realized that by not sewing the nine-patches into the quilt as part of the strips, I had to do partial seams throughout the construction. I don't have photos of the process. I was too into sewing for that. It took a lot of planning as I went, making sections of strips, partially joining them and then completing the seam after adding more strips or joining to a nine-patch. The great thing about this is that I think I would have quickly grown bored just sewing long strips together over and over. This took a lot of thought, which was a fun challenge and kept me interested. 

After I finished the top, I had a lot of strips left over. I did not want to make another quilt and there were more than I could use in a scrappy binding, so I decided to make a pieced back to complement the front. I first made some strip sets with the turquoise and white leftovers, making just the middle row of nine-patches. Then I laid all the leftover strips around and made as big a section as I could to cover a portion of the quilt. When I was finished, I found that if I bought one length of fabric the same measurement of width of the quilt, I could split it to cover the top and bottom of the back. This time, masking up and going to the store took a little more courage, as by that time the number of Covid cases was beginning to rise again. I chose to go to a larger quilt store, ensuring a wide selection of fabric. I also had about 30 dollars on a rewards card that I had earned just before the lockdown that I wanted to use up. I am usually a very slow fabric shopper, but I challenged myself to find a fabric as quickly as possible. I wasn't seeing what I had envisioned, but did find this watery fabric. I wasn't convinced, but grabbed it along with some basics, a pack of needles, and a few fat quarters to use up my rewards and was out of there in about 15 or 20 minutes. My, how this virus has changed my shopping habits!! And you know what? That watery fabric grew on me, and now I think it is just right for the backing.

Long before the quilt was finished I had an idea for a quilting pattern. 

I quickly sketched it, and after basting the quilt, drew the main lines with a flexible curve. (That is a scary tool for me, because I think there is lead inside of it. It stinks!! I store it in a heavy plastic bag deep in a drawer so I don't need to be near it. Weird, I know, but it does come in handy occasionally.) Then I used my walking foot to quilt each of the four sections. The result was nothing like my sketch. I tried following each line 3/4 inch away, but instead of graceful curves flowing across each section I ended up with (wonky, but that's a given for me) lines that flattened as I went. Luckily, it happened pretty much the same in each quarter of the quilt, so it looks like maybe I planned it that way? I'm sure it has something to do with the geometry of using a pattern like this in a not quite square shape. Plus user inexactness. Who knows? Luckily, I don't mind. I am a weird mix of precision-ish piecer and lackadaisical quilter. And, yes, finished is better than perfect, and all that.
initials/date with washable marker guide

initials/date after washing

I am thrilled with how the top turned out. The ombre created a lot of movement, and the bright colors are, as my husband described the quilt, joyful. And one other thing I have to note: I have not worked with pinked fabric strips before, and I had heard that sometimes widths are varied and difficult to work with. I did not find that to be the case with these strips. They measured 2 1/2 inches wide at the points and as long as I aligned those with my seam guide, everything fit together well. 
Selfie!
 
This quilt has been a blast, and a very good occupation during a challenging year and stressful time in my country for so many reasons.This was me on election night. 

I'm not sure I've ever completed binding on a lap quilt in one evening before. I was hoping that it would relieve stress. I'm not sure it did, but the quilt finish did result in happiness and satisfaction. I think Paula would approve of the result. I sewed with bright colors, tried a new technique, and I intend to donate this quilt (to be determined after I have a small batch of quilts finished). There was some talk after the blog hop in May that there would be another on Paula's birthday next year. If so, I think I might link this post up as this is my quilt to honor her legacy. I could not have done it without all the people who I mentioned at the beginning of this post, so many thanks to all of you. 

Here are the stats: 
Pattern: Variation of Nines in the Middle by Doris Rice for Moda. (Interestingly, the pattern had pink in the nine-patches in the photo, but I have since found a version of it with turquoise, so my quilt is definitely not unique even though I did not strictly follow the pattern.
Fabrics:  Boundless Fabrics Ombre Sunset Jelly Roll (Gift from Louise); Shabby by Lori Holt of Bee in my Bonnet for Riley Blake Designs (not sure of the color name); Robert Kaufman Kona Snow. Backing is a digitally printed fabric, Horizon in Dawn by Grant Haffner for Windham Fabrics.
Batting: Hobbs Premium 80/20
Thread: Superior Masterpiece in Granite for piecing; Superior King Tut in Temple for quilting; Superior Treasure Hand Quilting thread in Little Prince (variegated blue) to sew down binding.
Binding: 2 1/2 inches cut, double layer, machine sewn to front and hand stitched on back. 
Size: 53 1/2 by 61 inches before quilting; 52 1/2 by 60 1/4 after quilting; 49 1/2 by 56 5/8 after washing on cold and machine drying on low.
Machines: Singer Featherweight for piecing; Singer Treadle 115 for  quilting and the machine work on the binding.


Have a lovely weekend, and if you live in my country, take a deep breath, with patience and  hope for the future.

(Just a reminder: I'm not affiliated with any company, so when I mention products, services, or stores I'm just documenting what I used or liked.) 


Thursday, October 1, 2020

Hollyhocks Finish

It's been a year since our last proper vacation. Sigh. I realized this yesterday because I have a long-awaited finish to share--my Hollyhocks quilt! 

I tried straight-on photos on the garage, but the breeze kept blowing the quilt, so the driveway will have to do.

I started this quilt back at the end of July in 2017. It took me a month to piece, and then I set it aside as my vacation hand quilting project. And my daycare trip quilting project. By March this year, we realized that it would probably be a long time before we would be traveling again, so I decided to try to finish this quilt in the evenings over the summer. Last night I went through my old blog posts about my progress and had a sweet armchair vacation as most of the posts show scenes of our vacations as well as some fun bike rides. If you feel the need of an armchair vacation (or want to see how this quilt came to be), just click on the Hollyhocks label on the right side bar or at the bottom of this post. For today, let's just enjoy the finish.

Work over the summer went slowly. For some reason, I had trouble getting my needle eye to pull through the batting. I don't remember that problem before. I tried all the types of needles I had on hand and ended up using a rubber band to pull it. In recent years, I had been using polyester batting for hand quilting, but I think this batting is cotton. Maybe that was my problem. It was annoying, but I kept at it. I also started to get tired of quilting on the busy fabrics on the front and discovered that quilting from the back side was much more satisfying. In fact, I love the modern back of this quilt in contrast to the cottage-y vintage look of the front.


I had some bright blue Grunge fabric that I wanted to use for the binding to represent a summer sky, but I didn't have enough. I found two cottage-y print blues in the drawer that fit nicely with the Grunge for a subtle scrappy binding. You can see them in some of my close ups.


Sorry about that loose thread. 


Okay, back to the front, and some stats:


Pattern: Hollyhocks blocks from Ruth B. McDowell's Pieced Flowers. Freezer Paper Piecing technique (like puzzle piecing).
Fabrics:  Scraps from my supply for the leaves, flower centers, scrappy border strip, and binding; 3 purchased Grunge fabrics for the flower petals; purchased background fabrics, and 6 fat quarters purchased from a sidewalk sale for the backing (one, a Kaffe Fassett, yes?). 
Batting: I'm pretty sure it's Quilter's Dream Cotton Select.
Thread: Superior Masterpiece in Granite for piecing. Several different threads to match the flowers, leaves and border. I used a hot pink Aurifil for the stipple quilting in the interior of the background, and a variegated blue Superior Treasure hand quilting thread for the border and hand stitching the binding. You really can't tell the difference in those colors unless your nose is a foot away from the quilt, but it was fun to use both. The overall quilting was meant to add texture without detracting from the flowers. 
Binding: 2 1/2 inches cut, double layer, machine sewn to front and hand stitched on back. 
Finished Size: 22 5/8 by 55 5/8 inches. Not washed.
Machines: Singer Featherweight for piecing; Singer Treadle 115 for the machine work on the binding.

The wind did that.

I don't grow hollyhocks. The impatiens will have to do.

This project went on way longer than I meant it to, but I am so happy it's finished. I plan to hang it in my living room in the summer, but I think it just might hang in my quilting room the rest of the year along with the floral theme in there and the antiques. Its cottage vibe will fit right in. When I complete a hand quilting project, I'm always a bit lost because I need more hand work for something to just pick up, but to get to that I need to think up and prepare another project. I'm toying with the idea of some hand piecing. We'll see...

This week I'm linking up with Kelly at My Quilt Infatuation for Needle and Thread Thursday, Michelle at From Bolt to Beauty for Beauties Pageant, Sarah at Confessions of a Fabric Addict for Can I Get a Whoop Whoop and Wendy at Wendy's Quilts and More for Peacock Party

Have a good quilting week, and I hope you get a chance to do some handwork, too!

(Just a reminder: I'm not affiliated with any company, so when I mention products, services, or stores I'm just documenting what I used or liked.) 


Thursday, September 24, 2020

Bear Paw Coleus Finish

I have another finish to share this week. It was finished last week, but the finishes were piling up, so I have to spread out the posts. This is my Bear Paw Coleus, a squirrel of a project inspired by an exercise in the Quilter's Color Quest workshop led by Rachel Hauser to dive into her book The Quilter's Field Guide to Color. That was a workshop that went on for much of this year, and you can still follow it on her site. I shared a lot about this quilt in the last part of this post here. In that post, I shared about the blocks I made, but it's time for more photos because it's all done, and I love it.


I had fun letting the blocks speak to me. They asked for dirt-brown sashes with bits of flower and leaves in them. Not all of the leaves wanted to have sashes between them. The verdigris flower pot wanted to get involved, too, so that very unlikely color showed up as the binding. Want to see some close-ups?


You need sunglasses to look at the back. This is from a big piece of Kona Limelight that I bought for a quilt for my grandson a couple of years ago. It was way brighter than I expected (despite the color name), so I keep searching for ways to use it up. This seemed just right.


I love how the quilting shows up on the back. 


For a few days, I displayed this at the bottom of my stairway. It will go back there again next summer (with a proper hanger). Now my usual autumn leaves quilt is there, but I couldn't bring myself to store away the coleus quilt just yet, so I moved it to another awkward display area at the top of the stairs for a few more days. 


Remember how the flower pot that inspired the design looked back in the spring?


Well, those plants are all grown up now.


This was a fun improv quilt. My favorite project (so far) from all the Bear Paw blocks I made during the Quilter's Color Quest. Here are the stats:

Pattern: The Bear Paw blocks were suggested by Rachel as a means of practicing color combinations during the workshop. The colors were inspired by my photo of plants in my garden. The flower block, letter blocks and sashing/layout are my own design.
Fabrics:  Scraps from my supply. Backing, as noted above is Kona Limelight. I remember that the binding was bought years ago at Yoder's Department Store in Shipshewana, Indiana when I was making Amish-inspired miniature quilts.
Batting: Umm...a scrap. Maybe Hobbs 80/20?  
Thread: Superior Masterpiece in Granite for piecing; King Tut in White Linen for the bobbin when quilting. A variety of colored threads to match the leaves for quilting--most of them were from a giveaway packet of Aurifil that I won several years ago. Lighter areas, as well as the border, were quilted with an old cone of King Tut in Mint Julep. I played thread chicken with it and won! Treasure in a variegated blue for handstitching on binding. 
Binding: 2 1/2 inches cut, double layer, machine sewn to front and hand stitched on back. 
Finished Size: 20 by 28 3/4 inches. Not washed. (Bear Paws are 6 inches square. and letter blocks are 3 inches square.)
Machines: Singer Featherweight for piecing; Singer Treadle 115 for walking foot quilting.

I'm linking up this week with Kelly at My Quilt Infatuation for Needle and Thread Thursday, Michelle at From Bolt to Beauty for Beauties Pageant, Sarah at Confessions of a Fabric Addict for Can I Get a Whoop Whoop, Wendy at Wendy's Quilts and More for Peacock Party and Cynthia at Quilting is more fun than Housework for Oh Scrap.

See you next week with a long-time-coming finish. In the meantime, take care of yourself and others, keep quilting, and if you are in my country, get yourself ready to vote!

(Just a reminder: I'm not affiliated with any company, so when I mention products, services, or stores I'm just documenting what I used or liked.) 

Thursday, September 17, 2020

Sewing Double

No, you're not seeing double. I've been sewing double, bit by bit, for most of 2020. The project I hinted at has been gifted and I can finally share. 


The quilt on the right is a very belated wedding present (and by now, a housewarming present) for my brother-in-law and new sister-in-law. They were married in January. Why is there another quilt? Well, let's see...

This all started with a squirrel project back in mid-October--that leaf you see in the bottom right corner. I had an urge to make a freezer paper pieced aspen leaf that you can read about in the second half of this post here. At the time, I knew I wanted to expand that block into a quilt with other natural elements, but I didn't have a plan. I knew it would become part of a wedding present for M and C because they live in Colorado, where these leaves are glorious in autumn. At the time, I was also looking ahead to our church's art show in May 2020. I figured I'd make two quilts simultaneously, using the quilt on the left as my practice blocks  and then entering that quilt in the art show. So while my October post showed one leaf, there were actually two identical squirrels that month. For a little extra interest, I made the central vein and stem a three-dimensional flap. 

Art show quilt


M and C's quilt (with initials and date)

I had a nasty virus all during January, so I was slow getting started with the project at the end of the month. I knew that the next block I would make was a columbine blossom. For this one, I used a pattern from Ruth B. Mc Dowell's book Pieced Flowers. You know she's my favorite quilt artist, and I love using her freezer paper piecing, which I think of as puzzle style piecing. Her quilts often make dramatic use of fabric color, pattern, and value rather than more realistic representations. I have not mastered that, but I do love using the techniques and developing my own interpretations of color and texture. Most of the fabric used in the blocks were from my scrap bins and drawers. I had to use two different purple and white fabrics for the centers of the columbines as I didn't have enough of one fabric. Figuring out how to get the purple parts where I wanted them was a challenge with lots of do-overs, but I think they both worked in their own ways in the end.
Art show quilt

 
M and C's quilt

I was a little stumped about the next small blocks because I had sort of exhausted my knowledge of Colorado nature, but an internet search revealed that the state butterfly is the Blue Hairstreak. Well, sure. I've been on a butterfly kick for the last couple of years, so that would be fun. I made my own pattern on graph paper with multiple versions to simplify the design, and then transferred it to freezer paper for the patterns. It was fun fooling around with a batik berry print to make the "eyes" on the wings. I used embroidery after quilting for the antennae and little hairs at the bottom of the wings.
Art show quilt

M and C's quilt

I also found that there is a state cactus: the Claret Cup. Breathtakingly beautiful in the photos I saw. I drew a pattern and then waffled about how to represent it in fabric. I tried two different ways--one with subtle red shading and the other with more pattern in the fabrics. I like both of them. By this point in the process, I had ordered some fabrics online because I wanted some that represented spines and dryness in the background, so most of the fabrics in the background are new fabrics (except the dark brown scribbly print that I've often used to represent woody landscapes). I don't often buy fabrics online because I have a really difficult time visualizing them from a computer screen, but I had no choice. By then we were in lockdown due to the pandemic. I think I bought these from Lark Cottons, and all but two worked. I loved the other two, but the designs were too distinct. 
Art show quilt


M and C's quilt

M and C live near the foothills of the Rockies with a rather subdued mountain right outside their windows, but they have a second home in the mountains looking out at the chalk cliffs of the Collegiate range. I tried making a pattern for their mountain in the foothills, but never having been there, I had a hard time figuring out how to draw it just from photos. I did have access to photos of the chalk cliffs, though, taken on a brilliant day. My brother-in-law and some of his family members are in the foreground. I've blurred them out for privacy.

I knew I had found my header block when I found these photos. I designed an abstract version of the cliffs on newsprint and then made a freezer paper pattern. After that it was a matter of, little by little, building the different sections. (Sorry, forgot to take a picture of the pattern.)

I tried various patterned blue fabrics for the sky thinking they would fit with the other prints in the quilt.


But, I kept going back to that brilliant, cloudless blue sky in the photo and just had to use that. And I'm glad I did. 
Art quilt

M and C's quilt

You can see that I put frames around each block. I wasn't planning to do that at first, but as I developed a plan for the background of the quilt, it started looking mushy, so I framed the mountains in brown and the other blocks in various greens according to whatever was needed for a bit of contrast. I also tried some lighter fabrics for the background, but eventually chose a patchwork of yellow greens to represent various types of foliage. After laying out what I had on hand, I bravely made my way out to a local fabric store that had just opened after the virus lockdown to buy a few more pieces of fabric. It was the first time I had been to a retail store except for early morning "senior hour" grocery shopping, and kind of scary and surreal. The shop was outfitted with clear shower curtains to separate workers and customers, X's on the floors for social distancing, and of course, everyone was masked. It was probably the fastest I ever made decisions about fabric choices, but I did find what I needed to finish the quilts. By this point, it was easiest for me to foundation paper piece strips to make my quilts similar. It also ensured that I kept the quilt as squared as possible.

If you've looked closely at the small blocks, you'll see that I kind of scribble quilted different aspects to emphasize the main design elements and then I did stipple quilting in the backgrounds. The mountains were a bit more tricky. I set up my Ipad to look at the photos of them to try to imitate some of the features of the rock faces and the trees. 


I did some scribble trees in the foreground, but it's mostly texture quilting. I quilted straightish horizontal lines in the sky to add texture but not clouds. To soften the lines between the trees and cliffs, I did some zigzag free motion along the edges of the tree sections. Have you ever zigzagged with free motion? What fun! 
M and C's quilt

M and C's quilt


M and C's quilt
Here's one of the quilts before binding. Not a great photo, but it does show the quilting texture well. It was a bit ripply, so I had to do some stay stitching before sewing the binding on.
I bound the quilts with a green batik that I've had for years for my landscape quilts. The backing is a piece I ordered from Bernie's Needle and Foot Etsy shop. I bought it while we were still in lockdown, and I'm glad I did. It is really too pretty to be up against a wall, but I'll know it's there, and that makes me smile. 
M and C's quilt

The process of making the quilts was very slow. We were in lockdown much of the time, and during the early days of the pandemic, I had little energy or ability to concentrate for very long. I had another project that was a good distractor for me (which you can read about in most of my previous posts for 2020), but in between, I picked away at these quilts. I was happy if I only did one little thing on a day, whether it was cutting out pattern pieces or piecing a little section. I did not give myself a timeline--it was past the wedding anyway, and by the middle of March we knew there would be no art show at our church. (That quilt is temporarily hanging in my quilting room, but I think I have a plan for it.) So it was just a matter of working off and on as I felt like it. Over time, I got used to a relaxed--if isolated--way of living and regained my creative energy, which is why these quilts are finished now. It feels good! I did not keep good records, but here are the stats as well as I can remember them. 

Pattern: My own design, except for the Columbine block, which is Ruth B. McDowell's. The other blocks are based on various photos. 
Fabrics:  Pieces I had on hand except as noted above. I did not keep track of new fabrics, except the backing is a Harmony with Nature print by Norman Wyatt for P&B Textiles.
Batting: Hmm, hard to remember. I'm thinking maybe bits of Dream Select Cotton. Or maybe the Warm Company. Perhaps one in white and one in natural? But don't hold me to it. My mind is mush. I think I had to piece one of them.I really need to keep track of these things, but when I make wall quilts, I always dive into the batting bin looking for scraps and pay more attention to size than type. 
Thread: Superior Masterpiece in Granite for piecing; King Tut in White Linen for quilting the background and in the bobbin. Various random threads in colors to match the other elements. Luckily, I had them on hand. Treasure in Old Lace for handstitching on binding. 
Binding: 2 1/2 inches cut, double layer, machine sewn to front and hand stitched on back.
Finished Size: 39  5/8 inches by 26 inches quilted. Not washed. 
Machines: Singer Featherweight for piecing; Singer Treadle 115 for free motion quilting (and walking foot quilting in the sky).

And just a few more photos--


(The sedum flowers have turned pink now.)

I'm linking up this week with Kelly at My Quilt Infatuation for Needle and Thread ThursdayMichelle at From Bolt to Beauty for Beauties Pageant, Sarah at Confessions of a Fabric Addict for Can I Get a Whoop Whoop and Wendy at Wendy's Quilts and More for Peacock Party. And now that I've got my quilting vigor back I have two more finishes to share. One is a fresh one that started as a squirrel recently, and the other is a real oldie. Watch this space over the next two weeks. And then?? I've finished everything, so time to start something new. Whooppee!!

(Oh, and a question for anyone that can answer it. Some of my photos end up squished and elongated on Blogger on my phone. I've made all the photos on this post in Large size rather than Extra Large hoping that fixes the problem, but any tips you have would be appreciated. I prefer to make my photos as big as possible. Blogger is just one surprise after another, isn't it?)

Remember to take care of/for yourself and others.This country I'm living in is such a mess. Hopefully, there will be some cheer and relief in the future. I'll keep quilting, and you keep quilting, too, if you can. It is truly therapeutic.

(Just a reminder: I'm not affiliated with any company, so when I mention products, services, or stores I'm just documenting what I used or liked.)