Showing posts with label RSC22. Show all posts

Friday, June 23, 2023

Rainbow Bear Paws

 This quilt has been a long time coming. 


It all started with a block I made during the Quilter's Color Quest workshop led by Rachel Hauser during the pandemic in 2020 (that seems SO long ago) following her Quilter's Field Guide to Color book. 

At the time I didn't have a clear plan for the block. It was supposed to be inspired by a personal story. (You can read about it here.) I knew I wanted to make more of this style block eventually. 

During 2022, I made lots more blocks following the colors of the Rainbow Scrap Challenge hosted by Angela at SoScrappy. I chose yellow for the centers and each month paired the designated color with a variety of other colors from my rainbow solids bin. I bought some Kona cotton in white for the backgrounds. Then I discovered that I had actually made the original block with Kona Snow, so I had to do a little surgery to replace it. By the end of the year, I had enough blocks for a quilt and knew I wanted to use a black and white stripe in some way with more solid white to make a quilt. I already had a fun retro 60s/70s print for the backing that I had bought in February 2021 as an option for another Bear Paw quilt. I chose a 1/4 inch stripe to make sashing strips 1 1/4 inch wide. 
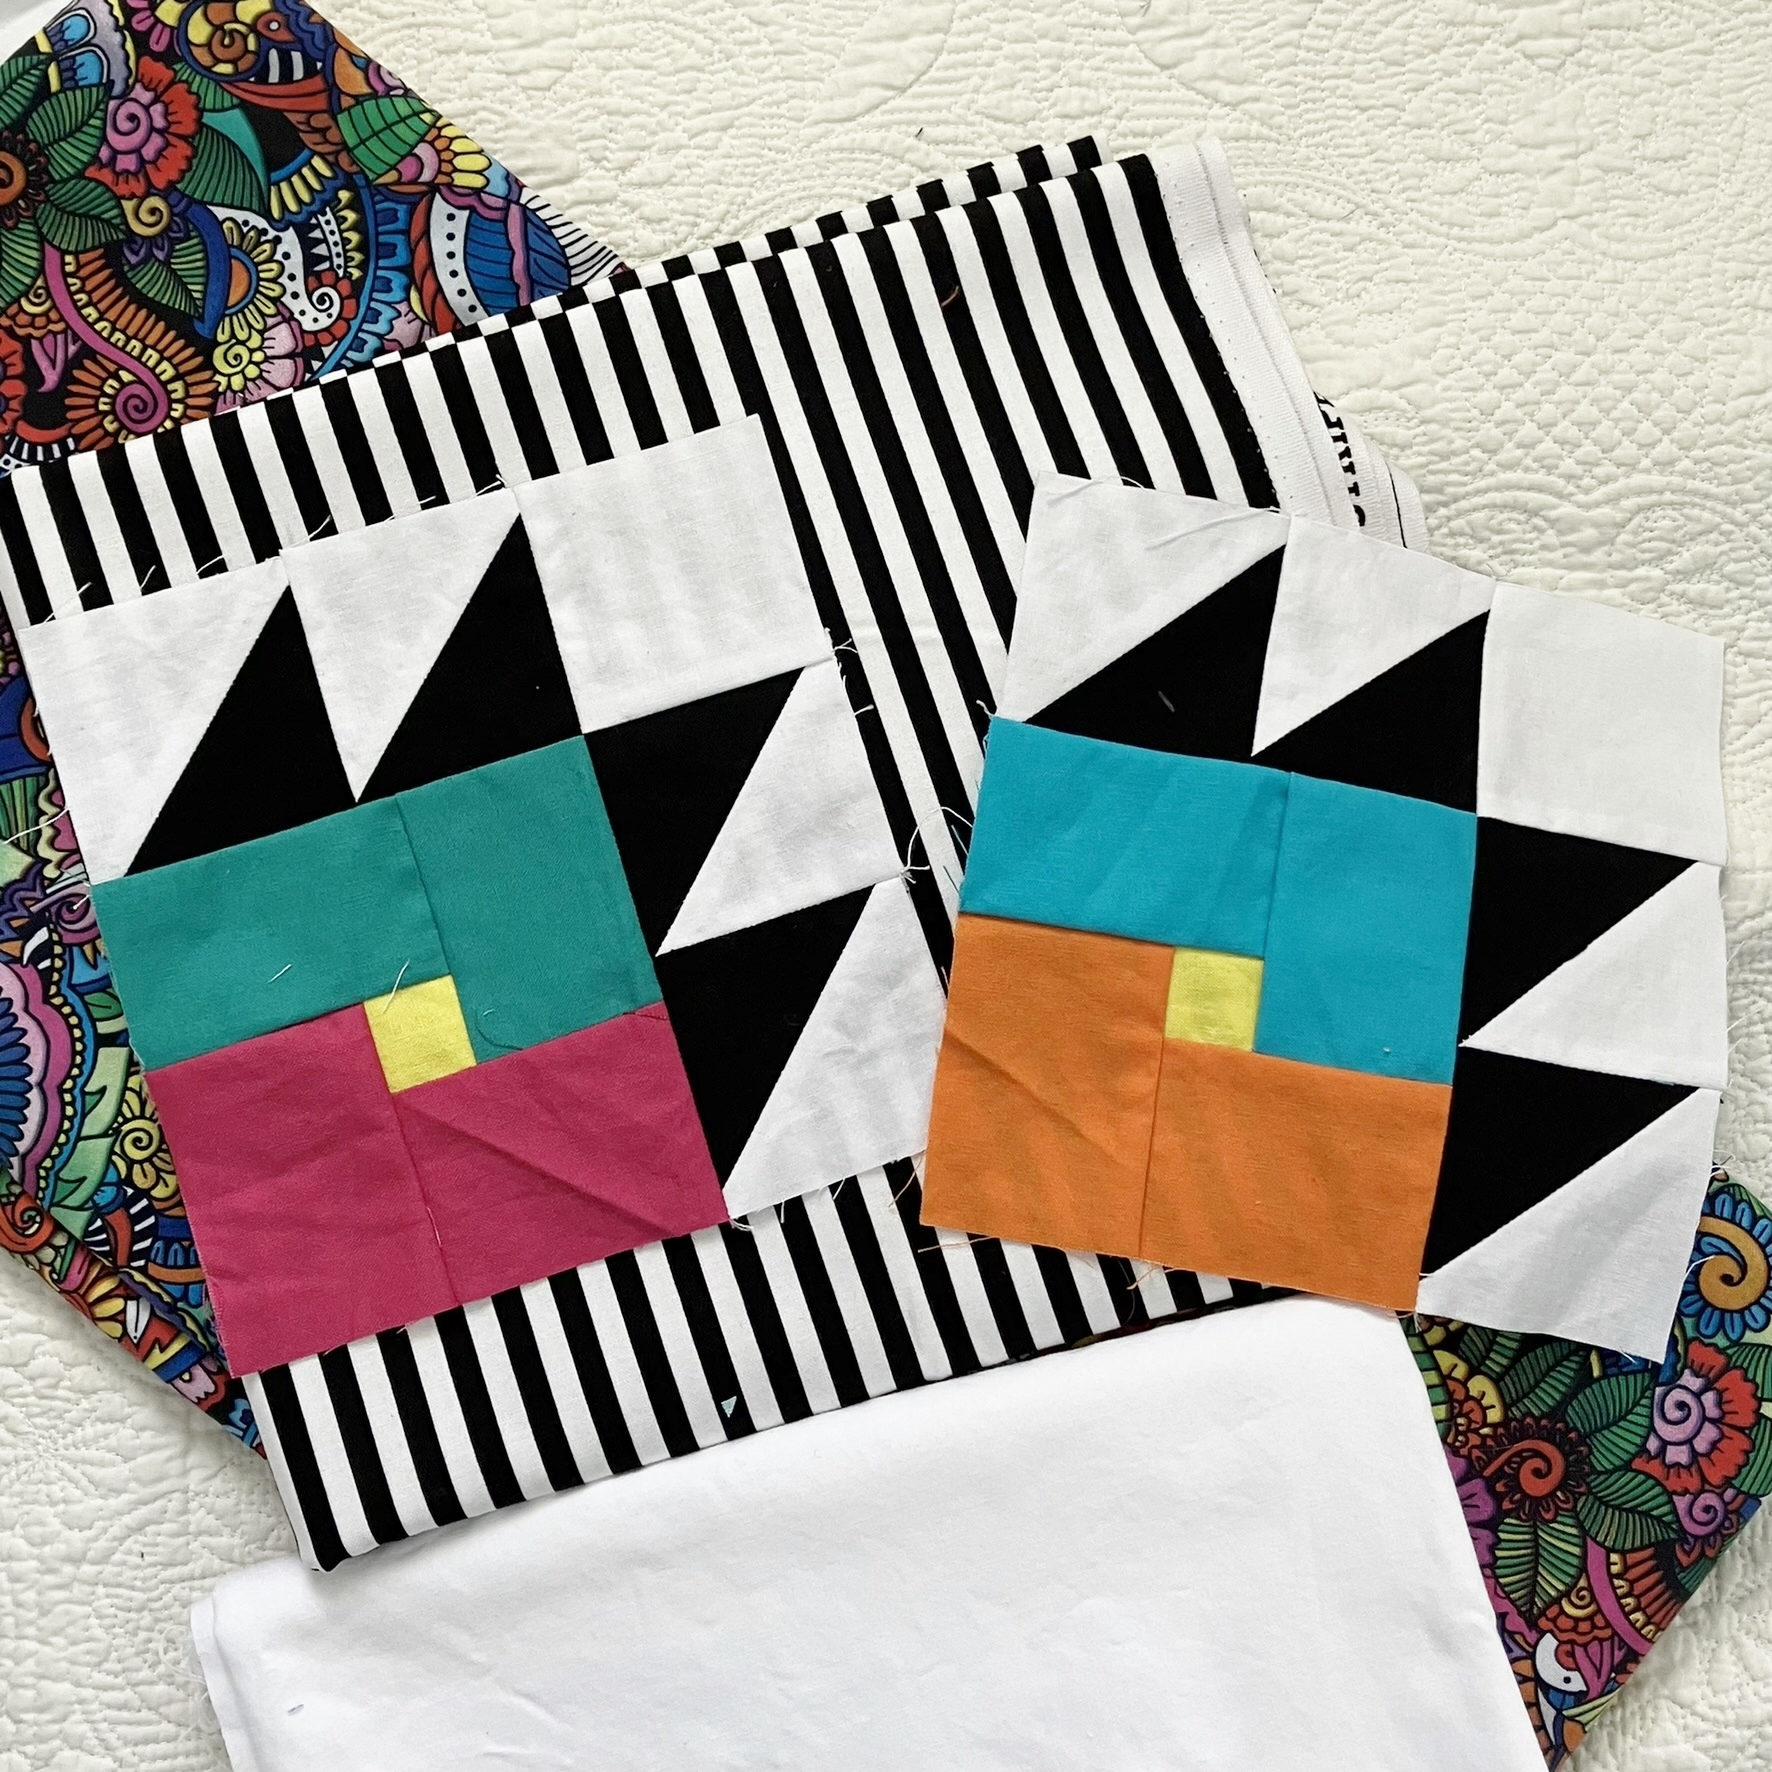

I put the blocks up on my design wall pretty randomly. I may have made a couple of changes after taking this photo, but it's about how the layout ended up. 


Then I cut about 24 sashing strips 6 1/2 inches by 1 3/4 inches (to finish at 6 by 1 1/4) and sprinkled them around here and there. A "rule" I set for myself was to not place any striped fabric at the outer edge because I wanted a white border with a striped binding. I ended up using 22 of the strips. I didn't want to go crazy with the stripes and detract from the blocks. This seemed like the right amount. 


To plan the rest of the sashings I drew the quilt blocks out on graph paper.


After making the drawing, I decided I wanted the outer sashings to be a little wider for the border. (I avoid long pieces for borders when I can. I prefer to incorporate them into the blocks.) I drew a rectangle around the interior blocks and then marked out the sashes for those: 6 1/2 by 1 3/4 inches (to finish at 6 by 1 1/4 inches) and 7 3/4 by 1 3/4 inches (to finish at 7 1/4 by 1 1/4 inches). I needed to resize some of the sashes on the edges making them extra long, extra wide or both. Some were cut 8 3/4 by 2 1/2 inches, some 8 3/4 by 1 3/4 inches, some 7 3/4 by 2 1/2 inches and some 6 1/2 by 2 1/2 inches. It sounds complicated but I just calculated them from my drawing and scribbled the sizes and how many I needed along the edge of the page. This is truly my kind of improv (hard to explain): precise in numbers but plan-as-I-go. Anyway, it all turned out well when I laid it out.


Then it was just a matter of making the blocks, each with two or three sashings around them and sewing all the blocks together. No borders needed.

One little tip I have about cutting the striped fabric: I made sure that my seam lines landed somewhere in the middle of the black stripe so that there was always black at the seam--even if only a smidge--to set it off from the white sashing.
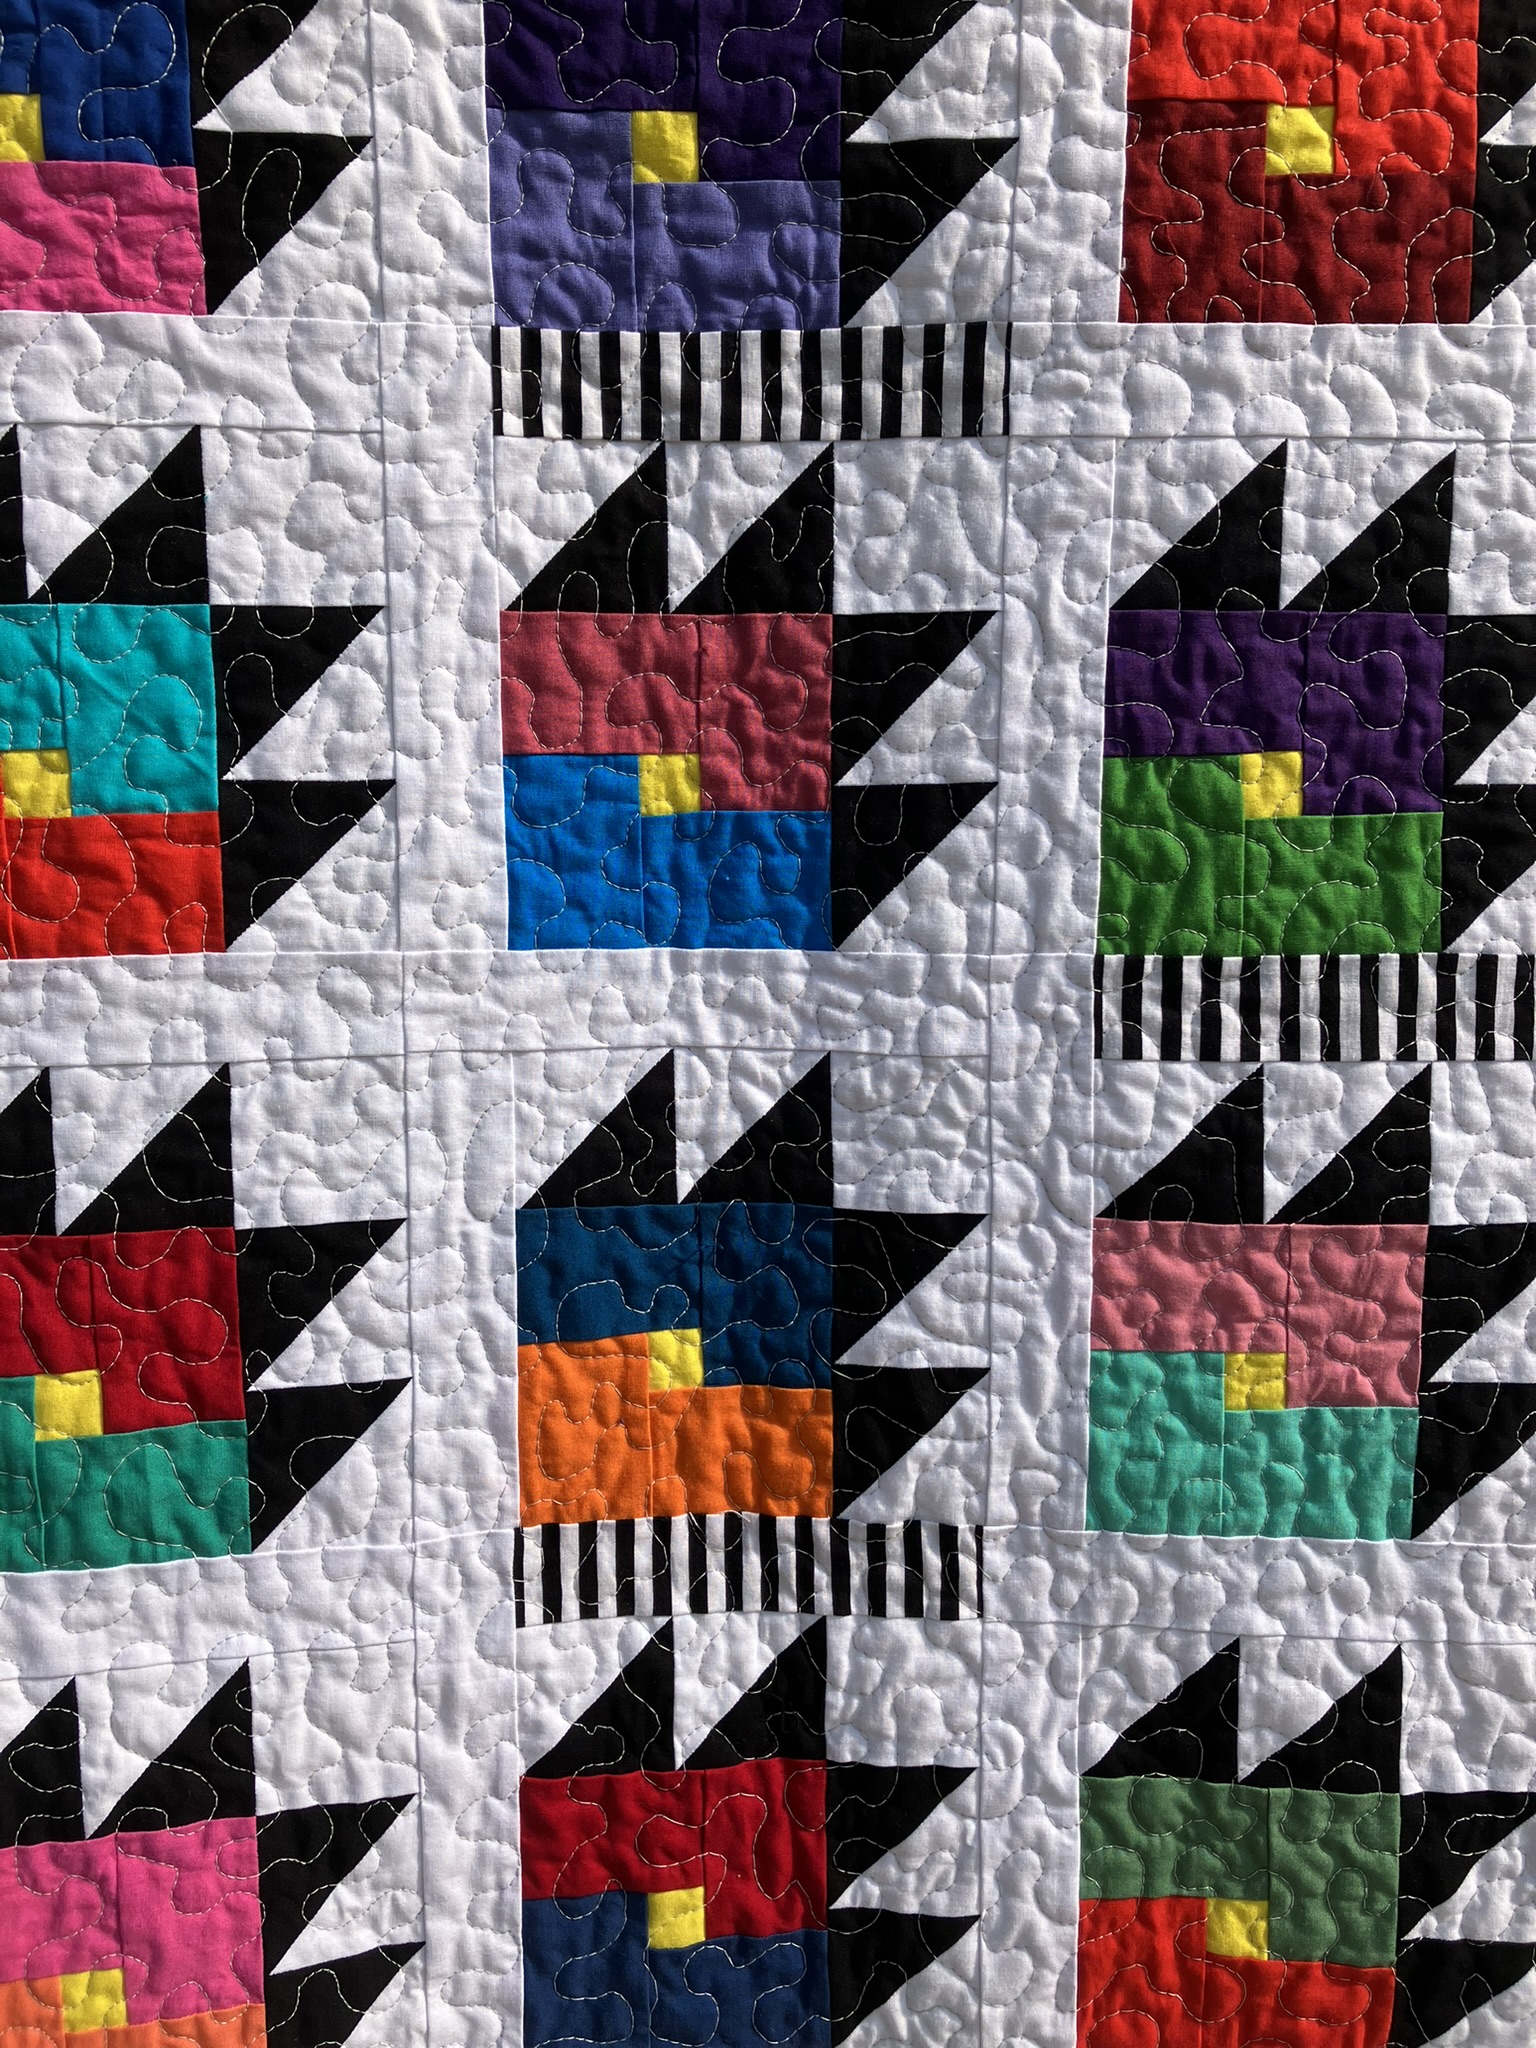

I did a meander for the quilting. There was already so much going on both on the front and the back that it seemed easiest. Then the fun of the striped binding...

I love it against that retro back. 

And just like that it was done and ready for the garage.

I'm always amazed how a pattern appears on the backing from the repeat of a large print. I'm glad I took the time to pattern-match the seam because it would have bothered me if it was off in the photo--even though that would not be noticeable any other time. 

Close up.

Here's the block that started it all...

And my initials and date...

On the driveway...

But we really need some glamour shots. We took a walk to the gardens at our Veteran's park and were surprised at how fast the flowers have come out, even with the pretty awful drought we have going on. (We have some great flower volunteers to make this happen in our township.) So here are some pretties along with the Stats.

Pattern: My own spin on the Bear Paw block, with a little square in the paw made with partial seams, and sashes around it. 

Block size 6 inches finished, and varies in size with the attached 1 1/4 inch finished width of the sashes in the interior and a 2 1/4 inch finished width on the outer edges of the quilt. 

Fabrics Variety of solids (mostly Kona, but some others, including maybe a few solid backsides of some prints), Kona white (background), Stripes by Riley Blake, and retro print fabric from Joann.

Thread Piecing: Superior Masterpiece in Granite; Quilting: Coats and Clark Machine Quilting Cotton Thread in Nugrey; Handsewing on binding: Superior Treasure in Antique.

Quilt size 54 by 61 1/4 inches pieced; 53 1/2 by 60 1/2 quilted; 51 by 57 3/4 washed.

Machines Singer Featherweight for piecing; Singer Treadle 115 for quilting and machine work on binding. 
This quilt will be donated, but I haven't decided where yet. 


I hope you've been tickled by a finish this month. I'm going with quick and easy this summer, so I'm not tied to my machine (unless I want to be). Having said that, it looks like I might be doing at least one (maybe two!) QALs. I'm starting behind on one, but I think it will be easy to catch up. Stay tuned.


(Just a reminder: I'm not affiliated with any company, so when I mention products, services, or stores I'm just documenting what I used or liked.) 


Saturday, April 29, 2023

Grocery Bags

Well, here I am again. Finally. I just can't seem to get into a good rhythm of sewing or blogging this year. This time it was Covid. We managed to avoid it for three years. Yeah, at this point, it's not a matter of if but when, right? It was relatively mild but took us flat out for a week with various annoying symptoms. We are thankful for vaccines because I sure couldn't imagine this without some protection--even if I'm pretty sure this version was beyond either of the Omicron variants we were last boosted for. The worst part was the lingering fatigue, nasal symptoms and cough. We didn't feel like ourselves for a month. I wasn't expecting that. If you sent me a comment during that time and didn't hear back, I apologize. I had no energy, but I appreciate what you said. We are pretty much back to ourselves this week, and yay, I felt like sewing. So I have something to share. Grocery bags!


Do you recognize the fabric? It's the adding machine tape project I did for Angela's Rainbow Scrap Challenge over at So Scrappy during 2022. 

I started these bags just before I got sick in March. I don't have photos of the process, but I'll share a bit about how I made them.

I really wanted to make them entirely from stuff I had on hand, so instead of batting, I used an old blanket that I had set aside for possible donation to an animal shelter. (Don't worry, I have other ones to donate.) All of the fabric was from my adding machine tape project and old leftover pieces that never seemed to find their way into other projects, and the thread was some quilting thread that I didn't care for.

I wanted the bags to be close to the size of a paper grocery bag, so I measured one and then planned a rectangle. I cut my blanket pieces (one for each bag) at 36 by 20 inches and did Quilt-As-You-Go along the long edges of the fabric strips leaving 1/2-inch seam allowance. You can see the batting with the quilting on the inside of these two bags-in-process. 


This was as far as I got before I got sick. So this past week I rushed to complete the project. I made these bags the simplest I could. After making one big rectangle I used a different method to box the bottom. You can see how I did it on a tutorial for Magic Market Bag at Epidastudio. Instead of sewing the side seams and then pinching the fabric and sewing a triangle, you fold the rectangle right sides out and then fold back from the short edges half the width of what you want for the width of the bottom of the bag. I wanted mine to be 7-1/2 inches, so I folded each side back 3-3/4 inches, then sewed the side seams. So easy. Just two seams to make the outside of the bag. Sorry for no photo, but the link shows you how to do it. Here's how it looks from the side on the completed bag. 

I used my favorite color strips to make outsides of the four bags, but still had enough adding machine strips left for more. I decided to use the less favorites to make the lining (without the blanket batting), and had enough strips to make almost two bags worth. Then I added bigger chunks of old fabric for the rest. There are some really old fabrics in there. (Some are older than my daughter who is--gulp--in her 40s. No, she's not old. It's just old for fabric. Ha!) I wouldn't trust them in a quilt, but they were perfect for these bags. The lining pieces were 37 by 21 inches, including seam allowance. You can see some of the linings peeking out here.
Raided my pantry for grocery models.

I also scrounged around for longer strips to make handles. I cut them 24 inches by 4 inches, pressed over 1/2 inch on the long sides and then folded in half and sewed along the edges. When I put the bags together (just by sewing the outer bag and lining right sides together--so easy), I inserted the handles 5 1/4 inches in from the side seams with 1-1/2 inches sticking up above the raw edge. I left an opening between the handle ends on one side for birthing the bag right side out, then sewed it together and topstiched around the whole top edge. 
That yellow lining fabric is one of the really vintage ones. 

To reinforce the handles, I sewed an X in a square just below the top edge. (I just realized that step is also in the Market Bag tutorial.)

I really like how these bags turned out. The blanket batting makes them sturdy enough to stand up. The boxed corners are kind of thick because of the batting, but they help the bag stay open for filling.

The completed bags are approximately 14 inches tall, 12-1/2 inches wide, and 7-1/2 inches deep. (Sizes are approximate as I wasn't real precise in my sewing.) We have already used them for a grocery run, and my bagger husband gave them two thumbs up. Here they are ready for their next run. 

I can't resist a few more glamour shots. 

It occurs to me that this is a really haphazard post (I'm going to blame it on Covid brainfog), but it's done and that makes me happy, because now I can move on to another quilt!! I will try to be more conscientious about photographing as I go so I can be more organized in describing my projects.  

Anyway, stay scrappy, stay healthy, and keep sewing. 


Saturday, November 5, 2022

Blues, Greens and Soul Restoration

Hello. It's been awhile. My sewing and blogging this year have been scattered--a little at a time, just enough to keep going as family matters have been a priority. My dad began hospice care in March, and left this life at the very end of August at the age of 98 years, 8 months. We are so thankful to have had him in our lives for so many years--all of them with incredible mental sharpness, curiosity, and good humor, even in his last days when he was heavily medicated for pain. Dad lived independently until his last three months when he decided to move from his condo to assisted living, so you can kind of imagine the practical things that needed to be taken care of during the summer to sort and dispose of belongings, save mementos and sell the condo. But everything went well, and we were able to spend lots of time just enjoying each other. Our memories of those last months with Dad are sweet.

It has been strange in a way to live without concerns for Dad's health and to find a new rhythm of life this autumn. Shortly after Dad's funeral (an outdoor service at his request on a spectacular day), we found a last-minute cottage booking for a week-long vacation on the shore of Lake Michigan. And in the last few weeks, we've taken some hikes and have spent more time with our kids and grands during little breaks from school. So I'm taking my time getting back to sewing projects, and that's okay. We've had a glorious autumn, with long-lasting brighter-than-usual color. (I hope that isn't really a harbinger of more serious climate concerns.) There will be time enough for more sewing when winter sets in. 

Meanwhile, I do have some bits of sewing to share, as quilting has remained a relaxing and therapeutic activity during this season of my life. I have caught up on my RSC color sewing for September and October--light blues and yellow-greens. I made one quilt-as-you-go placemat each in blue and green, and then after making my adding machine strips, I still had enough green to make one more placemat. The strips were a bit wider (probably some were binding bits), so it went fast. I also used large scraps for the backs as well as frankenbatting, which greatly reduced my scrap collections. These photos show fronts and backs. All of the placemats are 14 by 18 inches and will go into my Meals on Wheels pillowcase for donation next spring.


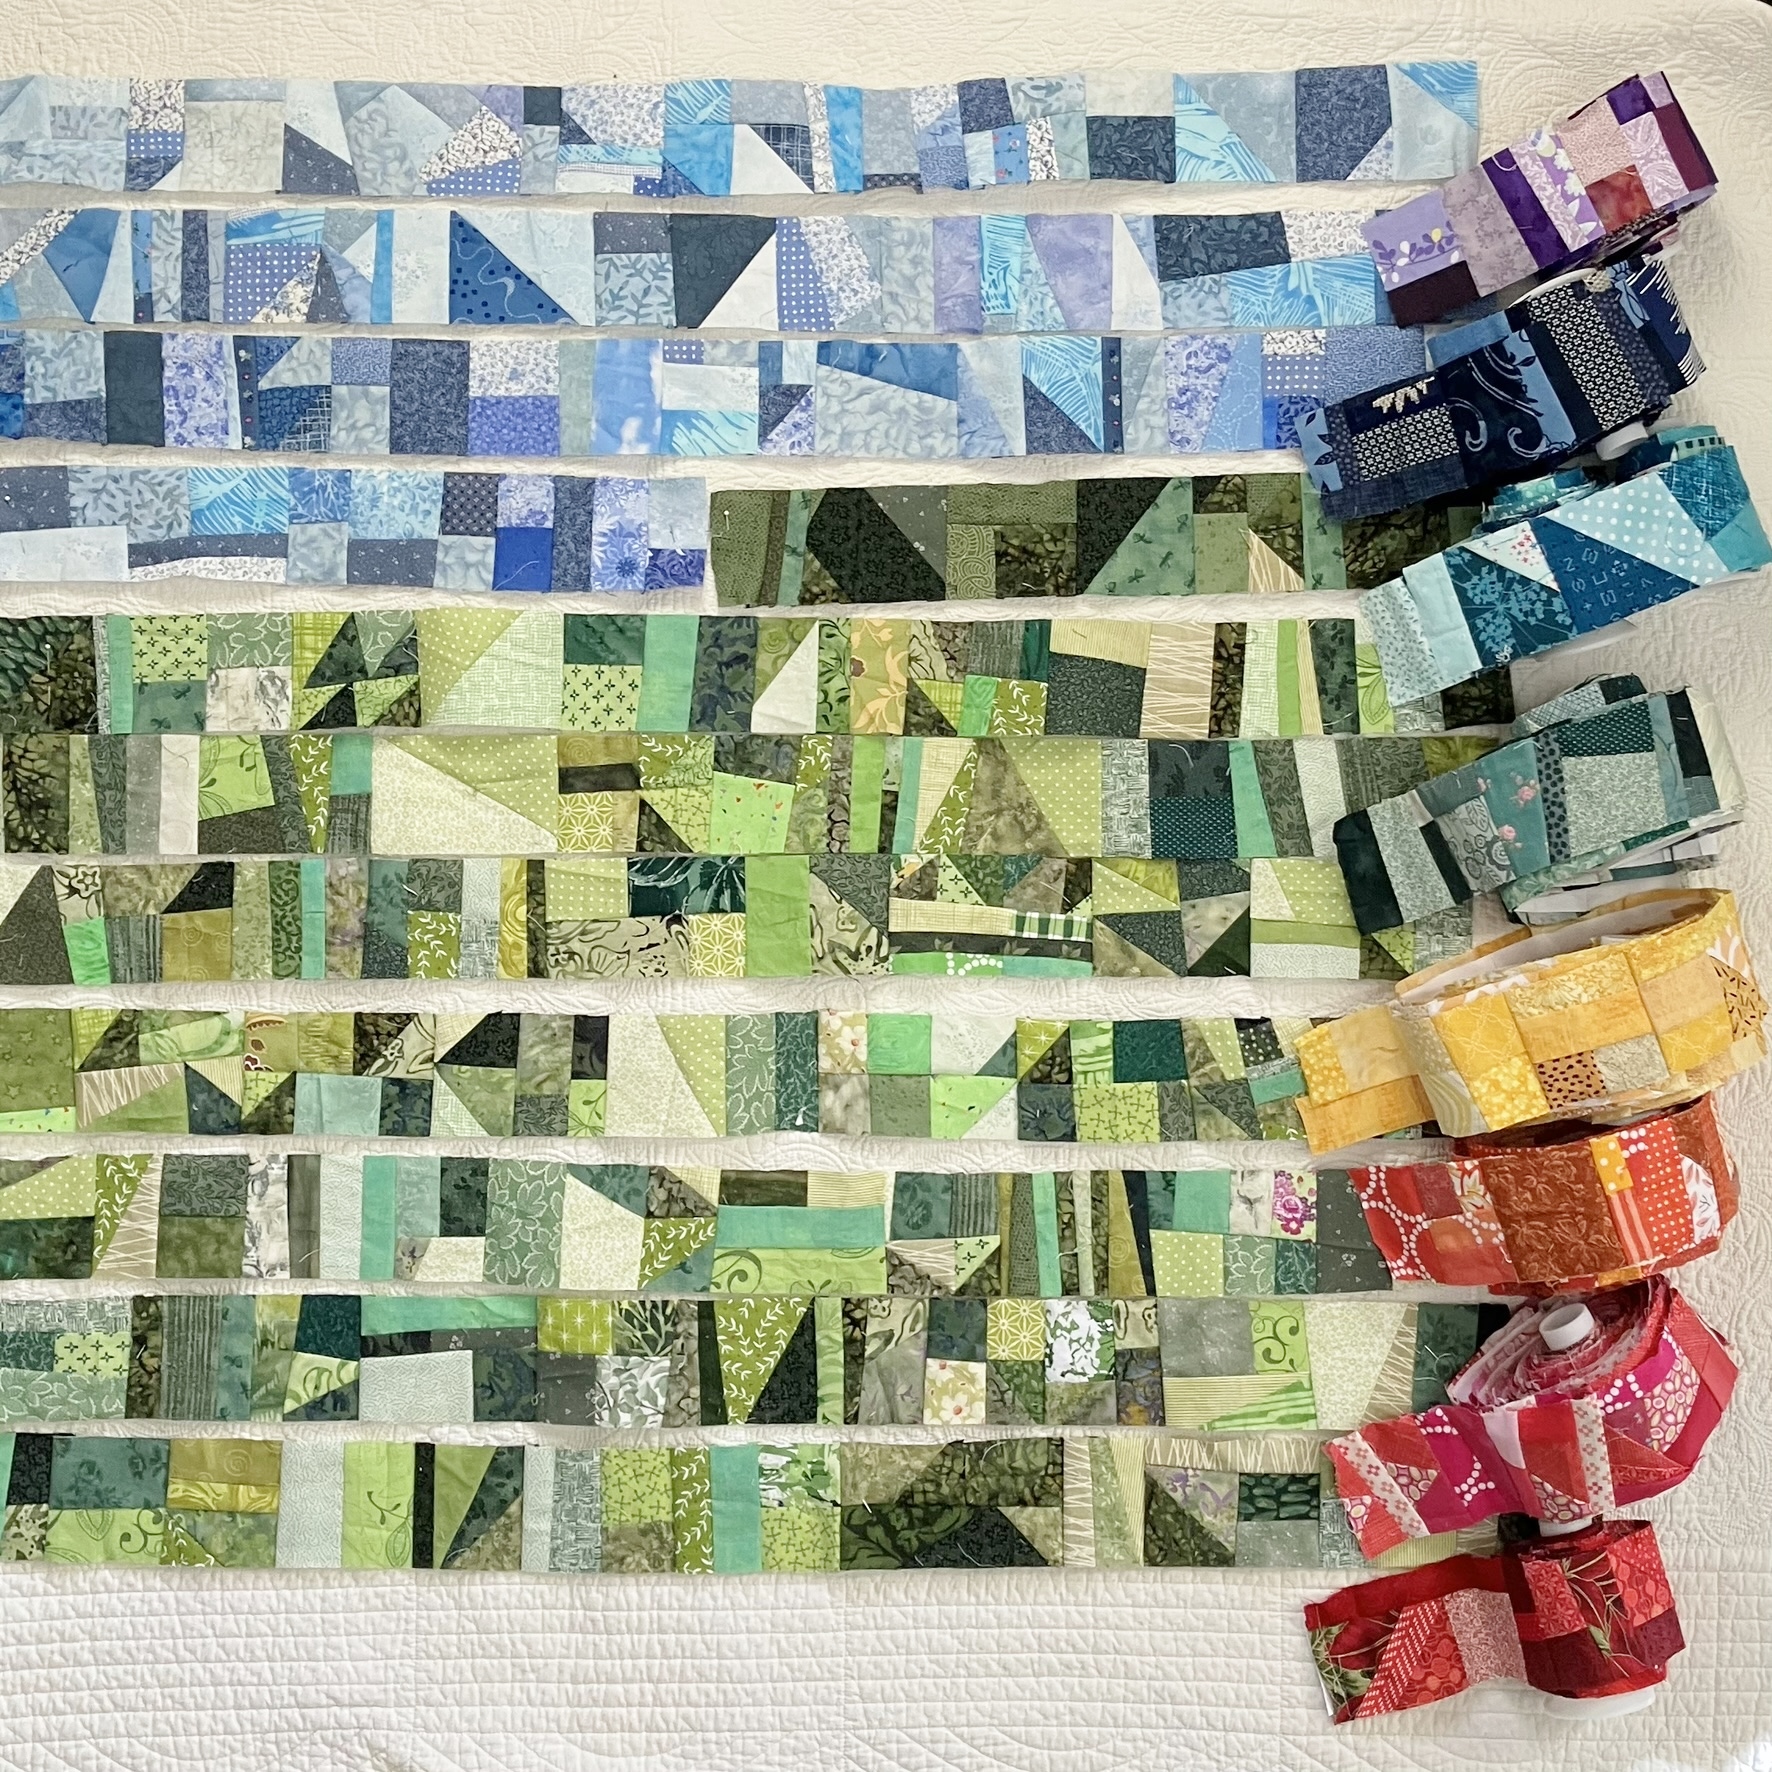
In all, I made about 10 1/2 feet of light blue adding machine tape strips and a little over 23 feet of yellow green. I have only a handful of green scraps left, and a little more blue than that, but not enough to bother me. I've always had way too much blue fabric, so I knew that would be the case. Here are the strips with all the other ones I made this year--around 172 feet altogether.

I think this will be it for RSC adding machine tape for now. I still have most of one of the rolls of tape, so eventually another project will pop up. I've been thinking of maybe making these strips into grocery tote bags. During the pandemic, we were not allowed to use our own bags at the grocery store. Lately, we've been using kraft paper bags and recycling them--I really don't want to add to the plastics problem. But now that it's okay to use our own bags again, I'd really like to have washable totes. Our old totes weren't washable, and I sort of shudder to think of how gross they might be. 

I did not make more Bear Paw blocks in the blue and green families for RSC as I decided I had plenty of blocks for a quilt. I want to play up the black and white a bit, so I ordered some black and white 1/4 inch striped fabric which will become part of the some sashing as well as binding. 

I think I might discontinue my RSC projects in the new year after I complete the current ones. I'm a bit tired of stretching a project out for a whole year--and besides, my scrap bins are pretty depleted by now. I do have some bins that still need attention. There are lots of multi-color scraps yet as well as a bin of neutrals (white, black, brown, gray) and a bin of solid color scraps. I'll still be working with them, but on my own time frame. Maybe it's my age? Maybe it's dealing with my Dad's stuff? But I feel the need to move things along more quickly. 

So let's see, what else? I did finish a quilt top over the last couple of months, and while we were on vacation, I discovered that a quilt store I used to order from online had a brick-and-mortar store near where we were staying. I decided that I would visit that store to buy the backing fabric I needed for that quilt. We happened to have a couple hours of rain one afternoon, so it was the perfect time to make that little visit. I found just the right fabric, and there was just enough on the bolt. Yay!! I also found a couple of fat quarter sale pieces. Hmmmm. They would have worked in that quilt, too. Here's everything stacked up. You'll have to wait to see the whole quilt a little longer. It's basted, but with guests here off and on, I've put off quilting it.


One other thing I've been working on off and on is my handsewn car quilt top. I've been sewing the four-patches I made into 16-patches. I took this project on vacation to sew in the evenings.


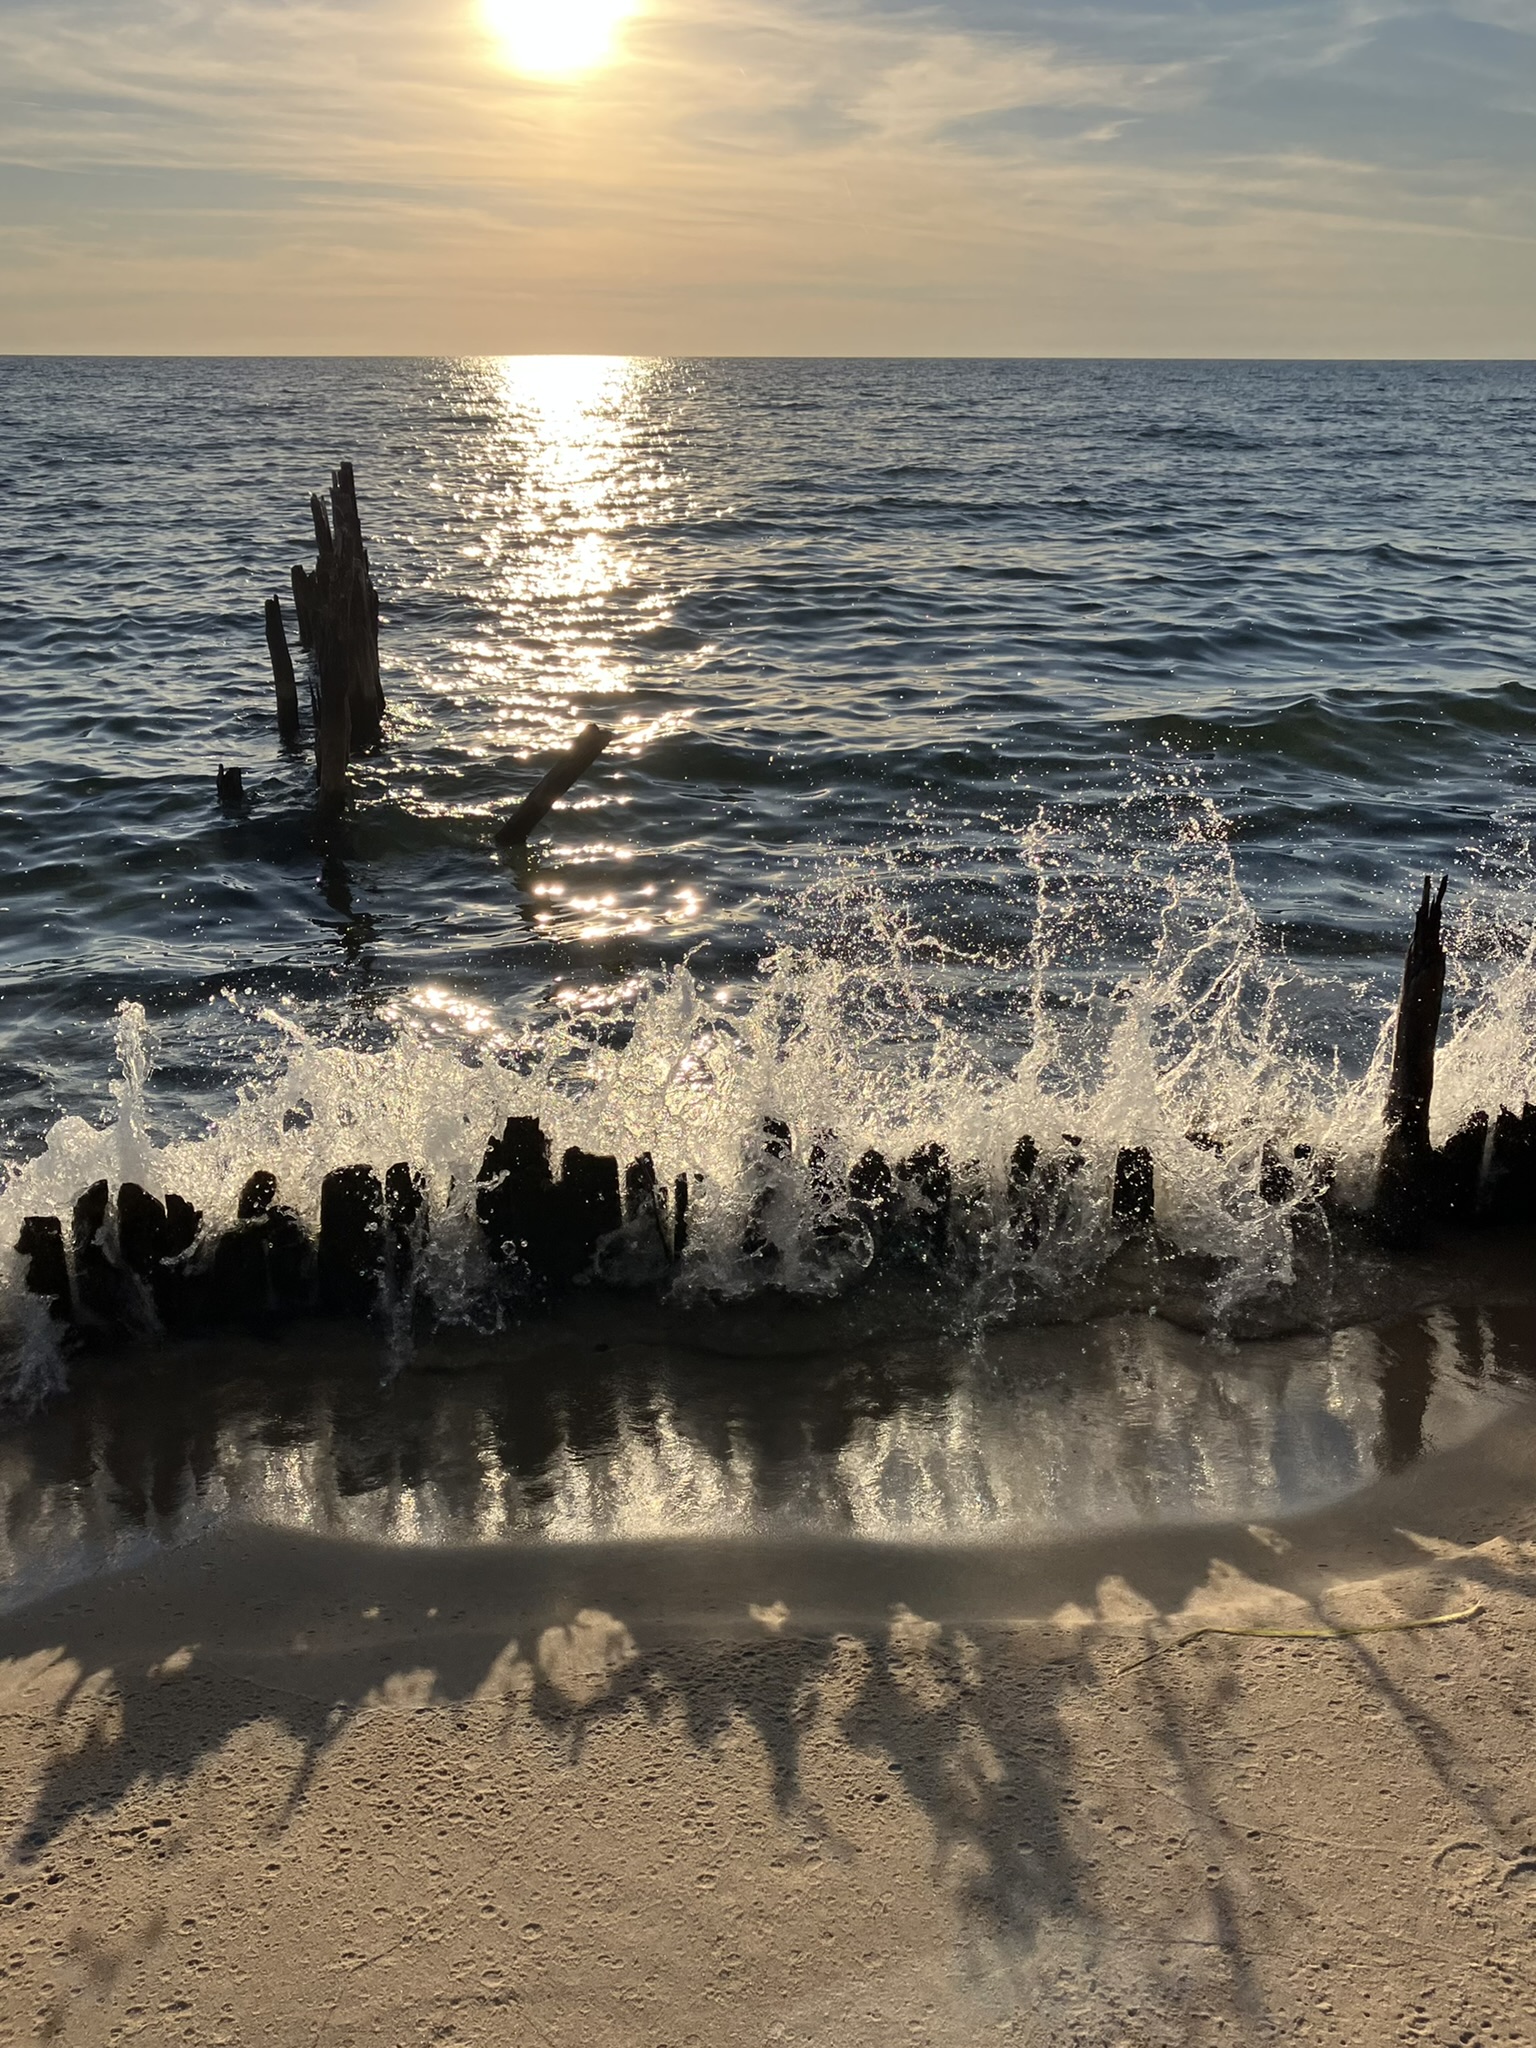
So, that's it for the past two months. I'll leave you with (more than) a few photos from our vacation and our autumn hikes during October. Being by the lake and walking among colorful trees has been real soul restoration. 

Along Lake Michigan...

Muskegon lighthouse

On the beach by our cottage

Bike ride along Muskegon Lake

Cottage beach

Duck Lake State Park

Hoffmaster State Park (When we took childbirth classes years ago, and I had to visualize a calming scene, this was always the one.)

Cottage bluff

Postcard view from our living room

And closer to home...

Esker Landing (near our neighborhood--I've never seen this much color there before,)

Lake Lansing Park North

Lake Lansing Park North

Lake Lansing Park North

The Ledges in Grand Ledge

View from the Ledges

I'm linking this with Angela at So Scrappy for ScrapHappy Saturday and with Cynthia at Quilting is more fun than Housework for Oh Scrap. 

I hope you've had beautiful Autumn/Spring weather wherever you are, and that quilting is an enjoyment for you through all the seasons of life.