Showing posts with label heart blocks. Show all posts

Friday, February 9, 2018

DrEAMi Doll Quilts

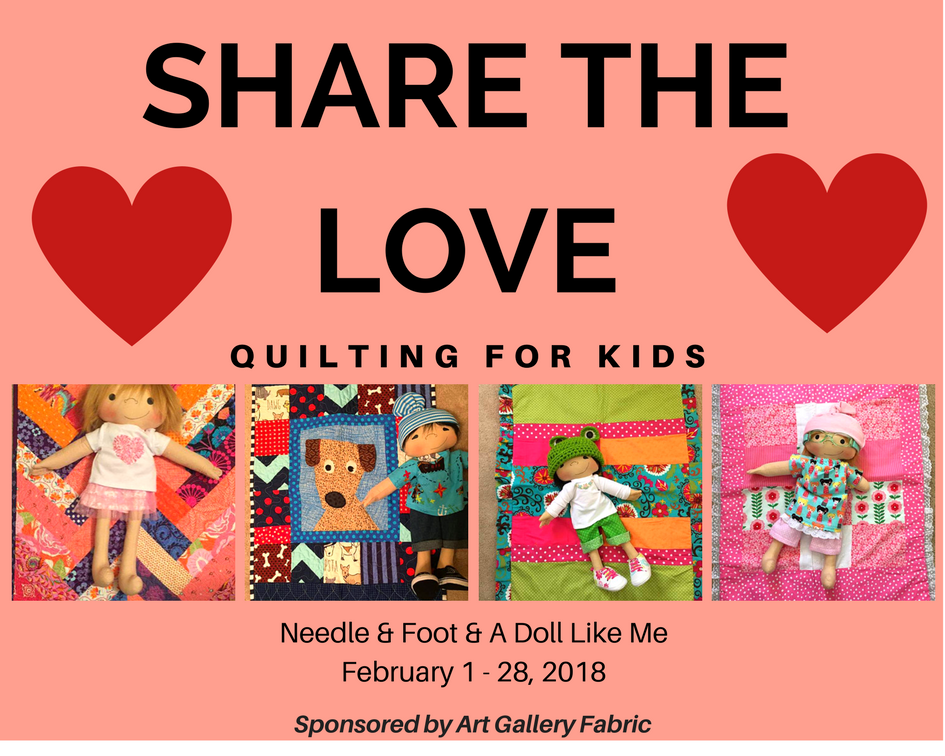
Oh, what a week it's been. It all started with a post from Bernie at Needle and Foot that highlighted A Doll Like Me, the business of Amy Jandrisevets, who makes dolls for children that match their physical characteristics (perhaps with a limb difference, or hearing aids, or any other unique feature that might not be available in commercially-made dolls). Amy also provides doll quilts to include with the dolls under special circumstances. This month Bernie is challenging quilters to help Amy build her supply of doll quilts through a project called Spread the Love, Quilting for Kids. Please go to Bernie's website to read all about it, and then go to Amy's Facebook page. It will be well worth your time. Well, this project was irresistible to me--as well as a whole lot of quilters; don't you love being part of this community?

First, I needed to decide just what I would make. Lots of people collect novelty prints and have lots of kid-friendly fabrics. I don't have that kind of stash. I have used those prints occasionally, but pretty much use them up on a project. I had just a few pieces, but they were the remnants of border edges, and the designs were cut off leaving partial pictures--like half a mermaid or half a car. I only had one piece of fabric that seemed to have possibilities. I rummaged in my fabrics and found a few pieces that were big enough for both backgrounds and backings. I decided that those along with some of my solids stash would work if I made my own little kid-attractive motifs. The result is this little set of quilts:

First some overall stats: 
The solid fabrics are mostly Kona, with a few others thrown in that I don't have info about. I had just the right scraps of my favorite batting (Quilter's Dream Select in white) for all three quilts. (Don't you love when that happens?!) It has a wonderful drape, so it's great for little projects. I pieced with my Singer Featherweight and quilted with my Singer Treadle and a walking foot. I used a 2 3/8" binding folded in half.

So let's take a closer look at each one: They each deserve some description and individual stats even if they are tiny, don't they?

The little heart quilt was my first one:
I had been attracted to the Regatta quilt by Daniela of Block M Quilts that everyone has been making. My quilt is based on that one, but I substituted little hearts for the background squares. The little hearts are a tiny version of the heart pattern at Cluck Cluck Sew that you are all well-acquainted with. I didn't have gradients of colors that make the Regatta quilt sing, but I still had fun messing with the pattern. I don't think I have the Regatta quilt out of my system yet, but this was a fun way to scratch an itch.
Here are the stats:
Size: about 22 by 23 1/4 inches
Heart size: 2 by 2 inches, finished.
Threads: Superior Masterpiece in Granite for piecing and bobbin when quilting; Aurifil Mako 40 wt. cotton thread in 1148 (Light Jade), 1154 (Dusty Orange) and 2132 (Tarnished Gold) for top quilting.
Fun connection: The floral fabric was leftover from a baby quilt I made years ago.

I designed a fish on a scrap of graph paper for my second quilt:
When a blogger friend saw it, she thought it was the Kissy Fishy pattern from Lorna at Sew Fresh Quilts. So, of course I had to look up Lorna's pattern. They are similar, but that is by coincidence. I just sketched until I had something I could l make from two shades of orange I had. However, if you would like to make a similar fish, I highly recommend you check out Lorna's patterns because I'm sure her seaming scheme is superior to mine. (And I don't do patterns!) 


Here are the stats:
Size: about 22 by 24 inches
Fish block size: 5 1/2 by 3 5/8 inches, finished.
Threads: Superior Masterpiece in Granite for piecing. Superior King Tut in Mint Julep for quilting
Fun connection: The striped fabric and some of the solids were leftover from the baby quilt I made for one of my grandsons.

Do you see that darker area where I pieced the back? I thought I did it "right" until I saw this photo. We'll call it a design element.

The design of the third quilt was determined by the one piece of novelty fabric I had with complete motifs (cars and trucks). I used every bit of it except two narrow strings I cut to even it up. I had to add substantially to it, so this quilt got four little car blocks, which I designed on graph paper and paper foundation pieced.

I used a suede print fabric for the sashing and borders to mimic roads. 


My husband  quilt advisor chose the binding, and when I started cutting it, I saw the name on the selvage:
Perfect
This quilt can also be a mini play mat!


Here are the stats:
Size: about 22 by 23 3/4 inches
Car block size 6 3/4 by 3 1/2 inches finished; whole block 6 3/4 by 7 3/4 inches finished. "Roads" are 2 1/2 inches wide.
Threads: Superior masterpiece in granite for piecing; King Tut in Canaan (variegated gray) and Temple for quilting. (I meant to use the Temple in the top thread for the road lines, but forgot. Now I'm glad I used the gray because the white would have emphasized the wonkiness of the lines--wonkiness is a hallmark of my walking foot quilting and my state's roads, though, so it's all good.) 
Fun connection: The gray and car print fabrics were in a baby quilt I made for a grand- nephew a few years ago. That quilt had (much bigger) pieced vehicles, too.

I thought I was all done, but then I read that some children who Amy makes dolls for also receive hospital gowns for their dolls as they sometimes need to spend time in hospitals. I just happen to have a hospital gown that I wore home from the ER after I broke my shoulder last year.  Mari at Academic Quilter found a pattern for a doll-sized gown in just the right size at Read Creations. That made me happy because I do not have any dolls in that size and was trying to figure out how to make a gown by guessing the size. So I made three little gowns from the pattern. There is still plenty of gown left for more if they are needed. Those gowns from the hospital are voluminous! Especially the one I had since it was made fit around broken limbs (Not sure we ever figured out exactly how!)
My stand-in doll. The gown will look much cuter on one of Amy's dolls.
This pattern was so fun!! I made three changes--I cut the seams of the shoulders and side seams about a quarter inch larger so I could do French seams, I used 1/2 seam binding instead of 1/4 inch because that's all I could find, and I extended the binding about 4 inches longer to make it easier to tie the thicker tails. I am so glad that something good could come from this gown.

If you have an opportunity, consider making a doll quilt or gown if you can. It's such a wonderful project for this month!
I'm linking this post up with the Spread the Love Linky party that Bernie is throwing beginning February 25. I'm also linking to crazy mom quilts for Finish it Up Friday, Confessions of a Fabric Addict for Can I Get a Whoop Whoop and with mmm! quilts at the end of the month (February 24, I think?) for DrEAMi (Drop Everything and Make It) because wow has this been DrEAMi!!

I hope you are having a wonderful month, DrEAMi or not!

Friday, August 19, 2016

Love Wins Finish

Whew!  A finish this week! I wasn't expecting that when I sat down to start hand stitching the binding to the back of my quilt, but I just kept going and going, and now it's done!


When I make a quilt, I usually try to piece the backing from leftover fabrics from the front, but with this quilt there wasn't a lot of fabric left, so I decided to use just one fabric. I ended up using a stripe after lots of dithering that I won't go into here. I'm definitely not fond of stripes as a backing. They are hard for me to square up and keep straight while basting. But I do love them for binding. Of course, using a striped binding with the same striped backing poses some problems. I tried to intentionally not match the stripes in the binding to the backing so that I wouldn't drive myself crazy trying to match them. That was harder than it might seem. There are some places where they do sort of match up. I'm not sure how that happened. I probably stretched the binding a little, but overall, I think it's okay. And I do love a striped binding.


Some weird shadows from the quilting here. Looks better in person.
I had two false starts with the quilting. I tried some concentric hearts on the heart shaped blocks, first in free-motion and then with a walking foot. I wasn't happy with my FMQ (wobbly) and did not enjoy all the quilt maneuvering I needed to do with the walking foot. So I ripped out what I had done and went with my old stand-by. Yup. Meandering. I did big meanders in the hearts--with some random tiny heart shapes (or maybe they look like leaves?) thrown in here and there--and little stipples in the background. At the bottom of the quilt I did the big meanders above and below the letters and little stipples between them to make them stand out and to keep the amount of quilting consistent with the rest of the quilt.


Just after finishing the quilt, I read a blog post telling why I shouldn't "ruin" my quilt with allover meandering. Ouch. I may need to write a rebuttal about why I love meandering.

This quilt begged to be made. Shortly after the shootings at the Pulse nightclub in Orlando, Florida, I read that the Orlando Modern Quilt guild was collecting quilts for the survivors, friends and families of victims, and first responders as a gesture of support. I had a bundle of Robert Kaufman rainbow fabrics that I had won a couple of years ago in a Quiltmaker's 100 Blocks Blog Tour. I was still trying to decide what to do with it. The bundle practically jumped off the shelf at me, and I knew I had to use it for a Quilt for Pulse. The Orlando guild suggested using a heart pattern from Cluck Cluck Sew. I liked the pattern, but it was so cheerful, and I knew that the hurt from the Pulse tragedy would endure. Lives were fractured; hearts were broken. So I decided to add some fractured and broken hearts to the other blocks to recognize that pain, but with the message that Love will win out in the end. I quickly sketched out an idea.


You can read about how I made the fractured and broken hearts here and here. I also planned the letters on graph paper, six inches high and proportional to each other. 

I don't tackle tough issues in my blog. I want to focus on the sweetness and light that is quilting. But there is so much ugliness in this world of ours, so much hate and horror and pain. I am thankful that we as quilters can do something to counteract the evil around us with love in the form of quilts. It's hard for me to put my thoughts and feelings into words, but I hope that my messages for healing can be read in my quilt. I know that there is a broad quilting community that gets this, and I am so thankful to be a part of it. I just wish there weren't so many reasons to make these kinds of quilts. I could go on, but I'll leave it at that.

Here are some more pictures in the backyard...


Look close for a message and signature

and at the park behind our township offices... 


and after washing, with all it's crinkliness (and flatness!)


And now some stats:
Blocks: Basic heart pattern from Cluck Cluck Sew; original fractured and broken hearts and letters.
Block size (finished): 10 inches
Quilt size: 50 1/2 inches by 60 1/2 inches before quilting 
                 50 by 60 inches after quilting
                 47 1/4 by 57 1/4 inches after washing (5 to 6 % shrinkage)
Fabrics: Rainbow fabrics from a Robert Kaufman bundle of Blueprint Basics by Valori Wells; additional rainbow prints from my stash; assortment of white, off white and white/gray scraps; A is for Alligator by Michele Scott for Northcott Fabrics for backing
Batting: a mystery to me. The last of a piece I had in my stash. I love it; it's scrunchy and soft--maybe an 80/20 blend. It squares up the quilt beautifully and flattens any ripples after washing the quilt.
Binding: same fabric as backing; 2 3/8 inches for a 3/8 inch finish; machine sewn on front and hand stitched to back.
Piecing thread: Superior Masterpiece in Granite
Quilting thread: Superior King Tut in Temple
Pieced on Singer Featherweight
Quilted on Singer 115 treadle

This quilt will soon be on its way to Florida to help with the healing of Orlando.

I'm linking this post with Crazy Mom Quilts and Free Motion Mavericks, but they're both on blog-cation, so those links will come later. Also with Confessions of a Fabric Addict for Can I Get a Whoop Whoop and Thank Goodness It's Finished Friday. You can hit the buttons on the sidebar when those links become active.

Have a lovely weekend, and thank you for all you do to heal others with the love in your quilts.


Wednesday, October 7, 2015

Hearts

Follow my blog with Bloglovin These weeks fly by so fast, I can't believe it's Wednesday already and I've been home a week since vacation. I have only a little project I can show you. When I got back from "up north" I remembered that I needed to fulfill a little promise to make some heart blocks for quilters in California that lost their homes to wildfires. I had read about the project in a post by Bernie at Needle and Foot. Pastel heart blocks are being collected by Kerrie's Quilting to make into quilts for the displaced quilters. Here are what I came up with (please pardon the wrinkles. I forgot to press them after signing):


I used graph paper to cut a six-inch heart pattern. I don't have a zigzag function on my sewing machines. I was going to hand stitch the hearts but didn't trust my sewing to make them both neat and secure, so I pressed them around a freezer paper template and then removed the paper and straight stitched them down. I signed them with FMQ on my treadle machine using pastel thread that was already in it. That was my favorite part of the project. I love doing handwriting in FMQ because I like stitching tiny designs in FMQ, and handwriting is such a natural feeling motion. Also, my FMQ handwriting is a lot like my cursive writing from my middle and high school years--so much neater than my college and present day writing. Back then, I guess I concentrated more on presentation than message. 

Anyway, these were fun to make. I did find, though, that I don't have a lot of pastel fabric in my stash (at least in large enough pieces for a 10-inch block). I might need to change that. I think tomorrow is the deadline for mailing blocks for the project so you still have time today to make one (or more), especially if you can zigzag the hearts. Just head over to Bernie's blog for the information and mailing address. I hope they will bring a spot of cheer to some quilters who probably feel quite overwhelmed right now. 

In other WIP news, I finished quilting my grandbaby's quilt this week. It was not without a crisis, however. After I finished quilting the third quadrant, I turned the quilt over to admire my work...and there was a big wonky pleat where two quadrants came together. WHAT??? I have never had that happen before. I've always prided myself (therein lies the problem--you know what they say about pride) in having nice tight basting and have never had a problem with the backing shifting. But it happened. If the fabric had been a busy all-over pattern, I might have let it go, but it's a stripe and the pleat wobbled back and forth because it happened as I was making a turn at the end of each row, so of course the stripe wobbled, too.

(Side note: I like to take those little personality tests online. The ones that determine whether or not I have OCD tendencies make me laugh because they always say that I am almost too laid back. It's just that seeing a picture of one piece of candy in the wrong container of a set of carefully sorted candy colors feeds my artistic whimsy. Ah, but when it comes to sewing, well that's a different story. Points have to match and seams line up, etc.) 

At first I thought I would have to unstitch the whole quadrant. But I came to my senses, and painstakingly unpicked all the stitches just over the wobble. Then I carefully folded a neat little pleat down the side of one stripe and hand stitched it down with tiny stitches (ironic, since I didn't trust myself to applique those hearts, above). I could tell that the fourth quadrant had the potential for the same problem, so I took a seam in a little deeper in the backing before rebasting (to the nth degree) the last part of the quilt. I requilted, matching up all the ends of the parts where I had removed stitches, and then I finished the quilt. AND IT WORKED!! Yippee!. You can still see where a stripe is narrower than it should be. I will have to talk myself into believing that it is a bit of artistic whimsy to keep the OCD part of me calm, but at least the wonkiness is straight instead of all over the place. After the baby comes (won't be long now), I'll have pictures up and you'll be able to see how it turned out. I have no pictures of the fixing--I was too freaked out to grab the camera. 

Now it's time to make some baby quilt binding. 

Have a great week, and remember, you still have time to make a heart block if you'd like. 

This week, I'm linking up with Freemotion by the River, Freshly Pieced, Sew Fresh Quilts and My Quilt Infatuation for their linky parties. The buttons are on the right. 

 And this week, thanks to the gentle encouragement of some fellow bloggers, I'm finally figuring out how to use Bloglovin'. (I had no idea how many blogs I had bookmarked. This will be much more efficient. Who knew? Obviously, everyone but me!)