Showing posts with label Quilters Color Quest. Show all posts

Monday, January 15, 2024

SAHRR 2024

I'm doing it. Joining the SAHRR this year. What is that, you ask? It's the Stay At Home Round Robin that Quilting Gail has hosted for the past several years. Usually in round robins quilters begin a quilt by making a block, and then they pass it around to other members in a group, and each person adds a border before returning it to the originator to finish. But in this round robin, each quilter begins the quilt and then keeps adding borders at home following a different prompt each week from a group of quilters selected by Gail. Check out her introductory post here to find out more about this year's SAHRR. 

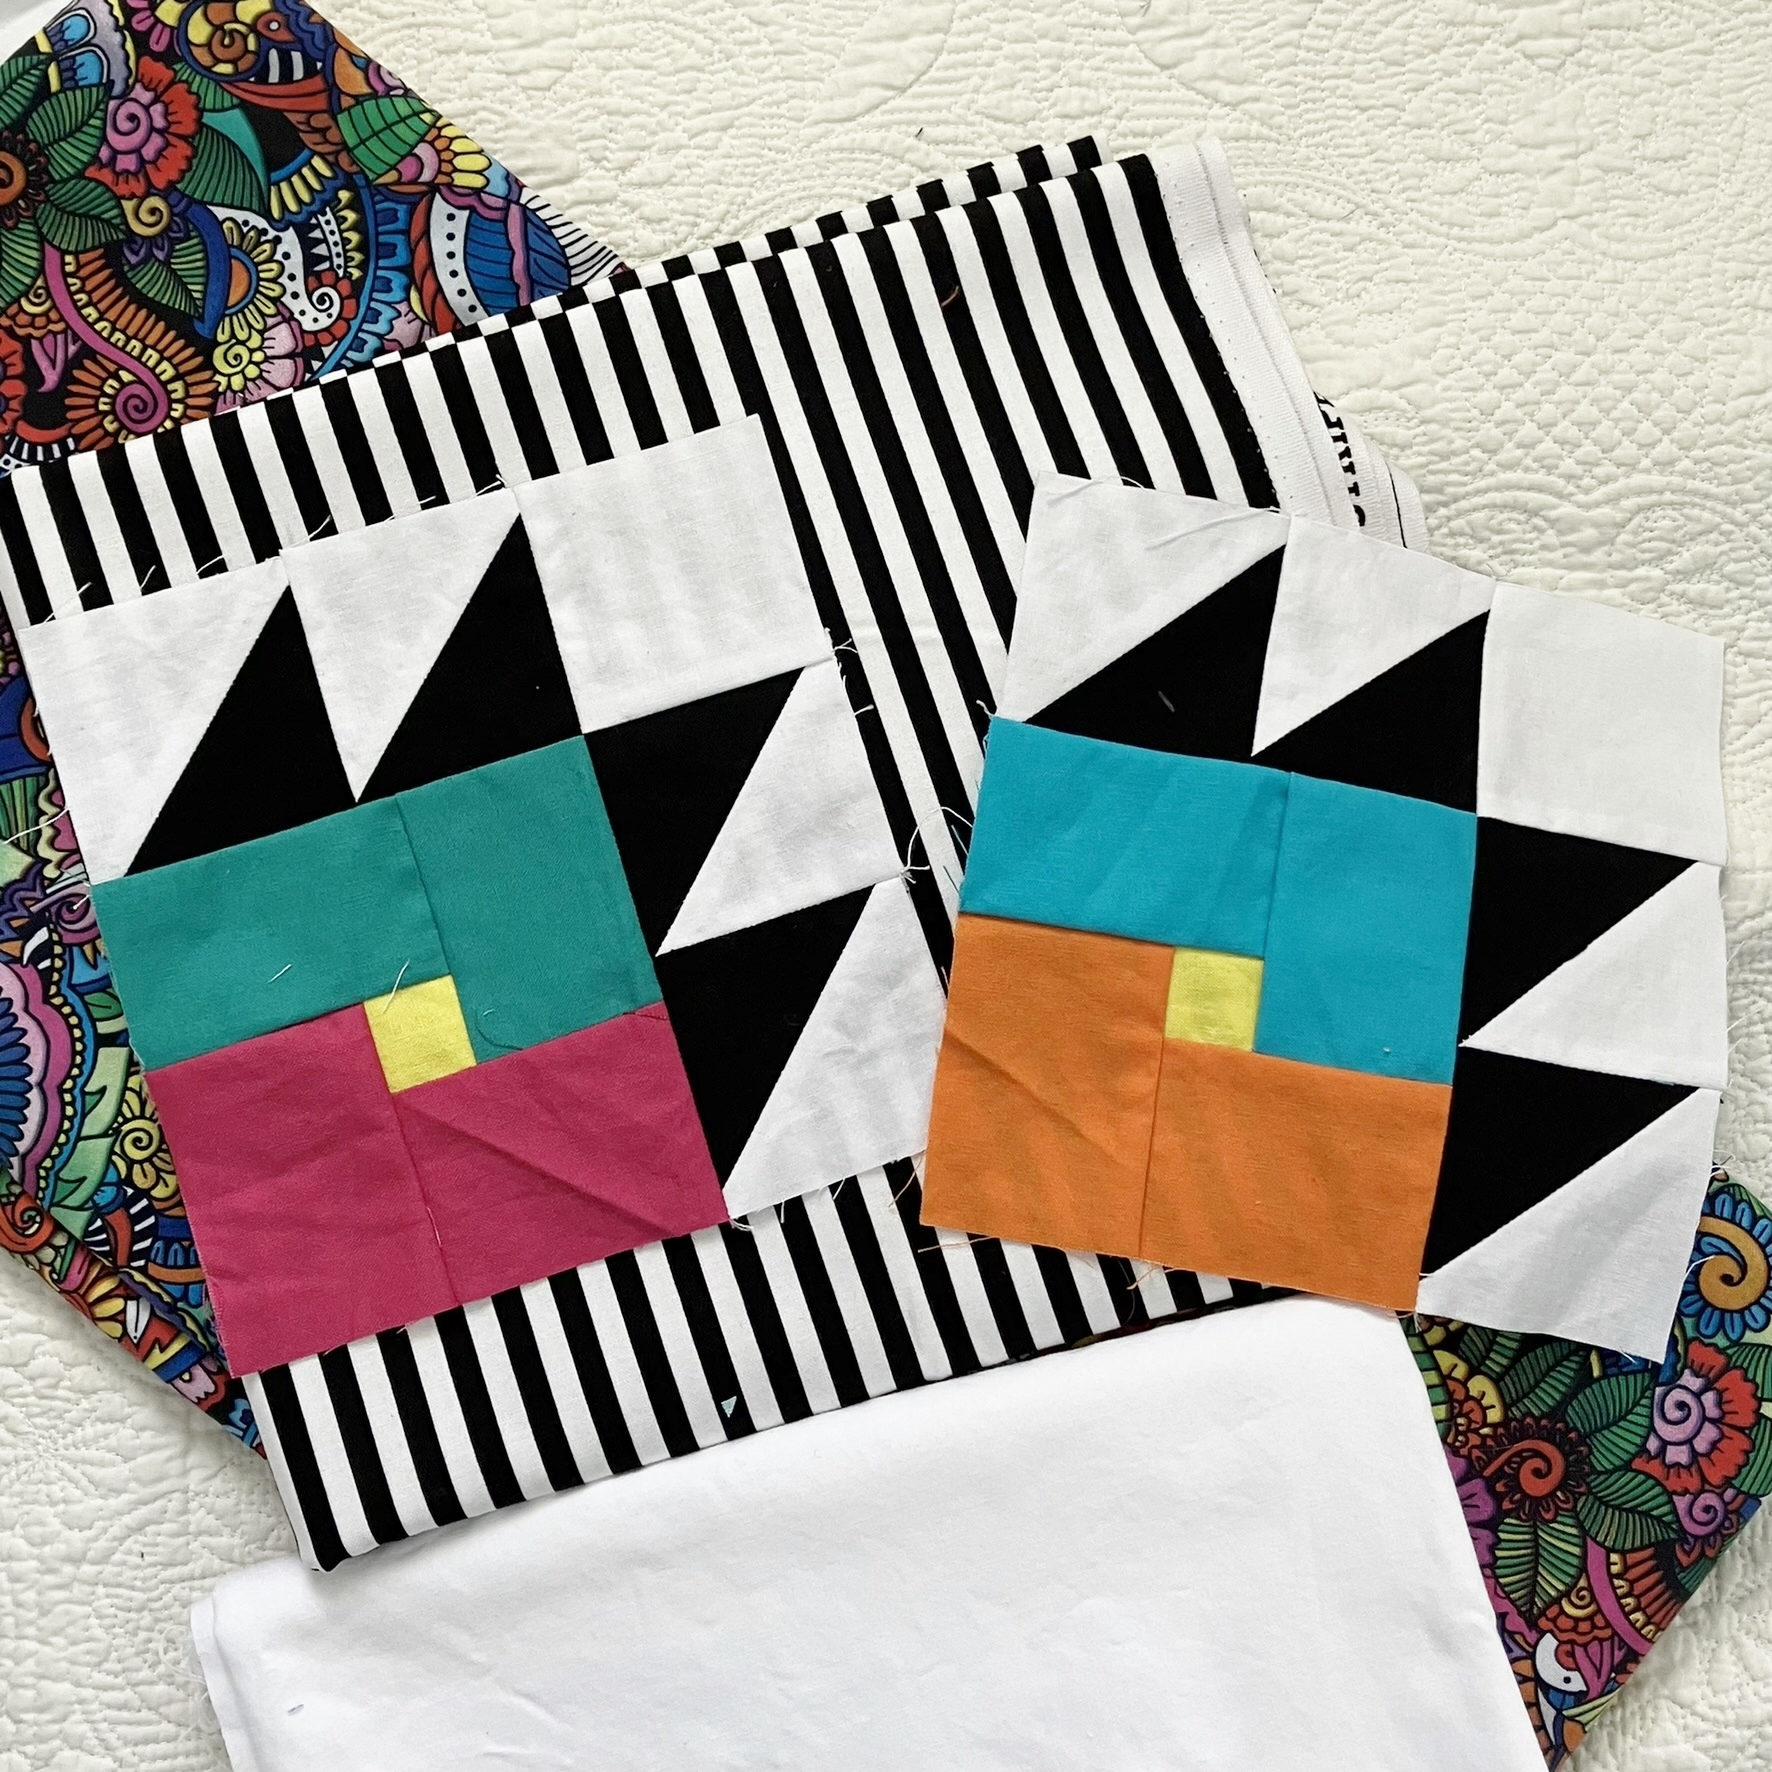
I have always enjoyed seeing the resulting variety of quilts. So it's time to join in the fun. Here's my starting block.

This block is from four Bear Paws I made during an online color workshop I took from Rachel Hauser in 2020 to keep myself sane while staying home during the pandemic. You can read the details about them in my blogpost from May 2020.  At the time I tried a layout of this larger block, but I wasn't sure that I'd use it that way in a quilt. When I decided to join SAHRR this year, I knew that I did want to use this layout. I had just enough leftover background fabric in my scrap bin to make the sashing. I also used a square of the black print fabric in the center that I auditioned way back when I made the originals. I did do some surgery to replace the two yellow claws with ones in a slightly darker shade because I didn't want them to fade into the background.

This block is 14 inches square, which might be big for the beginning of a quilt with the potential of six borders, but I'll assess things as I go and make adjustments if needed. I have no plan at this point, which makes me a tad bit nervous. I'd like to use only fabrics I have on hand for the top, but I'm leaving myself open to buying more fabric. I'm eager to see where this quilt is going. 

Thanks to Gail for hosting this fun way to begin a new year. And to her helpers who will inspire us with their blocks and prompts for the borders. I'm linking up to the first linky party here at Quilting Gail.

Hey, how does a SAHRR sound to you? Are you ready to join the fun, too?

(Just a reminder: I'm not affiliated with any company, so when I mention products, services, or stores, I'm just documenting what I used or liked.) 


Friday, June 23, 2023

Rainbow Bear Paws

 This quilt has been a long time coming. 


It all started with a block I made during the Quilter's Color Quest workshop led by Rachel Hauser during the pandemic in 2020 (that seems SO long ago) following her Quilter's Field Guide to Color book. 

At the time I didn't have a clear plan for the block. It was supposed to be inspired by a personal story. (You can read about it here.) I knew I wanted to make more of this style block eventually. 

During 2022, I made lots more blocks following the colors of the Rainbow Scrap Challenge hosted by Angela at SoScrappy. I chose yellow for the centers and each month paired the designated color with a variety of other colors from my rainbow solids bin. I bought some Kona cotton in white for the backgrounds. Then I discovered that I had actually made the original block with Kona Snow, so I had to do a little surgery to replace it. By the end of the year, I had enough blocks for a quilt and knew I wanted to use a black and white stripe in some way with more solid white to make a quilt. I already had a fun retro 60s/70s print for the backing that I had bought in February 2021 as an option for another Bear Paw quilt. I chose a 1/4 inch stripe to make sashing strips 1 1/4 inch wide. 


I put the blocks up on my design wall pretty randomly. I may have made a couple of changes after taking this photo, but it's about how the layout ended up. 


Then I cut about 24 sashing strips 6 1/2 inches by 1 3/4 inches (to finish at 6 by 1 1/4) and sprinkled them around here and there. A "rule" I set for myself was to not place any striped fabric at the outer edge because I wanted a white border with a striped binding. I ended up using 22 of the strips. I didn't want to go crazy with the stripes and detract from the blocks. This seemed like the right amount. 


To plan the rest of the sashings I drew the quilt blocks out on graph paper.


After making the drawing, I decided I wanted the outer sashings to be a little wider for the border. (I avoid long pieces for borders when I can. I prefer to incorporate them into the blocks.) I drew a rectangle around the interior blocks and then marked out the sashes for those: 6 1/2 by 1 3/4 inches (to finish at 6 by 1 1/4 inches) and 7 3/4 by 1 3/4 inches (to finish at 7 1/4 by 1 1/4 inches). I needed to resize some of the sashes on the edges making them extra long, extra wide or both. Some were cut 8 3/4 by 2 1/2 inches, some 8 3/4 by 1 3/4 inches, some 7 3/4 by 2 1/2 inches and some 6 1/2 by 2 1/2 inches. It sounds complicated but I just calculated them from my drawing and scribbled the sizes and how many I needed along the edge of the page. This is truly my kind of improv (hard to explain): precise in numbers but plan-as-I-go. Anyway, it all turned out well when I laid it out.


Then it was just a matter of making the blocks, each with two or three sashings around them and sewing all the blocks together. No borders needed.

One little tip I have about cutting the striped fabric: I made sure that my seam lines landed somewhere in the middle of the black stripe so that there was always black at the seam--even if only a smidge--to set it off from the white sashing.


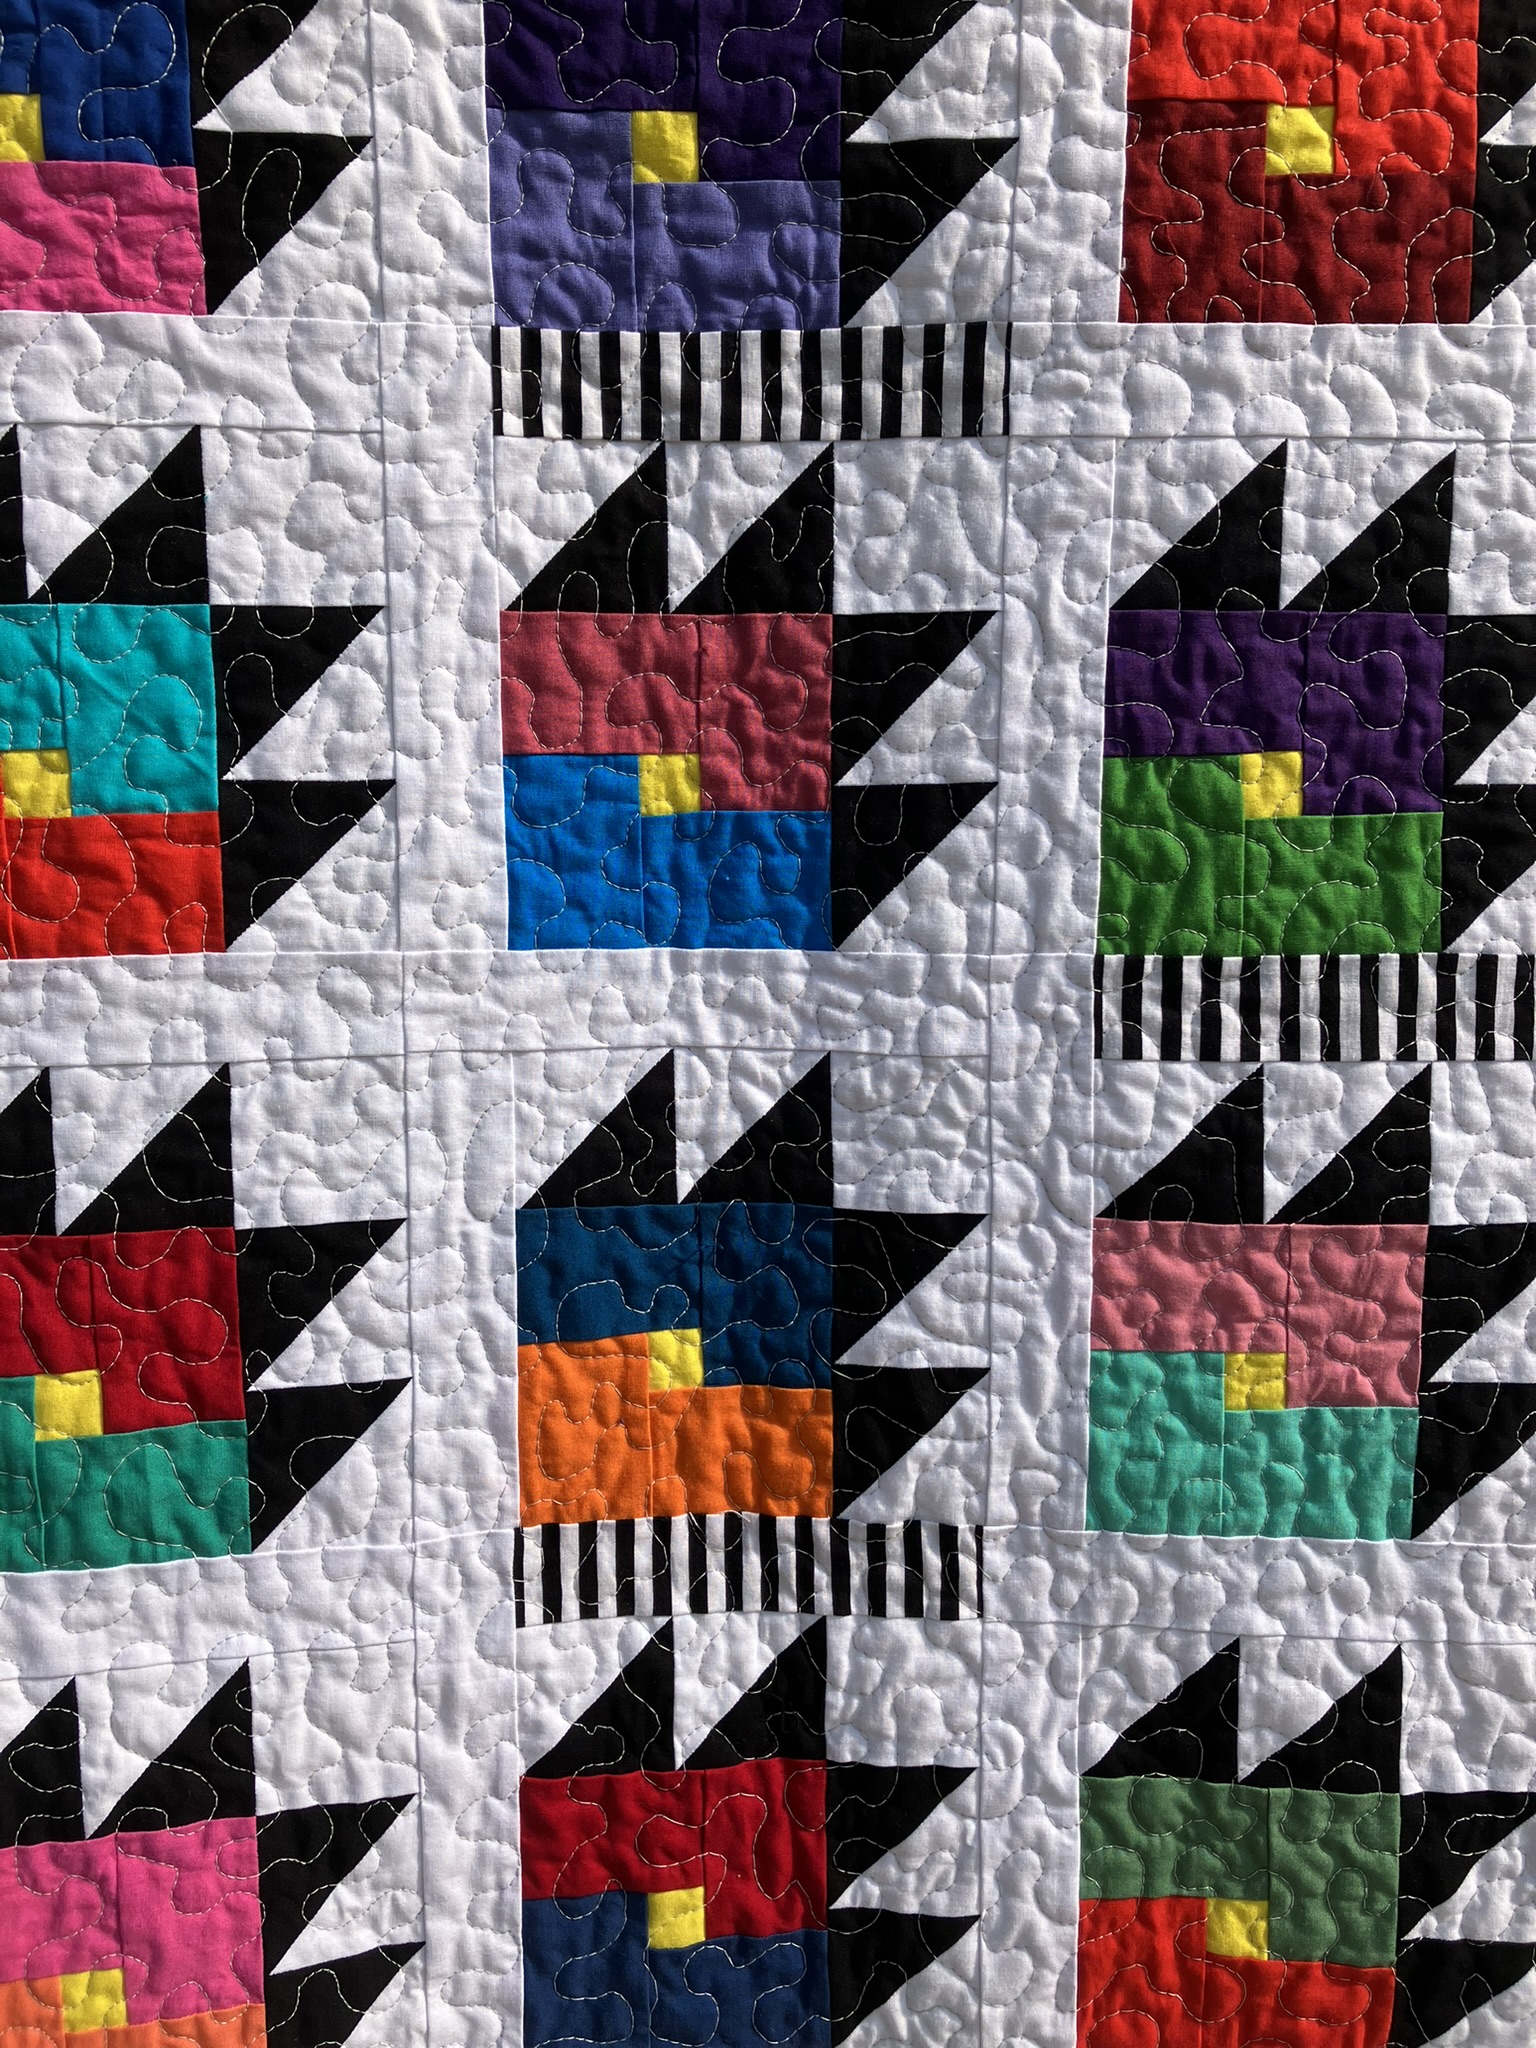
I did a meander for the quilting. There was already so much going on both on the front and the back that it seemed easiest. Then the fun of the striped binding...

I love it against that retro back. 

And just like that it was done and ready for the garage.

I'm always amazed how a pattern appears on the backing from the repeat of a large print. I'm glad I took the time to pattern-match the seam because it would have bothered me if it was off in the photo--even though that would not be noticeable any other time. 

Close up.

Here's the block that started it all...

And my initials and date...

On the driveway...

But we really need some glamour shots. We took a walk to the gardens at our Veteran's park and were surprised at how fast the flowers have come out, even with the pretty awful drought we have going on. (We have some great flower volunteers to make this happen in our township.) So here are some pretties along with the Stats.

Pattern: My own spin on the Bear Paw block, with a little square in the paw made with partial seams, and sashes around it. 

Block size 6 inches finished, and varies in size with the attached 1 1/4 inch finished width of the sashes in the interior and a 2 1/4 inch finished width on the outer edges of the quilt. 

Fabrics Variety of solids (mostly Kona, but some others, including maybe a few solid backsides of some prints), Kona white (background), Stripes by Riley Blake, and retro print fabric from Joann.

Thread Piecing: Superior Masterpiece in Granite; Quilting: Coats and Clark Machine Quilting Cotton Thread in Nugrey; Handsewing on binding: Superior Treasure in Antique.

Quilt size 54 by 61 1/4 inches pieced; 53 1/2 by 60 1/2 quilted; 51 by 57 3/4 washed.

Machines Singer Featherweight for piecing; Singer Treadle 115 for quilting and machine work on binding. 
This quilt will be donated, but I haven't decided where yet. 


I hope you've been tickled by a finish this month. I'm going with quick and easy this summer, so I'm not tied to my machine (unless I want to be). Having said that, it looks like I might be doing at least one (maybe two!) QALs. I'm starting behind on one, but I think it will be easy to catch up. Stay tuned.


(Just a reminder: I'm not affiliated with any company, so when I mention products, services, or stores I'm just documenting what I used or liked.) 


Thursday, February 11, 2021

Valued Bear Paws

This year, in addition to making any quilts that choose me (you never know what's going to come up), I'm planning to supplement all those Bear Paw blocks I made as part of the Quilters Color Quest last year. If you recall, there were lots of versions of blocks in many styles/colors of fabric according to various prompts over the course of the workshop. They were all fun to make, but didn't all mesh well with each other, at least in my eyes. So this year I'm making more (yes, making Bear Paws is like eating potato chips--you can't stop at just one) to fill out the blocks for a variety of quilts. At least that's the plan at this moment. 
Because it was easy, I started with a simple plan of a quilt using two values of one color in each block. I had a few blocks as seeds for the quilt, and then it was just a matter of dragging out every tone-on-tone fabric in my drawers and pairing things up. Oh, and dragging out all the low-volumes/whitish solids I could find. What a mess!! A fun mess, though. I completely forgot to take photos of just which blocks I started with (probably only about four), and in the end I wasn't paying so much attention to whether there was a lot of contrast in the values of each block. I was just having fun pairing things up. Because I wanted to focus on color and value, I tried to leave out highly figured fabrics as much as possible. To each of the six-inch blocks, I added two strips of very low volume fabric to make 8-inch blocks. This makes a small lap size quilt that is preferred by my favorite agency for quilt donations. The most interesting thing to me is how those low volumes that looked pretty much alike while I was sewing them cast different subtle value changes across the quilt when viewed in sunlight.
I did need to buy some fabric for the backing. I have really enjoyed making pieced backings from leftovers/scraps over the years, but recently, that requires a lot of work because my available pieces are getting smaller and smaller. So I have been purchasing either wide backings or sale yardage. And even more recently, I've been purchasing them online for local pickup. For this quilt I browsed through the available sale fabrics at my chosen website until I saw that cute floral print on the right. It reminded me of a Liberty print, minus the luscious feel, of course, but still, so lovely and cheerful. I thought I was done looking, but then I had second thoughts. What if it didn't look the same in person? I kept scrolling through available choices. Oh, my! That fabric on the left. It took me right back to high school. I just had to have it, even though I knew there would be a dilemma over which one to use. 

I spend a lot of time laying my options over the quilt top. Dither, dither. One fabric picked up on the lighter fabrics of the top.

The other picked up on jewel-toned blocks.

In the end, I trusted my first impulse and went with the floral. I have all kinds of ideas running through my head for the 70's style print. I'm thinking pairing it with bright solids would be fun. 
Isn't it interesting how the repeat in a pattern causes a grid when you view the fabric from far? It's just a little off from square, but no one sees that when the quilt is in use. I did manage to piece a seam to match the pattern.

I knew when I pieced the quilt that I wanted it to be quick and easy. To me that means meandering in the background. Few stops and starts and fewer threads to bury. Plus, it's relaxing for me. Everything went well for a bit. Then my machine started to skip stitches about every three or four inches. I had just given it a spa treatment, so I couldn't figure out the problem. I put in a fresh needle (twice), rethreaded, found a little chunk of lint in my feed dogs, reset the bobbin, changed the bobbin, tried again and again, and...still skipping. So much for having few threads to bury. There were lots of stops and starts to pick out stitches. Then I noticed that the problem happened mostly when I was sewing over one kind of low volume strip. It was a prepared-for-dying fabric that was a little heftier than my other fabrics. I had used that fabric in another quilt last year and had no problem with the quilting, but I was using a walking foot that time, not FMQ. So I replaced my usual 90/14 topstitch needle with a denim needle, and voila! Problem solved! The needle made quite a racket puncturing the quilt, but I was so happy that it was sewing well again, I didn't mind. In no time at all the background quilting was finished. 

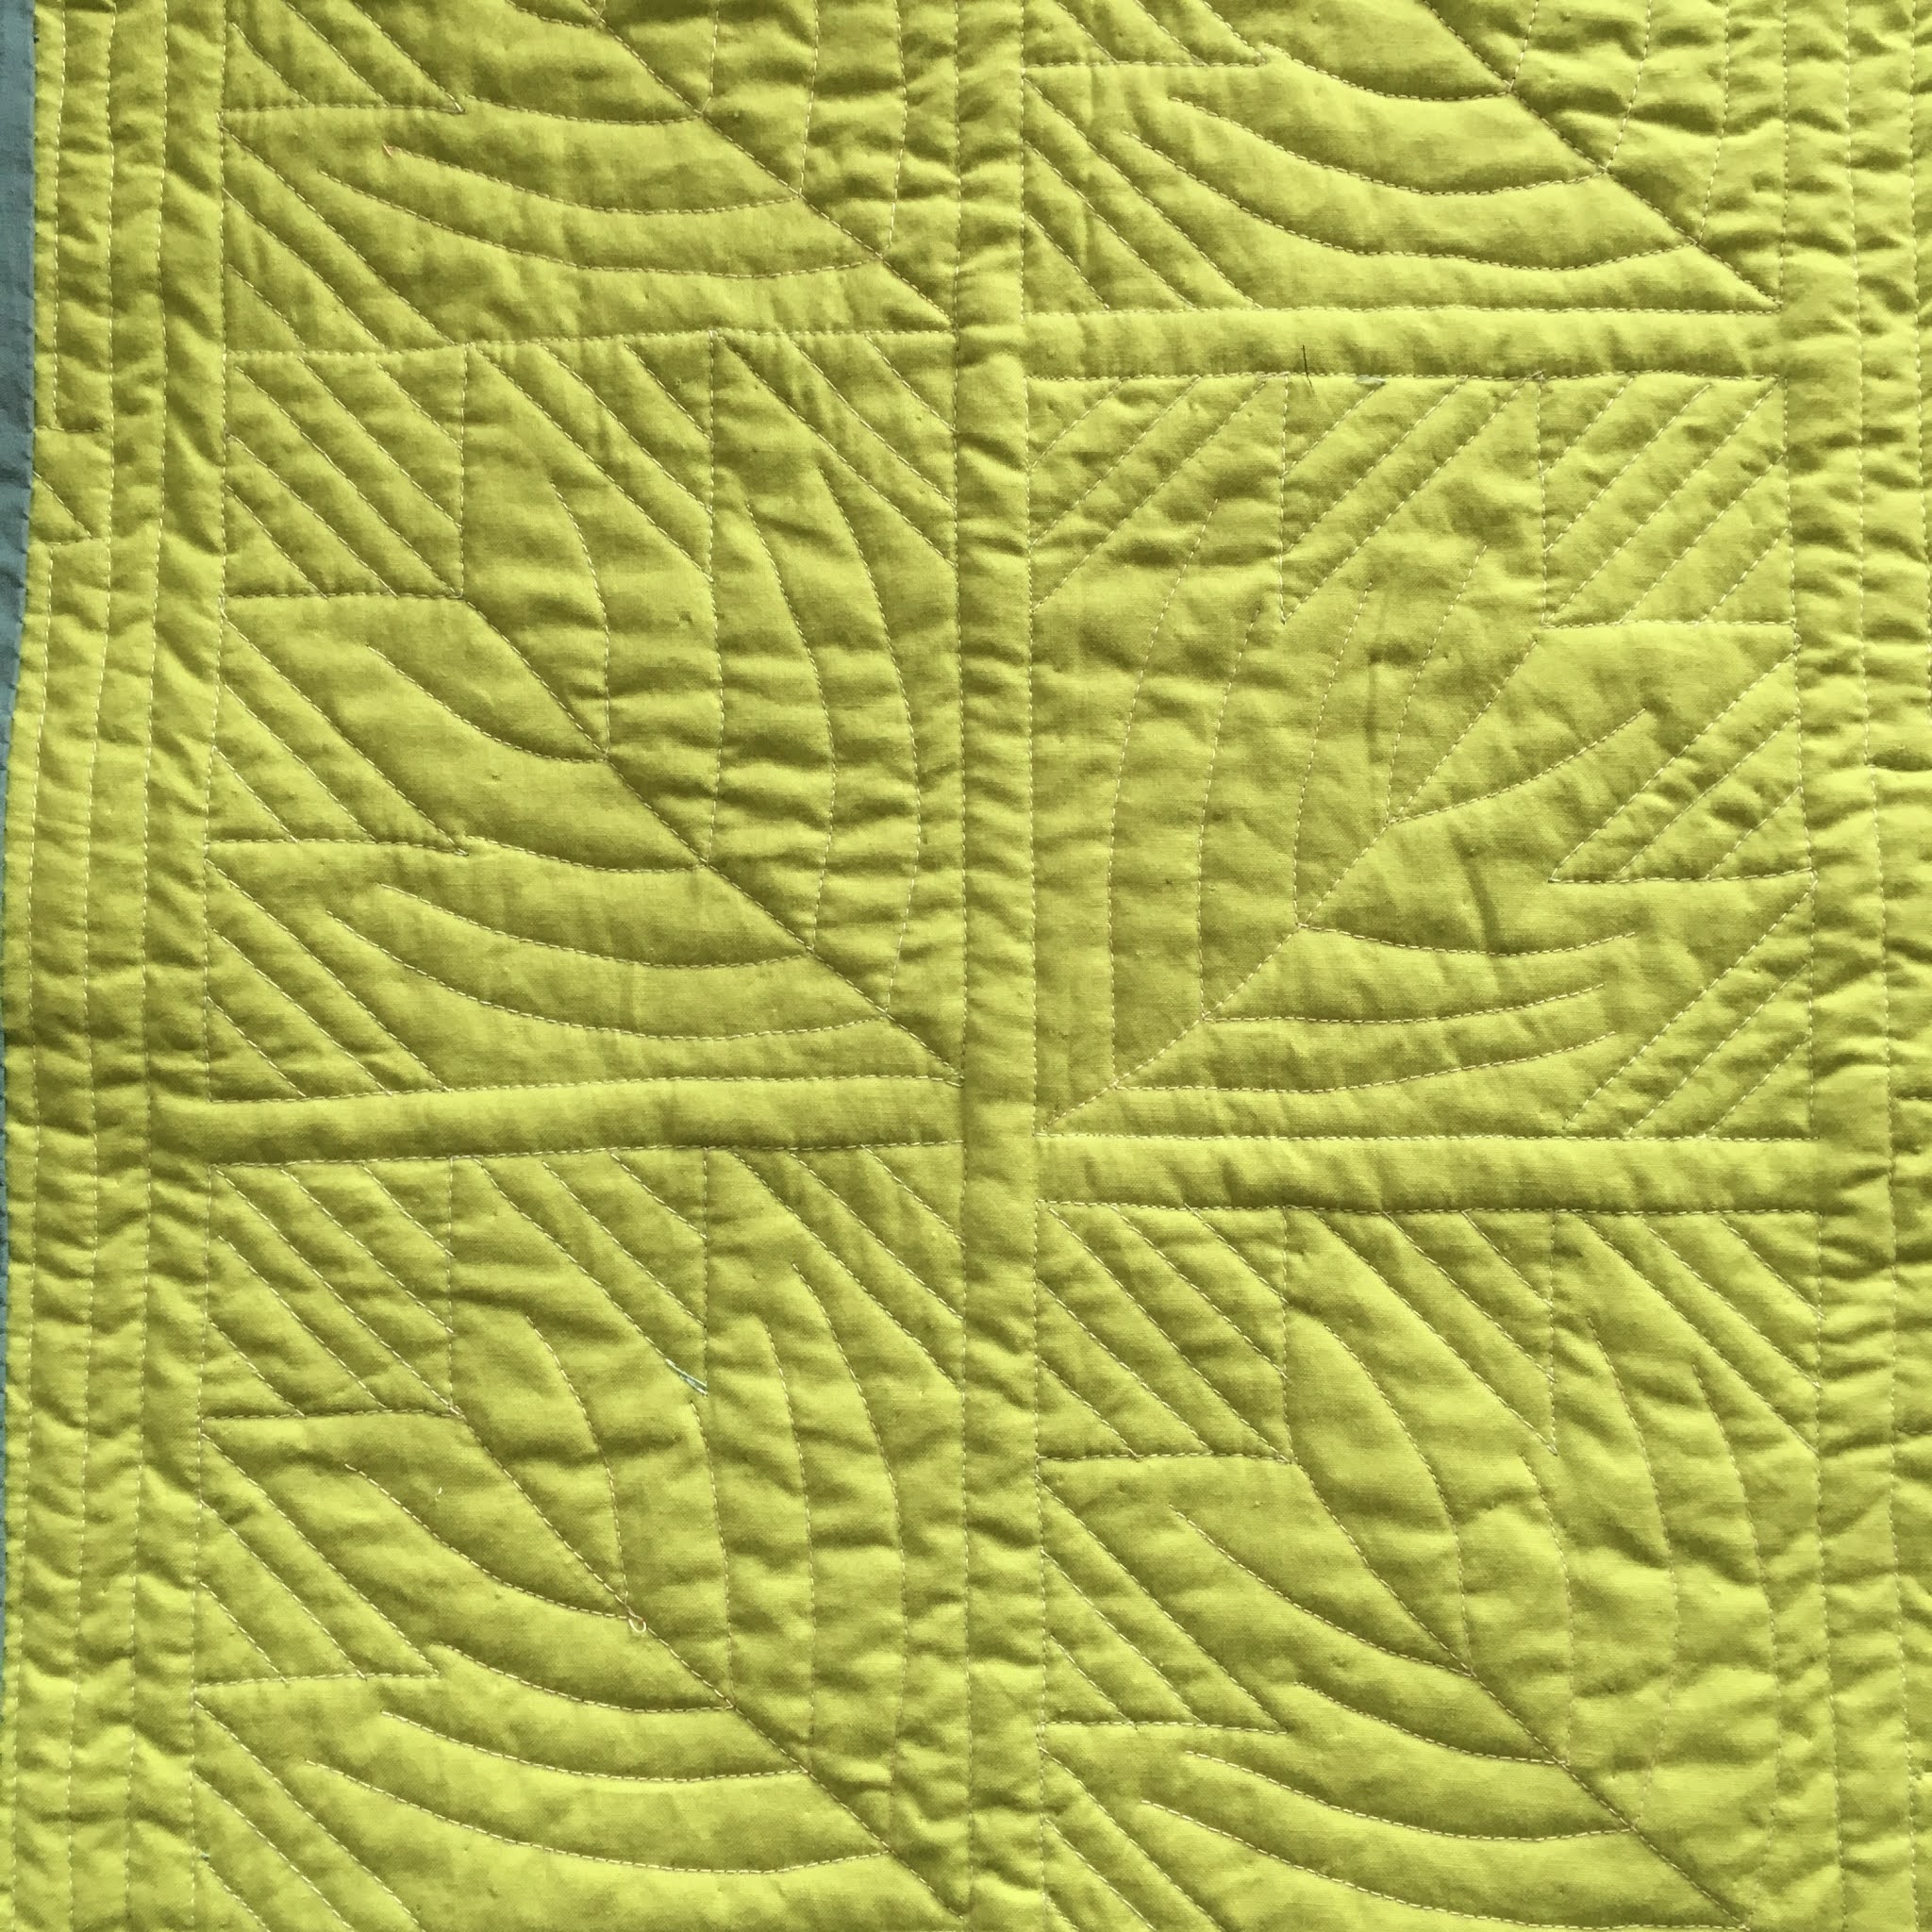
But what to do for the paws? For some reason, I wanted to do something different. When I made the blocks I pressed the claw seams open. I'm not sure why I did that, but it sort of eliminated in-the-ditch quilting for me as i don't like to sew in the seamline on open seams. I don't like in-the-ditch anyway, as I find it boring. So I decided to quilt about a 1/4-inch away around the blocks. With a walking foot because I don't do straight line FMQ well. Kind of a dumb idea. You can imagine how many times I had to spin the quilt to do that. I did figure out a way to do the whole block without breaking thread because, you know, I was trying to do this quick and easy. And it really didn't take all that long after all. But then, the middle of the paw. I had to do something there. I looked at gorgeous quilting by talented quilters online and must have drawn a zillion designs with pencil and paper. I was over with walking foot quilting. I still wanted something quick with few thread breaks. I finally came up with a stylized leaf. I wasn't happy with it, but by now, the quilt was no longer quick, so I just went with it. I'm okay with the overall look, but if quick and easy was my top priority, I should have just meandered the whole quilt and been done. Will I remember this next time? Who knows. But I've recorded it here as a reminder to my future self. 

So, here's how it all turned out. It's really fine, and definitely doesn't take itself too seriously. 

And I love the texture of the back.

I sneaked my initials and the year into the bottom right corner, using my washout marker. (After washing, it just becomes part of the texture unless you know where to look for it.)

Here are some close-ups.


And some with a glimpse of the scrappy binding. I cut lengths of about 8 inches (about 10 inches for the ones at the corners) from leftover paw fabrics in an attempt to reduce my scrap fabrics even more.


After years of binding with 2-1/2 inch strips, I had more recently been trying to make more modern narrow bindings, but my corners always looked rounded and "thick." Lately, I have realized that 2-1/2 inches is the sweet spot for me to get sharp corners, so that's my habit now. On quilts that have block points at the edge of the quilt, I cut my backing and batting about 1/8 inch outside of the top, and then I sew my binding with a scant 3/8-inch seam allowance. This keeps most block points intact, or close to it.

February has been a cold and snowy month for us. But yesterday, we had brilliant sunshine with no wind. So of course, I had to brave the cold not only for my usual garage photos, but a glamour session in the snow. Our front yard was pristine--not even marred by bunny tracks. So I tried. I really tried. I thought I could fling the quilt smoothly onto the snow. Except. One corner folded over. So those holes you see are my tracks from galumphing around to adjust things. Oh well. We'll celebrate snowy glamour shots anyway.


Here are the stats:
Pattern: Bear Paws; layout was based on a quilt pattern at Generations Quilt Patterns
Fabrics: Scraps from many years of quilt-making; backing is a Keepsake Calico (I think) from Joann. 
Batting: Hobbs Premium 80/20
Thread: Superior Masterpiece in Granite for piecing; Superior King Tut in White Linen for quilting; A heavy glace finish hand quilting thread that's no longer made (sigh) for hand sewing the binding.
Binding: 2 1/2 inches cut, double layer, machine sewn to front and hand stitched on back. 
Size: 48 1/2 by 56 1/2 inches before quilting; 47 1/2 by 55 1/4 inches after quilting; 44 5/8 by 51 5/8 inches after washing on cold and machine drying on low.
Machines: Singer Featherweight for piecing; Singer Treadle 115 for free motion and walking foot quilting and the machine work on the binding.

Indoors, after washing


This quilt will join two others I made in the last months for donation. 

Now I'm taking a little break from Bear Paws. Today I'm cutting up blue fabric that will put a big dent in the scraps. My pattern is one I got in a giveaway last year. It is the quilt that has chosen me this month. Stay tuned...


How are your scraps doing? 

(Just a reminder: I'm not affiliated with any company, so when I mention products, services, or stores I'm just documenting what I used or liked.) 


Friday, January 29, 2021

Pinkish

Happy new year of projects. I'm not really sure where I'm going, but I am pressing on. I'm starting with some small projects, one of which will continue little by little all year.

I did not participate in Angela's Rainbow Scrap Challenge (RSC) at So Scrappy last year, choosing instead to focus on the Rachel's Quilter's Color Quest. This year, I'm going to sorta, kinda participate in RSC. I plan to make a Year of Scrappy Triangles, a tutorial by Leila Gardunia from 2017. These are 6-inch (finished) foundation paper pieced patterns, one block each week for 52 weeks. Here are my blocks for January (not trimmed down all the way):


The RSC color for this month is pink. Now, you can see that many of my scraps in these blocks are not pink. But look closer. Every patch has pink in it. My plan is to try to use up some of my multi-colored fabric scraps from my overflowing bin. The bin holds not only single scraps but some cut-off bits of blocks with more than one fabric. That's the bin on the upper left. The plastic punch bowl has a subgroup of those scraps that have pink in them. 

 
My "rules" for these blocks is to use as many multi-colored scraps as I can to make my blocks and then fill in with other scraps and pieces from my stash (which really could also be called scraps as most of the fabrics are much less than a quarter yard). For these pinkish blocks, I managed to use a different fabric for each patch. (That might not be possible every month.) I don't know yet what I will do for the other half of each block. I think I need to see how these go for the next few months before I decide. I'm also not sure how closely I'll follow the color for each month. I'm going to be flexible--maybe some months I'll check out the Monthly Color Challenge at Patterns by Jen and throw that color in as well or instead of.

But wait. There's more. I'm really, really tired of my old stash, so to perk myself up, I'm going to treat myself to some brand new fabrics in the color of the month, building a collection of some fun modern prints as well as some colorful low volumes, all quarter-yard cuts (unless I see something that I simply must have more of). This month I found these fat quarters at Lark Cottons:


I'm tempted to use them in my scrappy triangles, but I think I'll stick to the fabrics I already had on hand for those. Just going to pet those new ones for a bit.

This month, I also made a bunch of Bear Paw blocks in two-value combinations, and pieced a top from them and others I made last year for the Quilter's Color Quest. (Sorry, I forgot to take a photo of all the new blocks.) I added in some low volume strips to bring the blocks from 6 inches to 8 inches, and then joined 48 blocks to make a quilt top. Here are a couple pink blocks from that project.


That quilt is basted, and I started quilting it this week. I got slowed down by a pesky stitch-skipping problem. After a lot of trouble-shooting, I finally put in a denim needle, and it worked, although it sure does make a racket munching into the fabric. I'll share more about the quilt when it's finished. 

I'm linking up this week with Angela at So Scrappy for Scrap Happy Saturday and with Cynthia at Quilting is more Fun than Housework for Oh Scrap on Sunday.

I'm looking forward to digging in the scraps again next month and checking out some modern new fabrics in the next color. I'm wondering, do you find you need something to perk yourself up this year? If so, what works for you?

(Just a reminder: I'm not affiliated with any company, so when I mention products, services, or stores I'm just documenting what I used or liked.) 


Thursday, September 24, 2020

Bear Paw Coleus Finish

I have another finish to share this week. It was finished last week, but the finishes were piling up, so I have to spread out the posts. This is my Bear Paw Coleus, a squirrel of a project inspired by an exercise in the Quilter's Color Quest workshop led by Rachel Hauser to dive into her book The Quilter's Field Guide to Color. That was a workshop that went on for much of this year, and you can still follow it on her site. I shared a lot about this quilt in the last part of this post here. In that post, I shared about the blocks I made, but it's time for more photos because it's all done, and I love it.


I had fun letting the blocks speak to me. They asked for dirt-brown sashes with bits of flower and leaves in them. Not all of the leaves wanted to have sashes between them. The verdigris flower pot wanted to get involved, too, so that very unlikely color showed up as the binding. Want to see some close-ups?


You need sunglasses to look at the back. This is from a big piece of Kona Limelight that I bought for a quilt for my grandson a couple of years ago. It was way brighter than I expected (despite the color name), so I keep searching for ways to use it up. This seemed just right.


I love how the quilting shows up on the back. 


For a few days, I displayed this at the bottom of my stairway. It will go back there again next summer (with a proper hanger). Now my usual autumn leaves quilt is there, but I couldn't bring myself to store away the coleus quilt just yet, so I moved it to another awkward display area at the top of the stairs for a few more days. 


Remember how the flower pot that inspired the design looked back in the spring?


Well, those plants are all grown up now.


This was a fun improv quilt. My favorite project (so far) from all the Bear Paw blocks I made during the Quilter's Color Quest. Here are the stats:

Pattern: The Bear Paw blocks were suggested by Rachel as a means of practicing color combinations during the workshop. The colors were inspired by my photo of plants in my garden. The flower block, letter blocks and sashing/layout are my own design.
Fabrics:  Scraps from my supply. Backing, as noted above is Kona Limelight. I remember that the binding was bought years ago at Yoder's Department Store in Shipshewana, Indiana when I was making Amish-inspired miniature quilts.
Batting: Umm...a scrap. Maybe Hobbs 80/20?  
Thread: Superior Masterpiece in Granite for piecing; King Tut in White Linen for the bobbin when quilting. A variety of colored threads to match the leaves for quilting--most of them were from a giveaway packet of Aurifil that I won several years ago. Lighter areas, as well as the border, were quilted with an old cone of King Tut in Mint Julep. I played thread chicken with it and won! Treasure in a variegated blue for handstitching on binding. 
Binding: 2 1/2 inches cut, double layer, machine sewn to front and hand stitched on back. 
Finished Size: 20 by 28 3/4 inches. Not washed. (Bear Paws are 6 inches square. and letter blocks are 3 inches square.)
Machines: Singer Featherweight for piecing; Singer Treadle 115 for walking foot quilting.

I'm linking up this week with Kelly at My Quilt Infatuation for Needle and Thread Thursday, Michelle at From Bolt to Beauty for Beauties Pageant, Sarah at Confessions of a Fabric Addict for Can I Get a Whoop Whoop, Wendy at Wendy's Quilts and More for Peacock Party and Cynthia at Quilting is more fun than Housework for Oh Scrap.

See you next week with a long-time-coming finish. In the meantime, take care of yourself and others, keep quilting, and if you are in my country, get yourself ready to vote!

(Just a reminder: I'm not affiliated with any company, so when I mention products, services, or stores I'm just documenting what I used or liked.)