Saturday, January 28, 2017

DrEAMi-ng

Sandra over at mmm! quilts has a new linky party starting this month for us all to link up our projects that we just had to make right now. It's Drop Everything And Make it (DrEAMi--get it?) I thought it was a neat idea but figured I'd never have anything to show because I'm sort of plan-oriented and focused when it comes to quilting. But then I realized that I did have a squirrely project this month. It's not really a quilt (unless rice counts as batting), and I didn't exactly get inspired by someone else's project or fabric or anything. But it was a sudden need (and I did drop my current project), and it definitely helps me keep sewing and quilting. I even took pictures and wrote notes as I worked (unusual for me) in case I ever wanted to make another one or wanted to write a post. 

Ready? It's a rice bag heating pad! (I know, there are lots of them on the internet, but I'm excited about it anyway.) I have a muscle on top of my shoulder that gets tight when I sew due to an injury a few months ago and ongoing rehab. I have some bags, but they are smallish and too full of rice and don't stay in place easily, which leads to even tighter muscles. I wanted something I could wear around my neck, and I wanted it right now! I'll share how I made it in case you'd like a soothing cushy "shawl" to wear when you sew, too. This project was totally wing-it style. I didn't plan it or measure carefully. These kinds of projects are never neat for me--I just want them to get done. So, while I give you some dimensions, they are just general and not meant to be a tutorial. 

Here goes:

I cut some cotton fabric about 30 inches by about 13 inches, folded it in half lengthwise right sides together (moot point in this case) and sewed the short ends. Then I turned it right side out, and drew pencil lines about 2 to 2 1/2 inches apart from the raw edge to the fold to make channels. These make the bag pliable and keep the rice from sliding to one end. 

Close up of channels--you can see that one of my channels is wider than the others. No matter.
I poured about a 1/4 cup of long grain rice into each channel using a funnel I made from paper. (That wider channel got a little more rice.) Then I safety pinned the top of each channel closed to keep the rice in while I sewed the hem. 

I stitched a line 1/4 inch from the raw edge to close the channels. Then I turned down the edge a couple of times and sewed it again to made a finished hem. I had to shake the rice down to make sure I didn't catch grains in the seam. 

And that was it for the bag. 

I made an envelope-style pillow case for my bag. It's best to use the bag as a guide for the dimensions. I cut some print fabric about 60 inches by 8 inches--enough to fold around the bag lengthwise with several inches of overlap. I hemmed the short ends by folding them down about 3/8 inches twice and stitching them down. I folded the case around the bag lengthwise with right sides facing in to determine the overlap and then removed the bag and stitched the long seams 1/4 inch and then 1/2 inch from the edge. If this wasn't a DrEAMi project, I would have done French seams, but I was in a hurry to get that bag around my shoulders.
 I turned the case right side out and slipped in the rice bag. The case is roomy because I wanted the bag to flex easily. 
 
Here's the bag on Teddy:
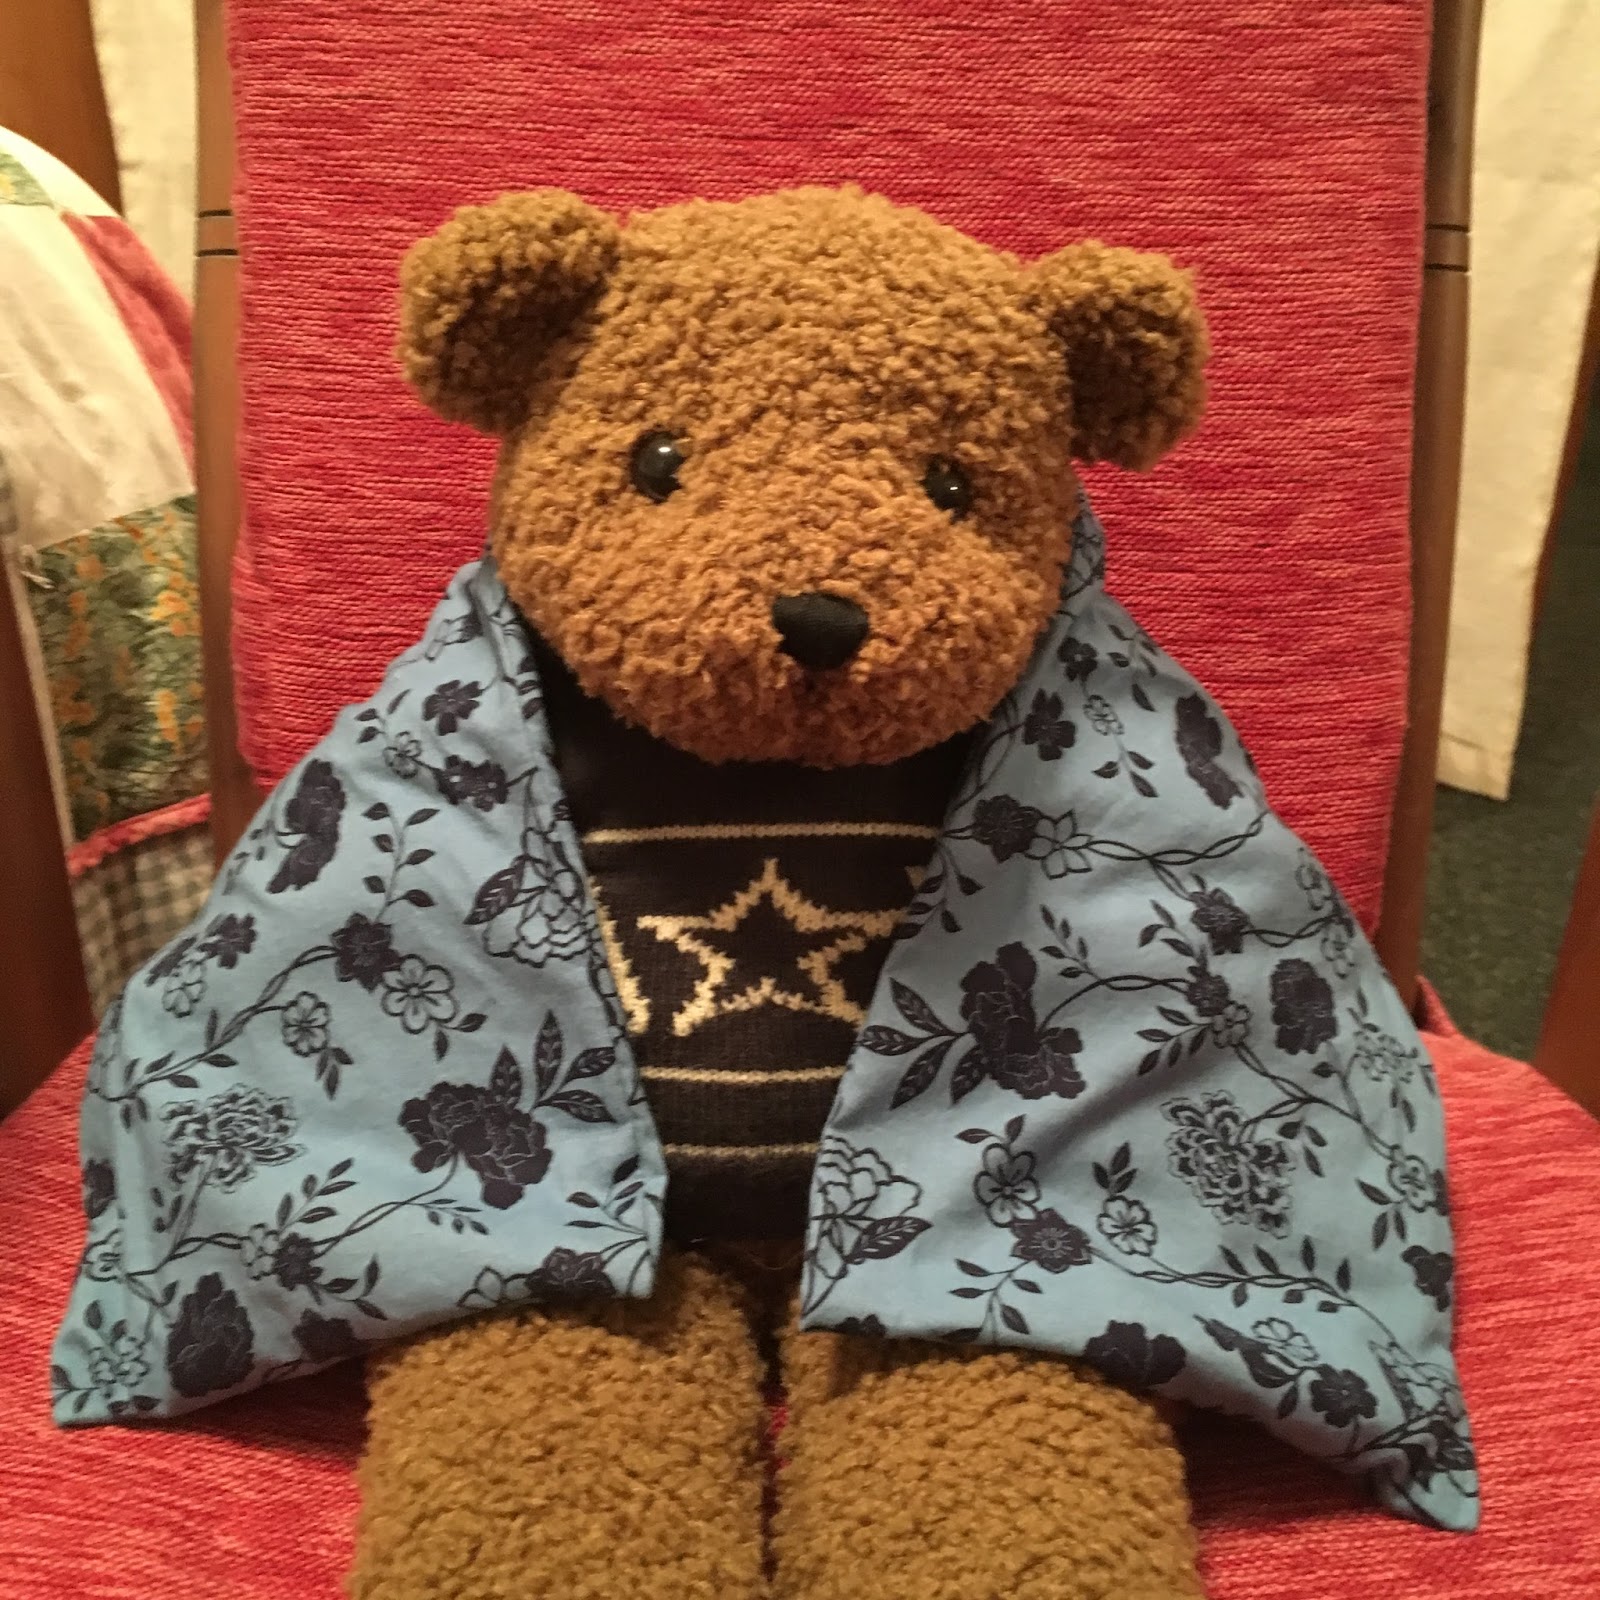
Isn't he a great model? I tried some close-up selfies, but my old-lady neck was just too scary to look at. Teddy's much cuter. 

To heat this long bag, I stand it up in a circle (like a crown roast, I imagine--I've never made one) in the microwave, and heat it on high for about 30 seconds, then circle it again with the opposite side out for 30 more seconds. Times and heat with your microwave may vary. Then I drape it around my neck and I'm good to sew in cozy comfort. The weight and heat are delightful. 

I'm linking up with DrEAMi and hoping you have some squirrely projects of your own to share. Stay cozy, my friends.

Tuesday, January 24, 2017

A Little Improv

It's time to make a quilt back. And that means it's time for a little improv. 

I finished the top of my Hexie Quilt this week. (I'll show it to you some other time, but you can see the layout here.) I wanted to continue the delicate theme so I challenged myself to visit just one store to find some fabric. And I found it. No dithering at all. It took one minute, tops. (Does that have anything to do with the fact that my husband was with me? No! I would have found it that fast all by myself.) And I knew it was the one. But then, of course, I did have to wander the store just a bit to make sure. But I did not waver. Yea, me!
My typical way of buying backing fabric is to buy a bit more than the length of my quilt. That is never enough, because my quilts are always a little too wide to use a simple length. So I fill in a strip somewhere off-center using as much of the leftover fabrics from the front as I can. I don't spend a lot of time with measurements or planning. I just start cutting and sewing in whatever way makes the best use of the scraps. For this quilt, I had one hexagon left from the top, so that was my starting point. I filled in the corners to make a rectangle and then cut long strips from the other fabrics. That seemed to make the best use because there were a lot of longish pieces along the selvages. I cut them the widest I could, and they turned out all fairly close to each other in width even though I didn't measure. I guess it was because they all started as fat quarters with four hexies cut from each. 
I laid them out on the floor with the length of fabric I bought and then shifted them around and cut some into shorter lengths until they looked about right to me. The pieces of the backing fabric will be wider--this is just to get an idea of the look.
I've sewn everything from the hexagon up in the above picture. I trimmed rows to even them up as I joined them, and they were almost exactly (just a smidge over) the width I needed to join them to the hexie rectangle. I'm still in the process of tweaking the placement of the bottom pieces. Here's a close-up of the top section:

And on it's own:

This is as improv as I get. And I love it. I think I've said it before: backs are so fun because I just play with them. There's no "pressure" to get it right the way as I sometimes feel when I'm making a top. I have limited fabric and I just try to use it up. I really do need to try this with a quilt top sometime. 

I'm linking up this week with Ann from Fret Not Yourself for the Ad Hoc Improv Quilters linky party (it came at just the right time to share this tiny bit of improv) and with Sew Fresh Quilts for Let's Bee Social. Have a fun quilty week, improv or not. 

Wednesday, January 18, 2017

Hexie Love

Hello, everyone. No more dithering here. For this quilt, anyway. Thanks for all of your input after my post last week. It was fun to read your opinions. Here's the arrangement I chose. It's pretty much the layout that got the most "votes" with just a couple of tweaks. Still low light for picture taking. January. Sigh.


I had started thinking that was the layout shortly after I hit the "publish" button, so of course I was pleased that a lot of you agreed with me. I still like the layout with the line of dark hexies down the side, but I was having some trouble with the distribution of those hexies given the assortment I had available. Maybe the darker coral hexies I rejected early-on will find themselves with some partners in that layout in another quilt. I feel like I've learned a lot about what I might want to put with them. 

When I put pictures on Instagram of what I was working on, I got a couple of comments about the construction. Sewing hexies by machine can be intimidating because it's basically a lot of Y-seams, which can be off-putting for a lot of quilters. Let's not call them Y-seams. That will help. And using large-sized hexies probably makes it easiest. Sewing hexies together by machine is pretty much the way quilters years ago sewed Grandmother's Flower Garden quilts by hand. (I'm sure some people still do--when they're not doing English Paper Piecing.) When sewing by hand, you don't cross seam allowances, and this is the same technique. I'm not going to explain the whole process here, but there are lots of tutorials online that show how to do this, and I encourage you to check them out. The ones I'm most familiar with are Jacquie's at Tallgrass Prairie Studios and Lorna's at Sew Fresh Quilts. There are also some good videos if you look around online. Each does the process slightly differently from the others. After reading several sources, I did what felt best for me, using tips from more than one. 

One of the things I did that helped me start and stop seams easily was to draw little registration marks on the diagonals. 
Close up
When sewing a hexie quilt, you first sew the columns and then join them together. Here I have the first two columns joined. I'm doing the joins as I go. 


Look how neat those corners come out! And they haven't even been pressed. (That gets done after it's all put together.)


Anyway, I'm having tons of fun. I'm taking my time sewing one seam at a time instead of using shortcuts like chaining, but that's most comfortable for me right now and keeps me from getting sloppy. 

I did take time out for a couple of other things this week. On the top of my rehabbing shoulder, I have a muscle that wants to take over and do all the work. Sometimes it gets pretty tight and sore, so I made a new rice bag heating pad that I can drape over my shoulders while I sew. It has lots of channels so it bends easily. Here's how it looks naked:

And here it's in its pillow case on Teddy. Isn't he a cute model? 

I also spent an evening de-papering the quilt top that I made for the  Autumn Abundance blog hop hosted by Needle and Foot. One step closer to a finish. 


I'm linking up today with Sew Fresh Quilts for Let's Bee Social

Have a good quilting week, and if you haven't machine sewn big hexies, consider trying them yourself. They're fun, and not hard at all.

Wednesday, January 11, 2017

Dither!

Hey, everybody, I found my word for the year! Dither! Kidding. I don't pick a word for the year. But if I did, it would definitely be "Dither!" this year. Because that's what I've been doing. I've always been indecisive. This happens with everything--clothing, paint colors, furnishings, quilt designs, fabrics, you name it. I could go on and on. I usually say something like this: "I don't know what I want, but I'll know it when I see it." And when I like something, I like it forever. The problem is that when I don't "see it," I spend lots of time trying to make up my mind about what to do. Dithering. 

Which takes us to today.

I started a new quilt this week from a fat quarter bundle of fabric I won in a Hawthorne Threads giveaway quite awhile ago (plus a few other fat quarters). If you look at this picture, you see the Paperie line by Amy Sinibaldi for Art Gallery Fabrics. Part of the reason I love this line is because there are no repeating patterns. The extras are the dark coral and darker aqua (Hazel line by Cluck Cluck Sew for Windham Fabrics), and the lighter aqua/white and a little leaf print, which are both mysteries to me because I didn't have the printed selvages. Anyway, I thought I'd add those extras in to add a pop of color to a light palette. I loved them all, especially the coral fabric.


I knew when I got the bundle that I wanted to make a hexagon quilt, not English paper pieced, but machine sewn. I wanted the hexagons to be large enough to make the best use of the fat quarters without much waste. I drew the size I wanted, then took my pattern to my local window/screen repair place and asked the owner to cut a template for me from acrylic. He seemed a little hesitant about making such precise cuts, but he did agree to do it. It turned out fine and made it easy for me to rotary cut the hexagons. 


If you look closely, you can see the clear template on top of the fabric. It's a little over 8 inches on one diameter and about 9 1/4 on the longer diameter. I was able to cut four from each fat quarter. 

Then it was time to figure out how to lay out the hexies. I didn't want to spend hours at the design wall, so I printed out some hexie grid paper and brainstormed options. I have a huge box of colored pencils, but was really surprised to find that I didn't have coral or aqua ones. Weird! So I dug up some old crayons leftover from my kids' school days. I kind of wanted an unplanned asymmetrical look, although you see I did try out a symmetrical one in the lower right corner. Here are some of of my ideas:

Eventually I chose two possible designs and started putting up the fabrics on the wall. (I've cropped the photos here so you can see how the quilt would look with the trimmed hexies along the edges.)


It quickly became apparent to me that the darker coral wasn't going to work at all. I was bummed because it was one of my favorite fabric pieces. I thought it would sort of pop with some of the other fabrics, which had a bit of the same color in them. Instead, it looked garish. Not what I wanted in a delicate little quilt. In addition, I did not like how it looked with the darker aqua because they had the same print, which grabbed all of the attention from the sweet little prints in the Paperie line. Not only that, but the little leaf print just didn't fit in. I tried it both right side up and wrong side up, but it just wasn't working. 


It looked fine to my eye, but when I took pictures, it really stood out. I finally rejected it. I'm not going to show you all the variations I tried with these fabrics. But I can say that I was seriously bummed that I wasn't "seeing it" when I laid out all my lovely fabrics.

I spent hours throwing hexies up on the wall, dithering all the while. So much for saving time by coloring the grid paper. I finally did keep the two extra aquas, but otherwise used only fabrics from the Paperie line. So. What to do. I've decided to show you what I came up with and see which you like better. I'm sorry about the quality of these photos. The weather's been grayer than gray here, and it's dark in the house. I tried photos with my phone, my Ipad and my husband's camera with the flash, but none of them turned out sharp. The color is pretty true though. Which do you think might appeal to someone more? (This quilt will be a donation quilt that will be given to a young woman.) This?


Or this?

Oh, and while I was writing this, I suddenly decided that I needed to give the more symmetrical arrangement a fair try, too, with a few tweaks:


As I said, I've always been a ditherer. But lately when it comes to quilt-making, I'm a champion ditherer. I think it might be partly because I don't have the ability right now to easily change things while sewing when they don't work out the way I hoped. 

So help me out here. What do you all think?? Any other suggestions?

I'm linking up this week with Sew Fresh Quilts and My Quilt Infatuation for their linky parties. The buttons are on the right side bar. 

See you next week, hopefully with some sewing done and much better photos. Have a good quilting week, and please, try not to dither as much as I do.

Wednesday, January 4, 2017

Happy New Year!

Hey, I'm back from my blogcation. I had a good time doing mini posts on Instagram this past month. I usually forget to keep up with that part of social media, but now that I'm a bit more in the habit, maybe it will stick. Anyway, it was fun to get some snaps of my holiday prep and activities. The past few weeks have been a whirlwind, but what fun! And now I can share some fabric-related activities that I couldn't share before because my little projects are all in the hands of their new owners. 

For the past five Christmases, I've been in the habit of making my granddaughter a felt applique Christmas ornament that represents her Halloween costume. This year, I decided to do the same for my grandsons. It was a challenge because the Grands had fairly complex costumes, but by tracing my patterns with freezer paper and ironing the paper to the felt, I was able to cut out precise pieces with my embroidery scissors. I was thrilled with how they turned out and with the reactions I got from my Grands when they found them in their stockings.

For Halloween, my granddaughter was Owlette from PJ Masks (a children's cartoon about kids who turn into superheros and do good deeds at night when they are in their pajamas). My older grandson was a golfer. He's not quite two years old, but he loves to hit golf balls and has perfect form. And my younger grandson was a monkey with a stuffed banana sewn to his costume. For the ornaments, I found clip art online to help me with the basic designs, and I chose felt colors and embroidery thread to match the kids' costumes. 

Here they are:

I stuffed each one with a bit of leftover batting (always looking for ways to use up those odd pieces). 

I also give ornaments to my kids every year. And this year I made a couple of extra ones for my physical therapist and my hair stylist since I had appointments just before Christmas. I can do handwork pretty well now, but using a sewing machine has been more challenging lately--partly because of aches and pains from rehab activities, but also because I've needed to keep the mess to a minimum while getting ready for guests. But I still wanted to use fabric, so I decided to make no-sew ornaments.

I found a folded star ornament that is EVERYWHERE on the internet. It seems that most people attribute the directions for the ornament to Sophie Legarth in this tutorial. Because the tutorial is not in English, I looked at a lot of other sites, too. I probably used this one by Betz White the most. But no matter what tutorial I looked at, I had a lot of trouble with the last step. There's nothing wrong with the tutorial. I just have a really hard time following pictures. I need lots of words to go with them to describe the process. I finally figured out my own way to stuff the ends of the fabric into the star, and I can't even tell you how I did it. All I know is that for each ornament, I had to figure it out all over again when I got to the last step. So these little projects took way longer than they needed to, and I pretty much had to limit myself to making one a day to keep frustration to a minimum. Really, they were fun, though. And my ornaments are quite puffy and tight, so they should stay together pretty well. 


The ornament on the upper right is the one I made for myself for practice. The two red, white and blue ones went to my son-in-law/daughter and to my physical therapist to celebrate the Cubs' win of the World Series (They are fans. Well, my daughter is a White Sox fan, but she was happy for my son-in-law.) The other two went to my son/daughter-in-law and to my hair stylist with no particular reason for the colors except that I liked how they looked together. 

These ornaments were not messy to make. Except for the mess of choosing the fabrics. You should have seen the bed in my quilting room. A fabric explosion! I had a really easy time picking out three fabrics that I liked together, but the fourth was always a challenge. By the time I was done choosing dithering, there was a HUGE pile of scraps on the bed. Because I needed to get it all cleaned up for company, I may have indiscriminately stuffed the mess into my scrap drawers. Oops! No, not the drawers in my closet. Those are still nice and neat ever since I did the major closet reno. These drawers are in a dresser. If I were the kind of person to make New Year's resolutions, one would definitely need to be to get all those drawers back in order again. We'll see. I kept my hand sewing area by my chair neat by using my "garbage vase." 


Yes, I know some of those scraps look salvageable. Maybe I'll go through them before I dump it out. It was so cheery looking, I left it out over the holidays.

Oh, one more thing--someone mentioned that it might be fun to have the recipe of some cookies I posted on Instagram. I usually make my go-to cookies over the holidays: Heath Bar cookies and cream cheese cut-out cookies. This year I also made some simple butter cookies with vegan "butter" for one of my grandsons, who can't have dairy right now. The Heath Bar recipe is my favorite. It was my mother's, and I don't know where she got it, but the cookies always disappear quickly. Yup, they're that good! Delicate and crispy.


I used to make them with a margarine brand that's famous for baking in my area, but the formula seems to have changed, and the cookies don't turn out as well with it anymore. So I went with real butter and upped the flour a bit from the original recipe.

Here's the revised recipe for anyone who'd like to try it:

Heath Bar Cookies  
Cream 2 sticks (1/2 pound) salted butter with 3/4 cup white sugar. Add 1/2 teaspoon baking soda and beat. Mix in 1/2 teaspoon white vinegar, and 1/2 teaspoon vanilla. Add 1 3/4 cups flour, somewhat packed. Chop 3 Heath Bars really fine (or use half a bag of milk chocolate Heath bar toffee bits, crushed a bit smaller) and mix in well with the above dough. Cool in the refrigerator for about 1 hour. With floured hands, roll dough into small balls (about the size of large marbles). Flatten out each ball very thin on a cookie sheet with a floured fork in a criss-cross pattern. Bake at 300 degree oven for 20 minutes or until light brown. This recipe makes about 60 cookies (if you don't eat the raw cookie dough while you're working). 

So, now, a new year. I fervently hope it will be a good one for our whole fragile world. If you live in my country (or even if you don't) I think you know what I mean. I'll keep doing my best to make it a better place through quilting. I'm not one to make resolutions (although I do enjoy reading everyone else's). I probably should clean up those messy drawers, though. And I do know that I have the same goal I've had for the last 4 (yes, 4!) months. To regain the full use of my left arm so I can sew and quilt as much as I want to again. I think that's enough. (And I will try to get in the habit of regular posts again.) As always, I'll continue to enjoy everyone's wonderful blogs, photos and quilts. 

Looking back over this post, maybe I should have called it Hodge Podge. Oh well. That's just how things are right now.I have three projects in process. Two are fall quilts and one is a summer quilt, so I think for the new year, I'll start something new to boost my enthusiasm and mix in something less seasonal. Stay tuned, and check out my Instagram feed (button is on the right sidebar) for a peek at the fabric. 

I hope the new year is a wonderful one for you, quilt-wise and every other way. 

I'm linking up this week with Freemotion by the River, Confessions of a Fabric Addict and Crazy Mom Quilts.