Showing posts with label foundation paper piecing. Show all posts

Thursday, September 24, 2020

Bear Paw Coleus Finish

I have another finish to share this week. It was finished last week, but the finishes were piling up, so I have to spread out the posts. This is my Bear Paw Coleus, a squirrel of a project inspired by an exercise in the Quilter's Color Quest workshop led by Rachel Hauser to dive into her book The Quilter's Field Guide to Color. That was a workshop that went on for much of this year, and you can still follow it on her site. I shared a lot about this quilt in the last part of this post here. In that post, I shared about the blocks I made, but it's time for more photos because it's all done, and I love it.


I had fun letting the blocks speak to me. They asked for dirt-brown sashes with bits of flower and leaves in them. Not all of the leaves wanted to have sashes between them. The verdigris flower pot wanted to get involved, too, so that very unlikely color showed up as the binding. Want to see some close-ups?


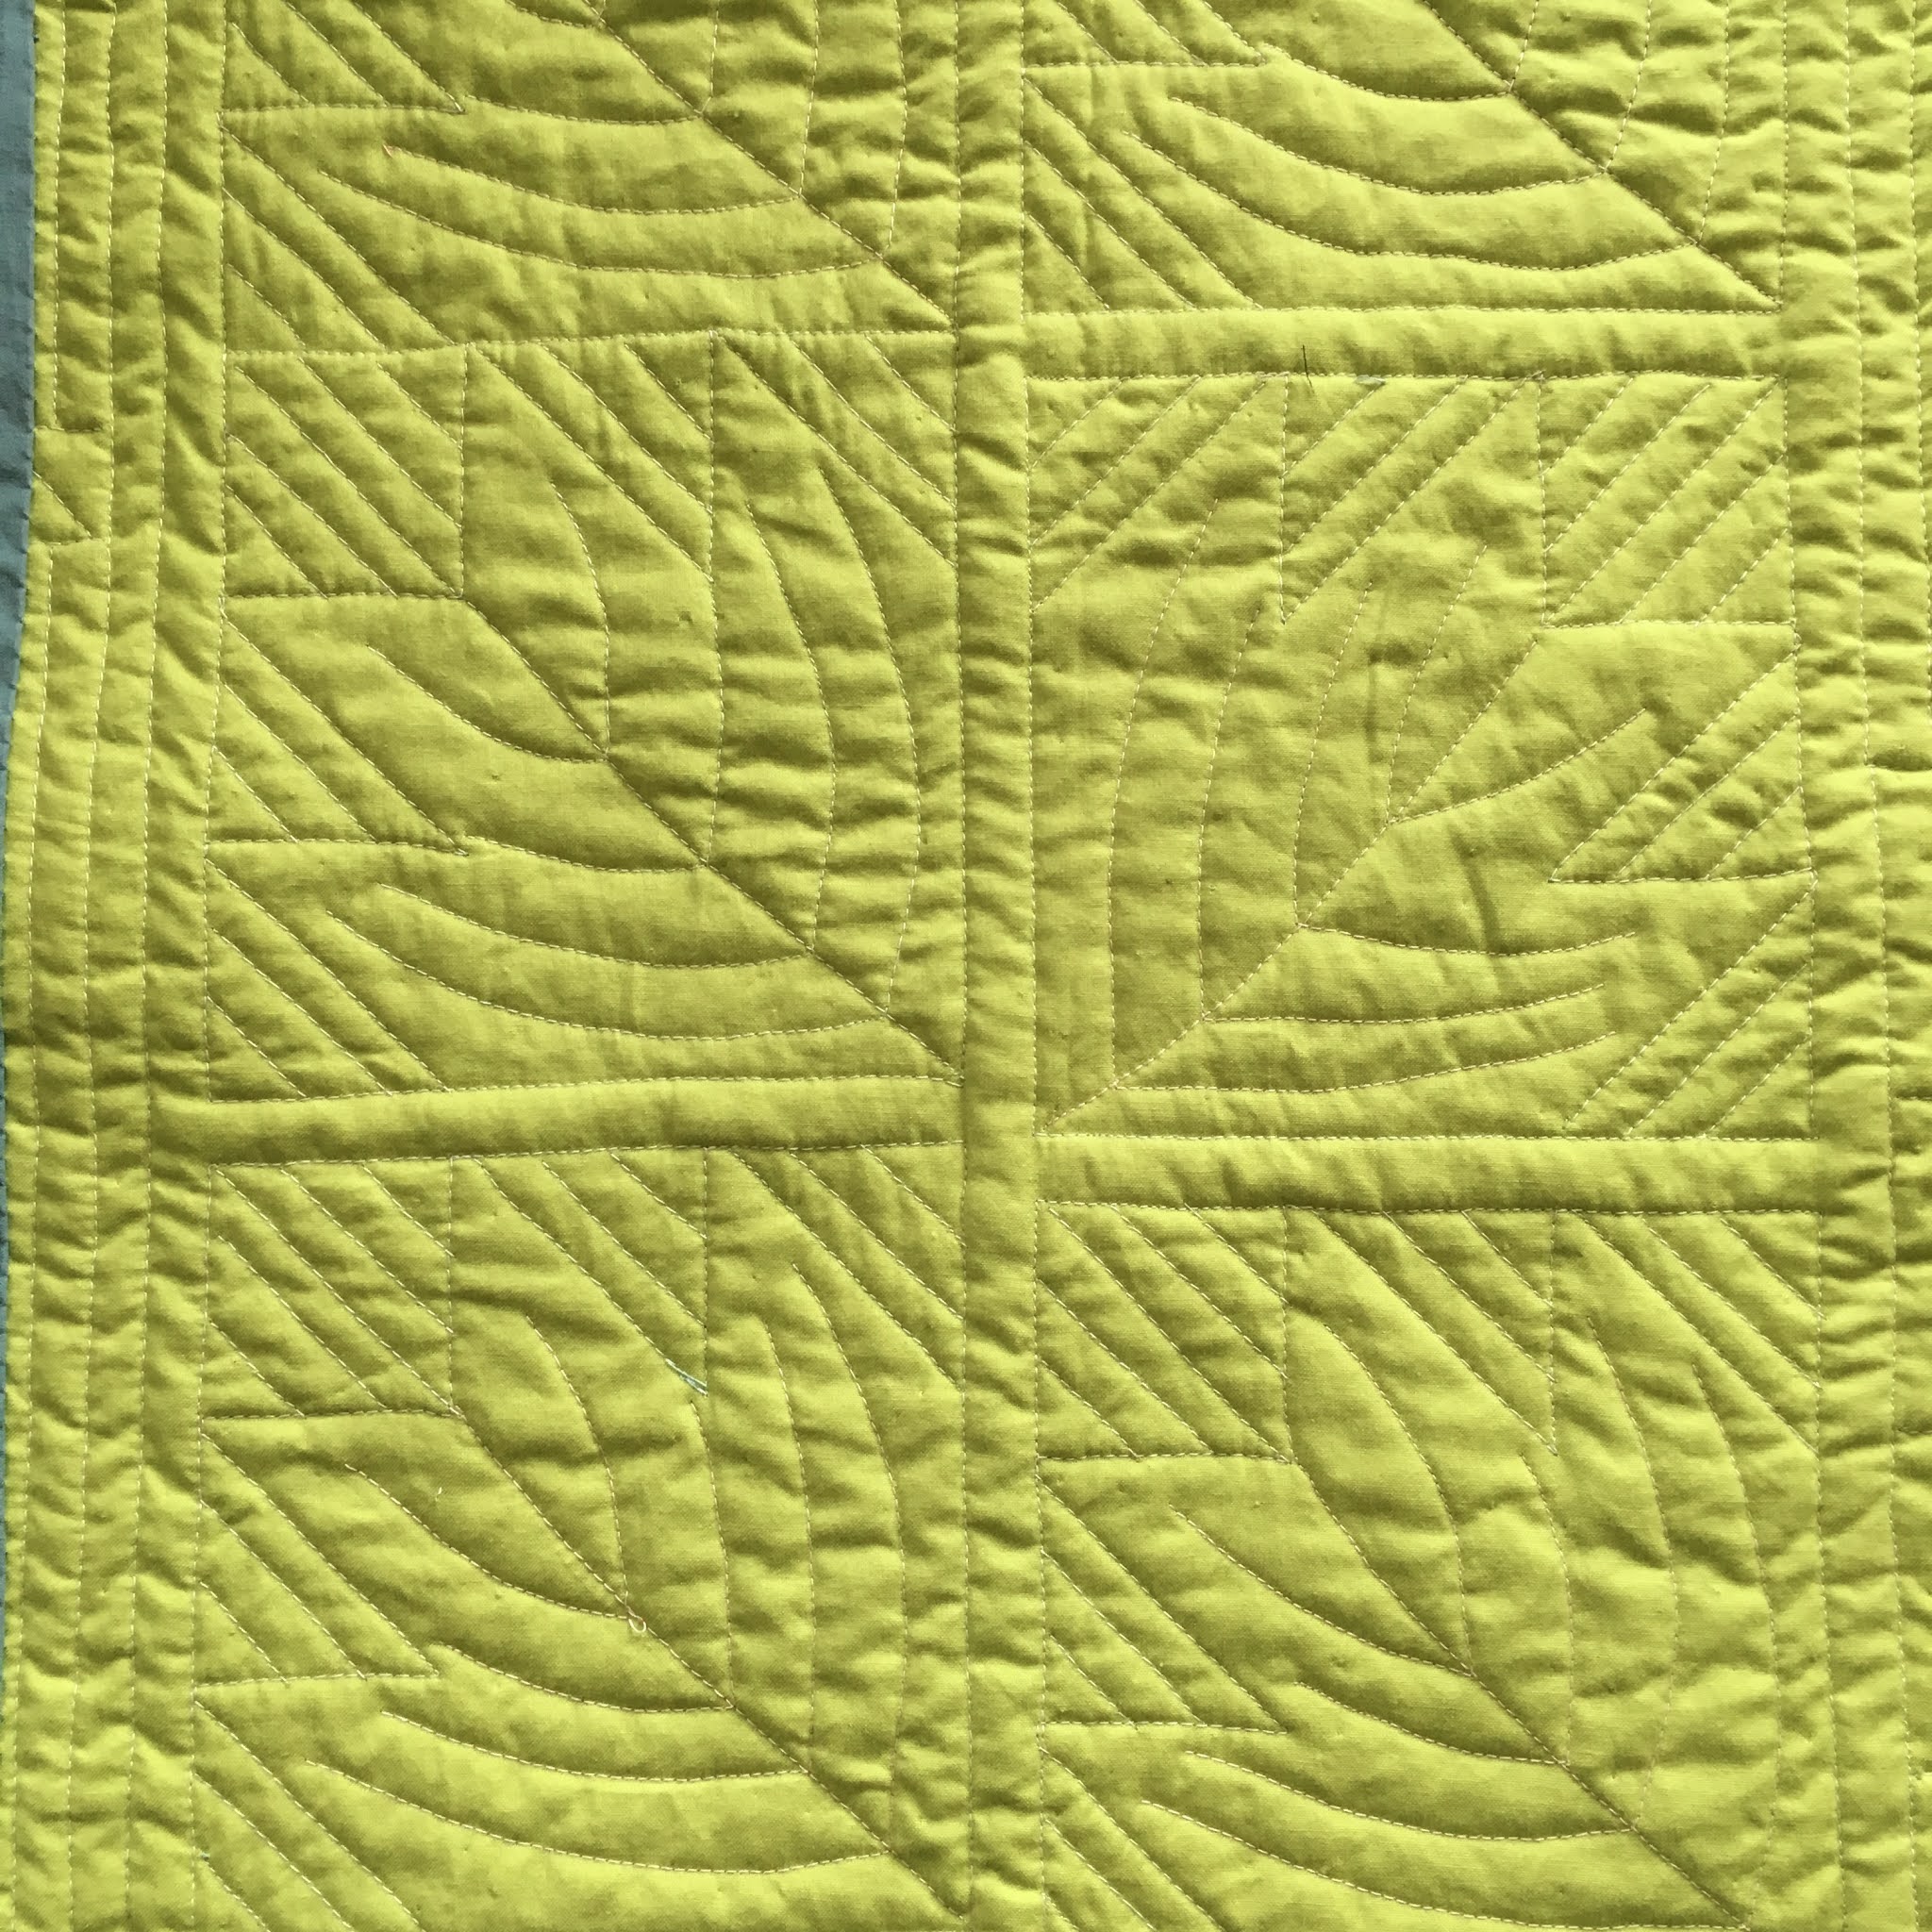
You need sunglasses to look at the back. This is from a big piece of Kona Limelight that I bought for a quilt for my grandson a couple of years ago. It was way brighter than I expected (despite the color name), so I keep searching for ways to use it up. This seemed just right.


I love how the quilting shows up on the back. 


For a few days, I displayed this at the bottom of my stairway. It will go back there again next summer (with a proper hanger). Now my usual autumn leaves quilt is there, but I couldn't bring myself to store away the coleus quilt just yet, so I moved it to another awkward display area at the top of the stairs for a few more days. 


Remember how the flower pot that inspired the design looked back in the spring?


Well, those plants are all grown up now.


This was a fun improv quilt. My favorite project (so far) from all the Bear Paw blocks I made during the Quilter's Color Quest. Here are the stats:

Pattern: The Bear Paw blocks were suggested by Rachel as a means of practicing color combinations during the workshop. The colors were inspired by my photo of plants in my garden. The flower block, letter blocks and sashing/layout are my own design.
Fabrics:  Scraps from my supply. Backing, as noted above is Kona Limelight. I remember that the binding was bought years ago at Yoder's Department Store in Shipshewana, Indiana when I was making Amish-inspired miniature quilts.
Batting: Umm...a scrap. Maybe Hobbs 80/20?  
Thread: Superior Masterpiece in Granite for piecing; King Tut in White Linen for the bobbin when quilting. A variety of colored threads to match the leaves for quilting--most of them were from a giveaway packet of Aurifil that I won several years ago. Lighter areas, as well as the border, were quilted with an old cone of King Tut in Mint Julep. I played thread chicken with it and won! Treasure in a variegated blue for handstitching on binding. 
Binding: 2 1/2 inches cut, double layer, machine sewn to front and hand stitched on back. 
Finished Size: 20 by 28 3/4 inches. Not washed. (Bear Paws are 6 inches square. and letter blocks are 3 inches square.)
Machines: Singer Featherweight for piecing; Singer Treadle 115 for walking foot quilting.

I'm linking up this week with Kelly at My Quilt Infatuation for Needle and Thread Thursday, Michelle at From Bolt to Beauty for Beauties Pageant, Sarah at Confessions of a Fabric Addict for Can I Get a Whoop Whoop, Wendy at Wendy's Quilts and More for Peacock Party and Cynthia at Quilting is more fun than Housework for Oh Scrap.

See you next week with a long-time-coming finish. In the meantime, take care of yourself and others, keep quilting, and if you are in my country, get yourself ready to vote!

(Just a reminder: I'm not affiliated with any company, so when I mention products, services, or stores I'm just documenting what I used or liked.) 

Friday, July 24, 2020

Color Quest Squirrel

My color quest for July has been squirreled. I'll get to that in a few minutes. Let's first look at what the July exercises were in the online workshop I've been doing this year with Rachel Hauser's book The Quilter's Field Guide to Color. 

I have to say, this month has been a lot of fun. We are beyond color theory now (not that I didn't like it, but I didn't always "get" it) and into inspirational things that are more like the emotions exercises we did earlier this year. Our first assignment this month was to use colors to tell a story based on an idea, feeling, experience, or something more tangible like a photo or a piece of fabric. I ended up doing three stories. As usual, I made my interpretations with Bear Paw blocks.

1. Riding the School Bus with my Lunchbox
The first one that popped into my head was related to my lunch box that I had as a kid. I don't know what got me started on that. Perhaps I saw a picture of my old Aladdin lunch box on a resale site. Anyway, that little tin lunch box was red and black plaid, and I loved it. Maybe that was a precursor to my love of fabric patterns? Thinking about the lunch box made me also think about riding the school bus. Our bus covered a lot of territory from the city, to the outlying areas and a little country town. I loved riding the bus. There was one little neighborhood with a dirt road. It was almost always bumpy with ridges and potholes, and I remember that everyone would try to sit behind the back wheels where it was bumpiest. If you were really lucky, you'd get to sit on the aisle end of the seat so that when the bus went over a big bump, you might accidentally/on purpose fall out of your seat into the aisle. Hilarious for kiddies just starting out their school career. Frowned on now, I'm sure. I chose colors to represent the lunch box (besides the red and black, there were little yellow and white lines) and the school bus (school bus yellow, of course--although now that I think of it, the actual color is more orange--and grayish green seats). 
Here are the possible fabrics:
Wouldn't it have been awesome to find a red and black plaid in there? I tried out lots of combinations but eventually settled on some sweet flower prints because they kind of suggested the vintage of my school days (late '50s/early '60s). No, those fabrics aren't that old, but some are pretty old.
Squeal...there's even that grayish green in the stems of the flowers.

2. House of Flavors in Ludington
The second story came to me quickly, too. I was thinking about the restaurant we like to eat at when we vacation (well, not this year) in Ludington, Michigan: House of Flavors--both a restaurant and an ice cream parlor that makes its own ice cream. It's in a beautiful area on the west coast of Michigan. There's a park with gigantic trees and a huge beach on Lake Michigan, a lighthouse, a short drive to the hiking trails in the State Park  (and another gorgeous lighthouse), a delightful downtown to stroll around and a sweet little Mom and Pop motel that we stay at that includes what used to be the lighthouse keeper's home. We usually go during shoulder season--either May or late September. The motel we stay at gives us a coupon for breakfast at the House of Flavors (within walking distance), which is a great start to a day of hiking. In the evening, we watch the sunset at the beach and then walk down to get ice cream at--you guessed it--House of Flavors. So I had to honor the place with a block. The floors of the restaurant are black and white alternating tiles, the bench seats are crisp white with turquoise trim and pink vinyl upholstery. From time to time, yellow makes an appearance in vinyl records or other decor hanging from the ceiling. The walls are covered with wallpaper murals of photos of the restaurant way back when it was a cafe. Such a cool place!
I didn't even make a collection of fabrics to choose from. I knew exactly what I wanted: solid color fabrics in those exact colors.I couldn't decide how to include them all in the block, so I made a pieced block for the paw of the Bear Paw, and used the black and white floor colors in the claws.

Doesn't this block just make you want to eat some ice cream?

3. Camping With Our Kids
When our kids were young, our vacations were tent-camping at Hoffmaster State Park in west Michigan. Our tent was khaki and dark green--a heavy canvas Hilary tent from Sears that blended in wonderfully with the wooded campsites. Sometimes my husband's parents and brother camped near us. Lots of fun memories living outside. The park has miles of hiking trails, two beaches and miles of shore along Lake Michigan. We spent our days hiking or playing in the waves (our daughter still has the Seahawk inflatable boat our kids played in more than 30 years ago) and always went to the beach in the evening to watch the sunset. 

At first I was going to make a block related to the tent, but then I wondered how to include other colors to represent memories of our times there. Here's what I came up with. 

It's easy to see the beach colors in the blues in the left column and the buff swatch and the campsite colors on the right. The other colors in the middle column as well as the pearl swatch represent what we found on our hikes depending on the time of year: trillium blooming in the spring; hoary puccoon, a yellow flower that grows in the dunes; hawkweed, an orange flower along a camp road to our favorite sunset view; black raspberries that our kids picked; and all the greenery everywhere. Here's my pull of potential fabrics:


I would love to make a quilt that has all of these colors in it. But for this exercise with my Bear Paw blocks, I divided the swatches into the three groups and made one block for each.
Pretty self-explanatory, I guess. It would be interesting to determine what proportions of all those colors would work to make a whole quilt that tells this personal story.

I really enjoyed this exercise. I tried a couple of other stories--the look of the misty fields at sunrise when I commuted to a rural school district during my career days, and the experience of a recent bike ride along algae covered ponds with their neon green. But I couldn't quite find a palette that worked for me. Maybe someday.

The other exercise for July was to start with an inspiration piece--a photo, a fabric or even something less tangible like a movie or a song--and build a palette from that. My inspiration piece was a photo I took of a coleus pot I planted in the spring.
I've grown fond of these plants in recent years. So much color in a shaded garden. And I knew I'd have a lot of fabric bits to interpret this photo. Many are very old burgundy leftovers, and then I have some newer limes that I bought for another project. I started with swatches. Kinda went crazy with them.
Then, the fabrics. Oh, yes, this will work. 

I was going to make just a few blocks. But then I kept thinking of other combinations.
And before I knew it, I had completely forgotten that these were Bear Paws, and I went straight into squirrel territory. Forget it that I have two quilt tops basted and waiting for quilting. This needed to be a quilt top. After I got these eight blocks done, I got the urge to make letters. Why not? Foundation paper letters! And I had lots of skinny strings from some old projects that would be just the right size.
I picked a three-inch square for each letter block that worked perfectly with a slanty font. And  lucky for me, these letters are similar in shape and proportion to each other. No weird Ws or M's to fit in somehow. It took me maybe 10 minutes tops to make a pattern. And this is what these turned into. So much fun!!
When I sewed the blocks together, I trimmed them down for more pleasing spacing.

Well, now I was far afield of Bear Paws. I knew how I wanted to place these letters, but one more thing was needed. As I said, I love coleus plants. But you know the flowers they sprout? Not so much. I would think such beautiful plants would have glowing flowers to match. But no. The flowers are thready, and their colors seem incongruous. They are even tough to focus on as you can see by this blurry photo I tried to take before I snipped all the flowers off, as I've heard that the plant gets all straggly if I leave them be.
But, now that I was in coleus mode, I set about drawing a bloom. Here is the pattern along with my blossom stalk

The blossom is kinda thready, a little hard to focus on. Just the way I see them.

So here's where this squirrel/Bear Paw/coleus is now.
I still have to plan some sashing and other minor elements. 

I think this exercise did what it was supposed to, yes? I did get inspired. And I'm still working with color--particularly colors I would not have usually chosen. And there are still Bear Paws. If you ask my husband, though, he will tell you that this whole quilt top thing is a form of procrastination because I'm really not sure how I want to quilt those two waiting quilts. He knows me so well. 

All in all, July was a success. It stretched my exploration of color and helped me see how I can make a quilt that tells my personal story instead of thinking in terms of what's trending or what fits my decor. We have one more month to go in this workshop with the book. I'm going to miss it when it's over, but I think that I now have a lot of seeds for future quilts. And I'm pretty sure that what I've learned about value, wheels and theory will kick in when it's needed--or not, and that's okay if I want to make a quilt that speaks for me. 


I hope this has been a good quilting month for you, and that you've found inspiration in unexpected places. 

(Just a reminder: I'm not affiliated with any company, so when I mention products, services, or stores I'm just documenting what I used or liked.) 

Friday, December 20, 2019

Holiday Squirrel Finish

I did it! With time to spare. Last time I wrote about this squirrel, I had taken a break because I didn't have the basting pins available to get it ready for quilting. I got the other quilt done (wrote about it in my last post) and then hopped right into this one. You can read about the process here. But here it is--my daughter's new Christmas tree skirt. It was a dark, wet day, so we moved our table out of our dining area to get as much light from the deck doors as possible for the photos.


I did all of the quilting with my walking foot. To kind of emphasize the snowflake shape of the skirt, I started with rows of lines through the longest sashings using the width of the walking foot to space them. 

At that point I wasn't sure what I'd do with the main sections of the quilt, so I started with lines along the sashings. I was tempted to quilt them as densely as the first sashings, but there was a bit of a problem. I was playing thread chicken with my quilting thread. I had an order in for more but wasn't sure how long it would take to get it. I was using white thread for both the top and bobbin, but decided to stretch it by switching to off-white in the bobbin. I also decided that I'd better not quilt the whole quilt so close together. 
To figure out what to do with the diamonds, I laid out thread across them. Option 1:

Option 2:

Option 3:

I ran them past my daughter, and we decided on Option 1, which was good as it would use the least amount of thread, but I liked the argyle look of it, too. I waited until the end to quilt the stars. I knew I wanted to outline them, but also knew that they would require lots of quilt wrangling if I did them with the walking foot. They actually were pretty easy, as the quilt is not that big and the stars were mainly near the edges.

The next step was cutting the skirt. I was a little worried about that, but it went fine. 

The binding was a different story. I knew I wanted to use straight grain binding for the edges of most of the quilt but that bias would be better (or should be better) for the circle. You have to know, though, that from the time I learned to sew as a teenager, I have had trouble with bias binding on inside curves. Any clothing I made that had bound armholes or necklines had that "homemade" look. This little project was no exception.
See how wavy that circle is? I'm thinking there are three things I might have done to make it smoother. I could have used narrower binding, but I really wanted to use my current favorite width of 2 1/2 inches (before folding) because that extra width helps me make better corners especially when they are other than 90 degrees. Maybe I should have clipped the curve before binding. I know I've done that before, but I wasn't sure how it would affect the size of the circle. Or maybe I should have sewed the binding to the back and flipped it over to the front to stitch down. Whatever, it did get done. And, hey, it is homemade, so the homemade look is fine. Best of all, no one will see that part under the tree, except the person responsible for tree watering. I'm really pleased with how the binding turned out on the rest of the quilt. Here are some too many close-ups.


The back is a tiny white print on turquoise. I know, it looks like a solid.


Here is the skirt under our tree because I couldn't resist trying it out. 
And some stats:
Pattern: Atomic Christmas Tree Skirt--a tutorial by Violet Craft, based on her pattern Atomic Starburst.
Fabrics:  A variety supplied by my daughter. The background is Kona PFD (Prepared for Dying). 
Batting: Hobbs Heirloom 80/20 
Thread: Superior-- Masterpiece in Granite for piecing; King Tut in Temple for top thread of quilting, and mostly White Linen in the bobbin. Treasure in Old Lace for handstitching on binding. 
Binding: 2 1/2 inches cut, double layer, machine sewn to front and hand stitched on back; cut width of fabric, except for area around circle cut on bias.
Finished Size: 56 inches from straight edge to straight edge and about 64 1/2 inches from point to point. I did not wash it because I liked the flat look of it when it was finished. 
Machines: Singer Featherweight for piecing; Singer Treadle 115 for walking foot quilting.

Here it is, sent, received, and under its own tree--

And I just had to include this one--
And how about those socks?!! Hello, Sunshine, indeed!
My daughter thinks the skirt pattern could be marketed as a poncho, too!

Well, I think this might be it for the year. I have a few projects in the works. I have RSC quilts to finish and some other things, but I think I might take a break until after the holidays. Maybe there will be one more wrap-up post of the year's projects. We'll see. Oh, and remember I was playing thread chicken? Even though I won--sort of, by using the two colors--my thread did arrive in the mail the day after I finished the quilt. So I'm all set for sewing in the new year.

I'm linking up this week with Sarah of Confessions of a Fabric Addict for Whoop Whoop Friday and Wendy's Quilts and More for the Peacock Party, and next Saturday with Sandra at mmm! quilts for DrEAMi (Drop Everything And Make it) because I can't just let this squirrel finish hang out there from last month. There needed to be the rest of the story.

I hope you have happy holidays wherever you are and whatever you're doing.


(I'm not affiliated with any company, so when I mention products, services, or stores I'm just documenting what I used or liked.)