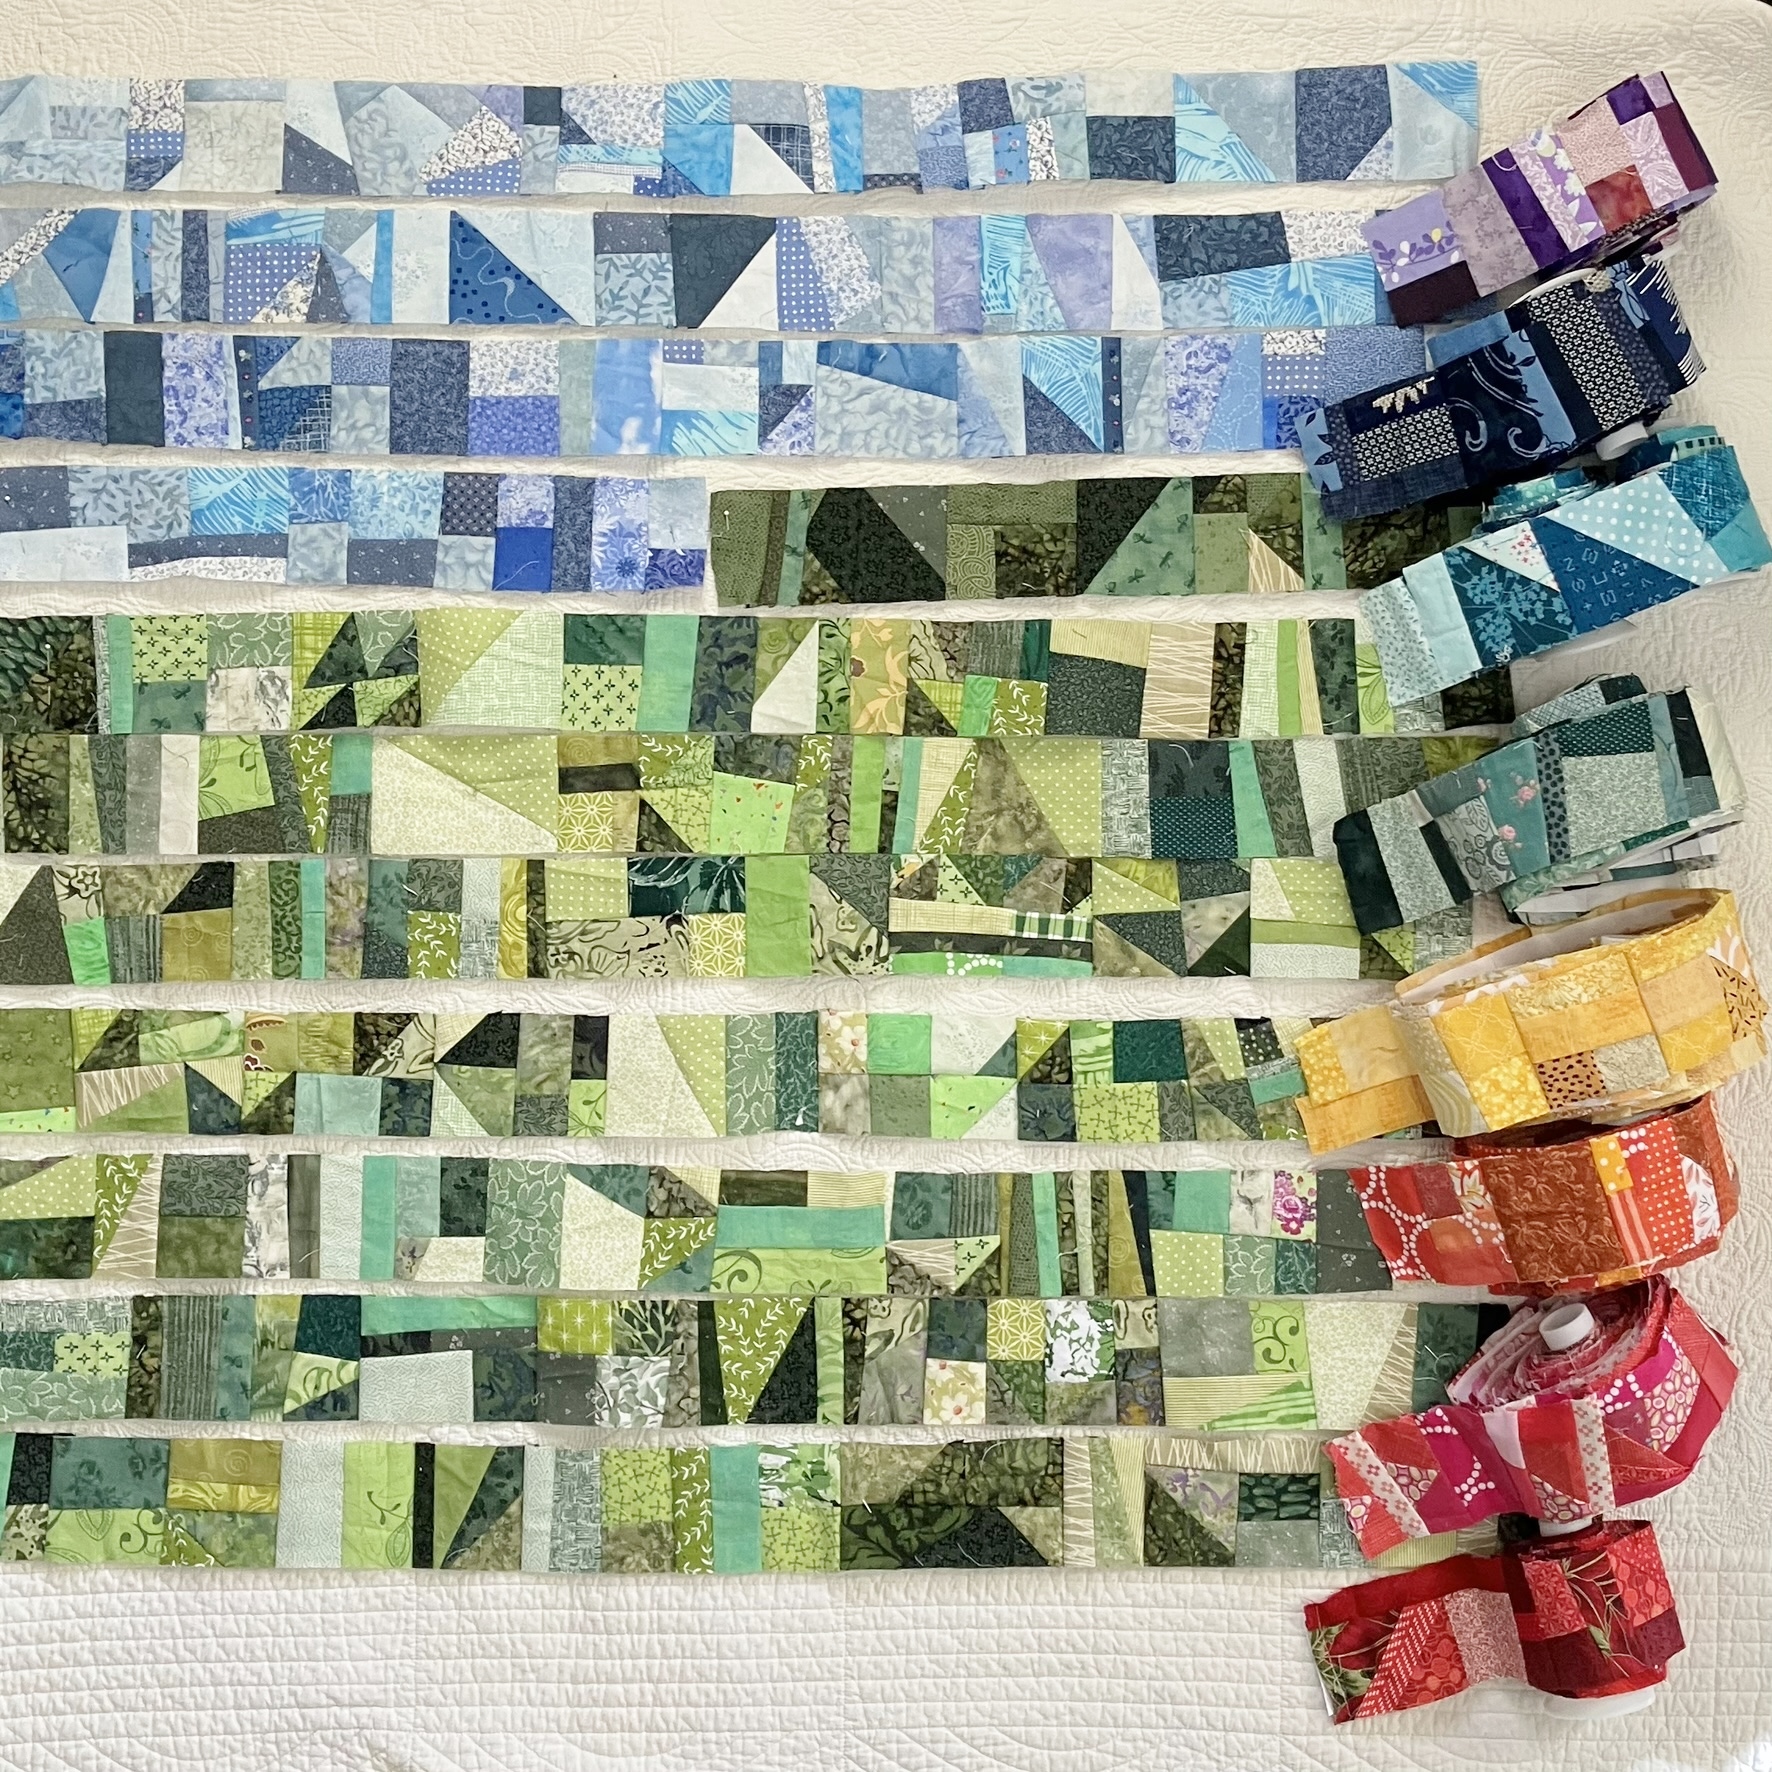
Showing posts with label Purse/Bag. Show all posts

Tuesday, December 31, 2024

Best (All) of 2024 Linky Party

So here we are again at the end of another year. My quilting was a bit different in 2024--a little here, a little there. We were also away from home off and on, so big projects didn't appeal to me so much after the warmer months arrived. I still want to do a recap, though, so everything is in one place. Let's get to it. I'll be linking this up with Cheryl at Meadow Mist Designs for her Best of 2024 Linky Party. 


Thanks, Cheryl for prompting us all to look back at our quilty productivity for the year. 

Links to my posts are in the items below.

1. My biggest project for the year was a Stay at Home Round Robin, hosted by Gail at Quilting Gail during the first three months. I don't usually do "mystery" quilts or group quilt alongs, but this appealed to me because I was in control of the design within the prompts, and I really did enjoy following everyone's progress and seeing all the different interpretations.
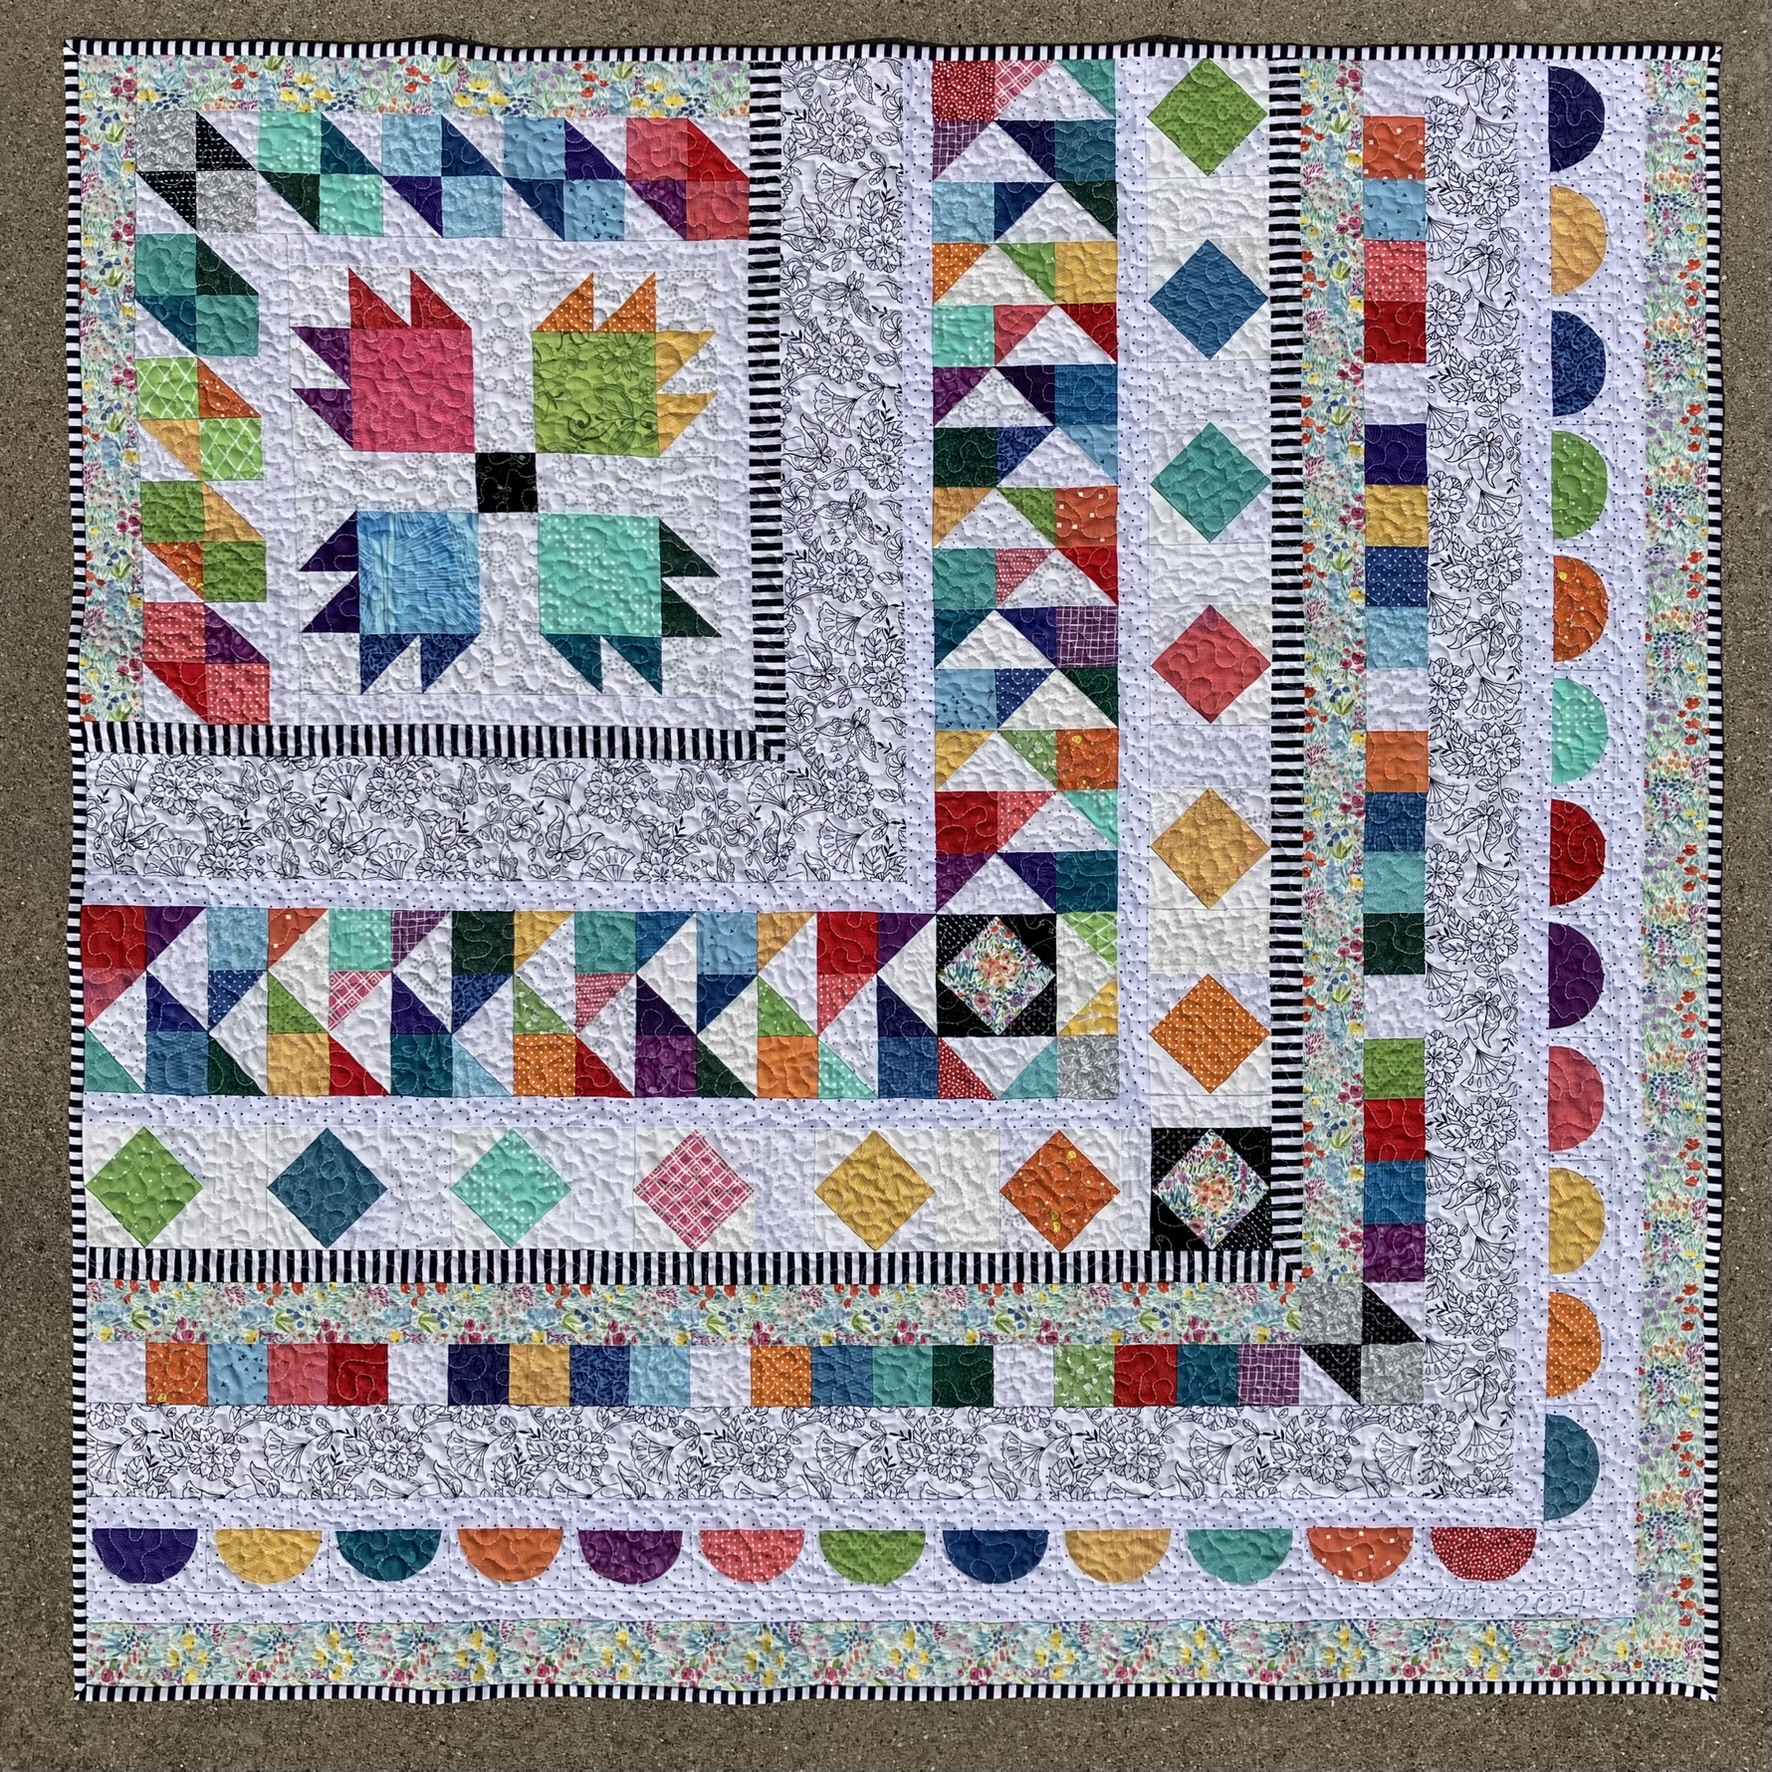

2. Another quilt: Checkerboard Chain from Lori Holt's Sew Your Stash You Tube Series Episode #39. I was really drawn to the little nine-patches. I would love to make this again in a more limited palette. 


3. I spent most of the rest of the year making placemats for Meals on Wheels from primarily Bear Paw blocks I made while taking Rachel Hauser's Quilter's Color Quest workshop in 2020 (yeah, that year...). I made a few each month using scraps and other fabric on hand, and focusing when I could on multicolored scraps. There are 15 finished ones in all. I sewed a few at a time and then took them on vacations with me to hand sew the binding. They'll be donated in the spring during the collection at one of my local quilt shops. If you'd like to see them up close, fronts and backs, just check out the placemats label in the sidebar. They are in the first two pages. 


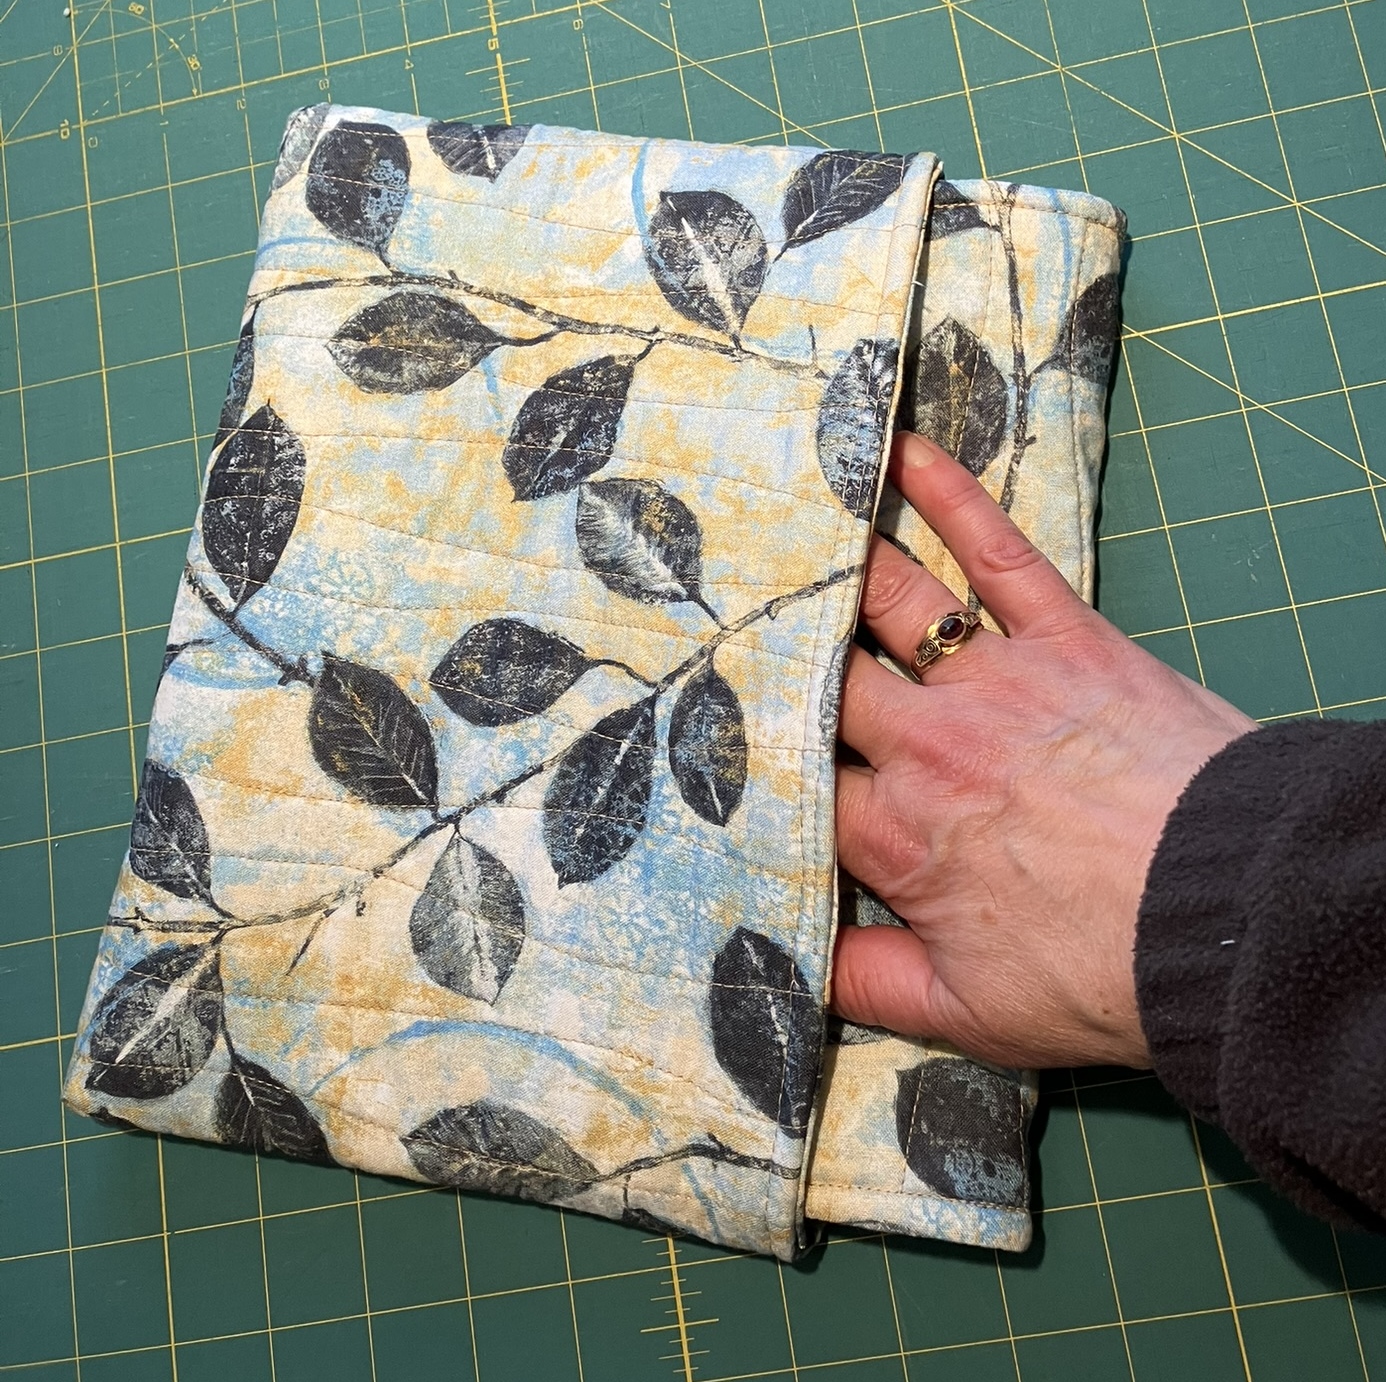
I meant to make three more placemats before the end of the year, and got a good start, and then ULP! A squirrel! I bought a new laptop a few weeks ago. It was time. I was still working off Windows 7, and my Chrome and other things would no longer update. I hated to do it because I loved that laptop. Perhaps, needless to say, the air has been blue around here ever since as I have tried to learn the new computer. I do not want every little thing I do to zoom immediately into the cloud. I have finally eliminated the nosy little program doing that, and I am suddenly a bit happier, although still losing track of icons and photos and other bits and bobs (like my cursor while doing this post). I know pretty soon it will be second nature. I hope. No, the new laptop was not the squirrel. But I suddenly, only a few days before the holidays, I NEEDED a new sleeve to protect my investment. I keep techy devices for many, many years, and I'm pretty sure part of the reason they last is that I coddle them with their own quilts. Since I've been on a scrap kick this year, I went into my biggest scrap pieces and came up with a doozy. A piece of fabric I used in a quilt I started making for our bed nearly 42 years ago!! Think it was time to use that fabric up? Yes, the quilt finally was finished after 13 years and was on our bed for 20 years before it wore out. 

I have no in-process photos of this because...it was a squirrel! Who has time for photos when chasing a squirrel? That's why it does not have its own post but will just have to share with all my end-of-year stuff. If you want to sort of know how I made it, you can check out my Ipad sleeve here because it's basically the same pattern. That project was also a squirrel, so the steps might also be a little hazy. I used the computer itself to figure out sizes of fabric pieces to cut. I used a fusible fleece interfacing to give it body, fusing to both the outside fabric and the lining as well as half of the flap fabric. I quilted both the body and the lining before construction, and the flap after I made that part but before I sewed it into the body. Here's the fabric and quilting:

And the computer slipped in:

And all tucked in:
Well, there you have my finishes. So what's next in 2025? First, there are those placemats that I started but threw aside for the squirrel. I have the fronts, backs and bindings of all three made. Just have to quilt them and sew the binding. 

I have a few more Bear Paw blocks left, so maybe 4 or 5 more placemats to make before the spring collection. After that? Maybe another quilt to donate. But then I think maybe some self-indulgent sewing. I have some new fabric bought on vacations this year to make a Lake Michigan quilt, and I have lots of barn photos taken from the car on our trips that really would like me to make some miniatures (foundation pieced). Stay tuned. I think 2025 will be a year for lots of escapist sewing or sewing to maintain my mental health as we enter a new era of uncertainty in my country and our world. I will try to keep up a positive but realistic attitude of hope for peace, decency, compassion, and maybe even wisdom. 

Meanwhile, Happy New Year! Do go to Cheryl's party (reminder that it's here) and share or see what your quilty friends have been up to.


Friday, May 26, 2023

Ipad Case

I had every intention of finishing a quilt this month, but the squirrels are active this time of year. Now I do have a quilt top almost finished (three seams to go), so I've done okay, but that project got set aside for an afternoon because after I made the grocery bags, I was in a bag mood and just had to make a protective case for my new Ipad. This new device replaced my Ipad mini that bit the dust awhile back. That one had a nice case and fit in my purse just right. But the new one doesn't fit in my purse. Also, I bought a cheapy vinyl cover for it which doesn't seem highly protective. I use the Ipad mostly at home but thought it needed something more cushy and protective for packing to travel. 


So here's how I made it--

I still had some "batting" aka cut-up blanket from the grocery bag project, so I cut a piece about 11 3/4 by 16 1/4 inches based on the measurement of my pad plus a bit more and seam allowance. 

I layered a piece of fabric of the same size on top and quilted them together with wavy lines. (That fabric is leftover from the backs of two quilts I made a few years ago. I bought it from Bernie of Needle and Foot when she had her Etsy shop, and I remember at the time that it was a shame no one would see the backs since they were wall quilts. So now this fabric has its time to shine.)

For the main part of the case, I folded the quilted piece in half right sides together with short edges matching and sewed along the sides with about 1/2 inch seam allowance. I cut the lining from the same fabric and and sewed it together with about 1/4 inch seam allowance. 

Next, I cut "batting" for a flap at 10 1/2 inches by 7 1/2 inches and another piece of fabric 10 1/2 by 15 inches to make both the outside and lining of the flap. I folded the fabric in half right sides together (short edges matching up), laid the batting on one side, and sewed the side seams with 1/4 inch seam allowance, rounding the corner just a bit at the fold. 

I'm not sure what I'm trying to show here, but I took the photo, so there it is. You can see I also tried to make some notes. but I quit halfway through. Squirrels don't like quilters to stop and take photos or notes. 

After turning the flap right sides out, I topstitched about a quarter inch around leaving the raw edge open as it would be in the seam of the case in the end. Then I quilted the flap with wavy lines.

I popped the outer case into the lining right sides together, inserting the flap between the layers (centering it between the side seams) and sewed around the raw edge leaving enough of an opening along the side without the flap so that I could "birth" the case. After turning the whole thing right side out, I topstitched close to the edge of the opening to close it and then topstitched 1/4 inch around the edge. 

I was going to put some kind of closure (button or velcro) on the flap, but decided to just tuck the flap into the case. It's neat and adds a nice bit of cushion. 

The ipad slips in just right.


This project was so easy--less than an hour start to finish. Maybe just a baby squirrel. And I can report that it went on its first little trip in my suitcase this past week (so we could watch some of our Grands play baseball and volleyball) and stayed cozy and safe. 

I'm linking up this Saturday with Sandra at mmmquilts for DrEAMI (Drop Everything and Make it). 

If we don't keep having beautiful weather for playing in the flowers
and bike riding
(Hey those are squirrels, too!),  I should have another quilt finished soon. Until then, keep chasing whatever squirrels you see at this time of year.

(Just a reminder: I'm not affiliated with any company, so when I mention products, services, or stores I'm just documenting what I used or liked.) 


Saturday, April 29, 2023

Grocery Bags

Well, here I am again. Finally. I just can't seem to get into a good rhythm of sewing or blogging this year. This time it was Covid. We managed to avoid it for three years. Yeah, at this point, it's not a matter of if but when, right? It was relatively mild but took us flat out for a week with various annoying symptoms. We are thankful for vaccines because I sure couldn't imagine this without some protection--even if I'm pretty sure this version was beyond either of the Omicron variants we were last boosted for. The worst part was the lingering fatigue, nasal symptoms and cough. We didn't feel like ourselves for a month. I wasn't expecting that. If you sent me a comment during that time and didn't hear back, I apologize. I had no energy, but I appreciate what you said. We are pretty much back to ourselves this week, and yay, I felt like sewing. So I have something to share. Grocery bags!


Do you recognize the fabric? It's the adding machine tape project I did for Angela's Rainbow Scrap Challenge over at So Scrappy during 2022. 

I started these bags just before I got sick in March. I don't have photos of the process, but I'll share a bit about how I made them.

I really wanted to make them entirely from stuff I had on hand, so instead of batting, I used an old blanket that I had set aside for possible donation to an animal shelter. (Don't worry, I have other ones to donate.) All of the fabric was from my adding machine tape project and old leftover pieces that never seemed to find their way into other projects, and the thread was some quilting thread that I didn't care for.

I wanted the bags to be close to the size of a paper grocery bag, so I measured one and then planned a rectangle. I cut my blanket pieces (one for each bag) at 36 by 20 inches and did Quilt-As-You-Go along the long edges of the fabric strips leaving 1/2-inch seam allowance. You can see the batting with the quilting on the inside of these two bags-in-process. 


This was as far as I got before I got sick. So this past week I rushed to complete the project. I made these bags the simplest I could. After making one big rectangle I used a different method to box the bottom. You can see how I did it on a tutorial for Magic Market Bag at Epidastudio. Instead of sewing the side seams and then pinching the fabric and sewing a triangle, you fold the rectangle right sides out and then fold back from the short edges half the width of what you want for the width of the bottom of the bag. I wanted mine to be 7-1/2 inches, so I folded each side back 3-3/4 inches, then sewed the side seams. So easy. Just two seams to make the outside of the bag. Sorry for no photo, but the link shows you how to do it. Here's how it looks from the side on the completed bag. 

I used my favorite color strips to make outsides of the four bags, but still had enough adding machine strips left for more. I decided to use the less favorites to make the lining (without the blanket batting), and had enough strips to make almost two bags worth. Then I added bigger chunks of old fabric for the rest. There are some really old fabrics in there. (Some are older than my daughter who is--gulp--in her 40s. No, she's not old. It's just old for fabric. Ha!) I wouldn't trust them in a quilt, but they were perfect for these bags. The lining pieces were 37 by 21 inches, including seam allowance. You can see some of the linings peeking out here.
Raided my pantry for grocery models.

I also scrounged around for longer strips to make handles. I cut them 24 inches by 4 inches, pressed over 1/2 inch on the long sides and then folded in half and sewed along the edges. When I put the bags together (just by sewing the outer bag and lining right sides together--so easy), I inserted the handles 5 1/4 inches in from the side seams with 1-1/2 inches sticking up above the raw edge. I left an opening between the handle ends on one side for birthing the bag right side out, then sewed it together and topstiched around the whole top edge. 
That yellow lining fabric is one of the really vintage ones. 

To reinforce the handles, I sewed an X in a square just below the top edge. (I just realized that step is also in the Market Bag tutorial.)

I really like how these bags turned out. The blanket batting makes them sturdy enough to stand up. The boxed corners are kind of thick because of the batting, but they help the bag stay open for filling.

The completed bags are approximately 14 inches tall, 12-1/2 inches wide, and 7-1/2 inches deep. (Sizes are approximate as I wasn't real precise in my sewing.) We have already used them for a grocery run, and my bagger husband gave them two thumbs up. Here they are ready for their next run. 

I can't resist a few more glamour shots. 

It occurs to me that this is a really haphazard post (I'm going to blame it on Covid brainfog), but it's done and that makes me happy, because now I can move on to another quilt!! I will try to be more conscientious about photographing as I go so I can be more organized in describing my projects.  

Anyway, stay scrappy, stay healthy, and keep sewing. 


Friday, July 30, 2021

RSC, Other Scraps and More

Lots of bits in this post. It's a fun summer of sewing. First off, more blocks for Rainbow Scrap Challenge/52 weeks of Scrappy Triangles. Blue again. This time, darker blues, maybe? Since all of my blocks are half dark blue, I wasn't sure I wanted to do these. But I found some prints with some dark blues in them to mix in that wouldn't blur into the navy HSTs. 


Five blocks since there were five Fridays this month. Funny, last batch of blues was also a five-block month, so they've kind of taken over the quilt. That's okay. I'll need to make extra blocks for a whole quilt, and other colors will get repeated, too. Here's the year so far:

Let's play a game: Spot the misplaced block 

I think it needs some orange and turquoise, don't you? I suspect by the time I post this we will know the next color.

I've also been collecting new fabrics this year in the color of the month. I really didn't want any blue as my mission lately has apparently been to get rid of blue. So I bought a loooong length of black dot fabric instead for my next quilt project and then realized that it also fits with the color of the month because an alternate color for this month was dark neutrals. 

So what am I doing with all this dotty fabric? It's the background for another scrappy project: the Confetti Quilt by Rachel Hauser. She had a quilt-along for this pattern recently. I couldn't take part, but now I can make it. It's a fascinating pattern for me. Crumb blocks. If you've read my other scrappy posts, you will know that I don't really care for making crumb blocks. But these are different--a combination of chain piecing scraps to width-of-fabric strips and paper foundation piecing. There are four different blocks to mix together so that the whole quilt will look improv pieced. I love it!! I have pieced three of the first block so far, all from the scrap bins. (Well, except for that background). I'll have more to share about this quilt later.


What else have I been making? I do have my Mercyful Positivity Quilt-Along Quilt finished. But it has to wait for its turn to shine (on location!) later in August. I can show you these placemats that I made from the bonus HSTs from snowballed corners of that project. I'm proud to say I used them up (and added four extras to complete the last placemat). These were sort of fun to make, but more fiddly than I expected. In fact, I think it takes as long to make a set of placemats as it does to make a quilt. Worthwhile to use up scraps, though, and to make for donations to Meals on Wheels. 


This one is 14 1/4 by about 18 inches. I quilted it with turquoise thread in the dark areas and off-white in the lights. Too time consuming, and lots of threads to bury. I needed to piece the back to have enough fabric, but I like it.


This one is 13 1/4 by 17 1/2 inches. Diagonal quilting with off-white thread. Pretty rustic quilting. I had pressed seams open and was pretty wobbly in following them. But overall it's fine. Note to self: no in-the-ditch quilting on these projects. Here's the back (easy peasy, and two different lime prints for the binding to use up scraps):


The last is my favorite.


This one is 13 by 18 1/4 inches, with simple off-white quilting in wavy lines. So quick!! And another easy back:


I hope to make more placemats to use up scraps. I learned from this little project how to make them more quickly, so I think I'll enjoy them more. Bigger pieces, simple quilting will be the way to go.

One more project for July. This one is not scraps, but I want to share it. My granddaughter was here a couple of weeks ago and bought some fabric for a purse. At 9 1/2 years old and well on her way to 5 feet tall, she had outgrown (in more ways than one) the mermaid purse I made for her several years ago. I made the new one sort of based on this pattern by Aleah at no time to sew, but I made lots of changes to it (size, process, materials) but it was a good place to start. I won't share how I made it here except to say that as a mostly reluctant bag-maker, I was slow, slow, slow, measuring 50000 times, reading 1000 tips on the internet, and cutting/sewing once. 

I really like the combination of fabrics she chose.


Four pockets inside, and


a big pocket on the back for all of her treasures. I did check with Allison at New Every Morning, as she has been making bags lately, and decided to cut my batting smaller so that there was no sewing through it. It made a huge difference in ease of sewing, and I was able to make the entire purse on my Singer Featherweight without it balking at the bulk. For anyone interested, the purse is 8 by 11 by 2 inches, just the right size for a growing girl and all her stuff.

Okay, I can't resist just a few more photos. We haven't been vacationing yet, but we did go to my dad this week, and instead of taking the highway, took the backroads for a day-cation. We passed some barn quilts; this is the only one I could get a photo of.


And then, this hayfield. It was gorgeous. Photos just don't do justice to a hayfield, but I tried.


Couldn't capture the expanse and light. But, backroads rock!

I hope your July projects and activities brought you as much joy as mine. Sometimes little things are so satisfying! 

I'm linking up this Saturday with Angela at So Scrappy for Scrap Happy Saturday and this Sunday with Cynthia at Quilting is more fun than Housework for Oh Scrap.

Okay, now back to those Confetti scraps.

(Just a reminder: I'm not affiliated with any company, so when I mention products, services, or stores I'm just documenting what I used or liked.)  


Friday, May 7, 2021

Squirrels for Safelight

I was relaxing and reading through some blogs a few days ago, as one does, and suddenly a big squirrel popped up in the form of the annual collection of bags for cosmetics and sunglasses (and now, tissues, too) that is happening this month by Carole of From My Carolina Home for Safelight Domestic Violence shelter . In my fogginess of last year, I totally missed it, and it seems that might have happened again this year if not for the blog post. Actually, it was one bold squirrel. Then her shyer, more elegant sister ventured out after I responded to the first one. 

Anyway, here was my project this week. It should have only taken an hour or so, but because I can never make a set of these bags without complicating the process, it took me a few days. 

I had some lovely fabric that I won maybe three years ago in a giveaway through Sandra at Musings of a Menopausal Melon--mmm quilts!. Wonderlust by Paula Nadelstern for Benartex. I had used some of it in other projects, including some bags for Safelight. I still had some of these marbled pieces. I loved the look and luxurious feel of them, but they had never quite fit with other projects, so I knew it was time to use them. I didn't have large enough pieces to just cut and sew, so I decided to do some improv piecing. I had to also piece one of the linings, but it all worked out well. I quilted with free motion flowers, stipples and wiggles using several different colors of threads. Here are the outsides of two of the bags before the final construction. 

And the linings.

Fronts

Backs

Peeky lining

I was pleased with the set and was ready to package it up and send it. But then that shy squirrel whispered, "Why make only one set, when two sets are just as easy to send?" Well, yes, I could do that. I searched through some other fabrics that I had won in a Fenceline Fabrics giveaway through Rachel Hauser last year. There was a lovely fat quarter of leafy fabric with a metallic sheen that I really liked, but also knew that it might never really fit in with the fabrics I usually use in quilts. It needed to shine on its own. It would have been so easy to just pick a lining and sew it up. But I noticed that the design was directional (I probably am the only one who would have noticed this, but I did), so I made some additional cuts  with added seam allowance to shift the fabric so that it would all be facing the same way when folded into a bag. In the same batch of giveaway fabric I found a sweet tiny plus peach fabric that picked up on the copper metallics in the main fabric, and thought to use it as a liner. The only place it would show was on the tissue holder where it would make a piped edge. I thought that was a shame, so I decided to add a strip to both of the other bags. See, this is why these bags take me longer. I just can't stop fiddling. I had to first measure carefully to make sure I had enough fabric in my fat quarter to do this. I did--just barely. I was going to slice and insert the strips, but that would have required lining things up carefully, so after stitching a 1 1/2 inch strip diagonally across main pieces of the bags,

 I folded the strip up to the stitched line, pressed it, 

and then folded it up again and stitched along both edges. 

That looked so much better to me. I think it makes the bags coordinate with each other more. Then I free motion quilted wiggly lines back and forth. 


A little crease-y--I've been folding these a few times.
I fiddled more, sewing the hook-and-loop closures on. I had been using blue thread, but didn't want it to show on the peach strip, so I changed thread colors part way through. Fiddle, fiddle. 

These were a lot of fun to make. Someday I really have to make a set without all the little changes. But I work with the fabric I have on hand, and it tells me what it wants. (Or maybe it's those pesky sweet little squirrels that tell me.) 

These projects are so satisfying (and probably usually really quick). Each set uses two fat quarters with little waste, and are a great way to use up those cut-offs of batting that don't work easily for other projects. Plus, they are a wonderful way to fill the tote bags that Carole puts together for Safelight every year to brighten the lives of people going through a really tough time. If you haven't made any, go check out her site. Yes, I do complain that they take me more time than they should, but they are also a neat way to try something a little creative and to practice quilting motifs. I have to say one thing, though, to quilters who quilt with lots of colors of thread to match their fabric: As a person who usually quilts with one color (mostly off-white), I have extreme admiration for your persistence in thread-changing. It was so time consuming for me to keep changing colors, and I really had to keep on my toes to remember to do it. New appreciation here for people who use multiple colors of threads!

I'm linking up today with Michelle at From Bolt to Beauty and on the last Saturday of this month with Sandra at mmm quilts for DrEAMi (Drop Everything And Make it). I didn't want to wait to link up because maybe some of you will still want to make some bags this month, and I didn't want to miss the opportunity to draw them to your attention. You can get the info you need at Carole's site here. 

Have fun with your squirrels!

(Just a reminder: I'm not affiliated with any company, so when I mention products, services, or stores I'm just documenting what I used or liked.)