Well, here I am again. Finally. I just can't seem to get into a good rhythm of sewing or blogging this year. This time it was Covid. We managed to avoid it for three years. Yeah, at this point, it's not a matter of if but when, right? It was relatively mild but took us flat out for a week with various annoying symptoms. We are thankful for vaccines because I sure couldn't imagine this without some protection--even if I'm pretty sure this version was beyond either of the Omicron variants we were last boosted for. The worst part was the lingering fatigue, nasal symptoms and cough. We didn't feel like ourselves for a month. I wasn't expecting that. If you sent me a comment during that time and didn't hear back, I apologize. I had no energy, but I appreciate what you said. We are pretty much back to ourselves this week, and yay, I felt like sewing. So I have something to share. Grocery bags!
I started these bags just before I got sick in March. I don't have photos of the process, but I'll share a bit about how I made them.
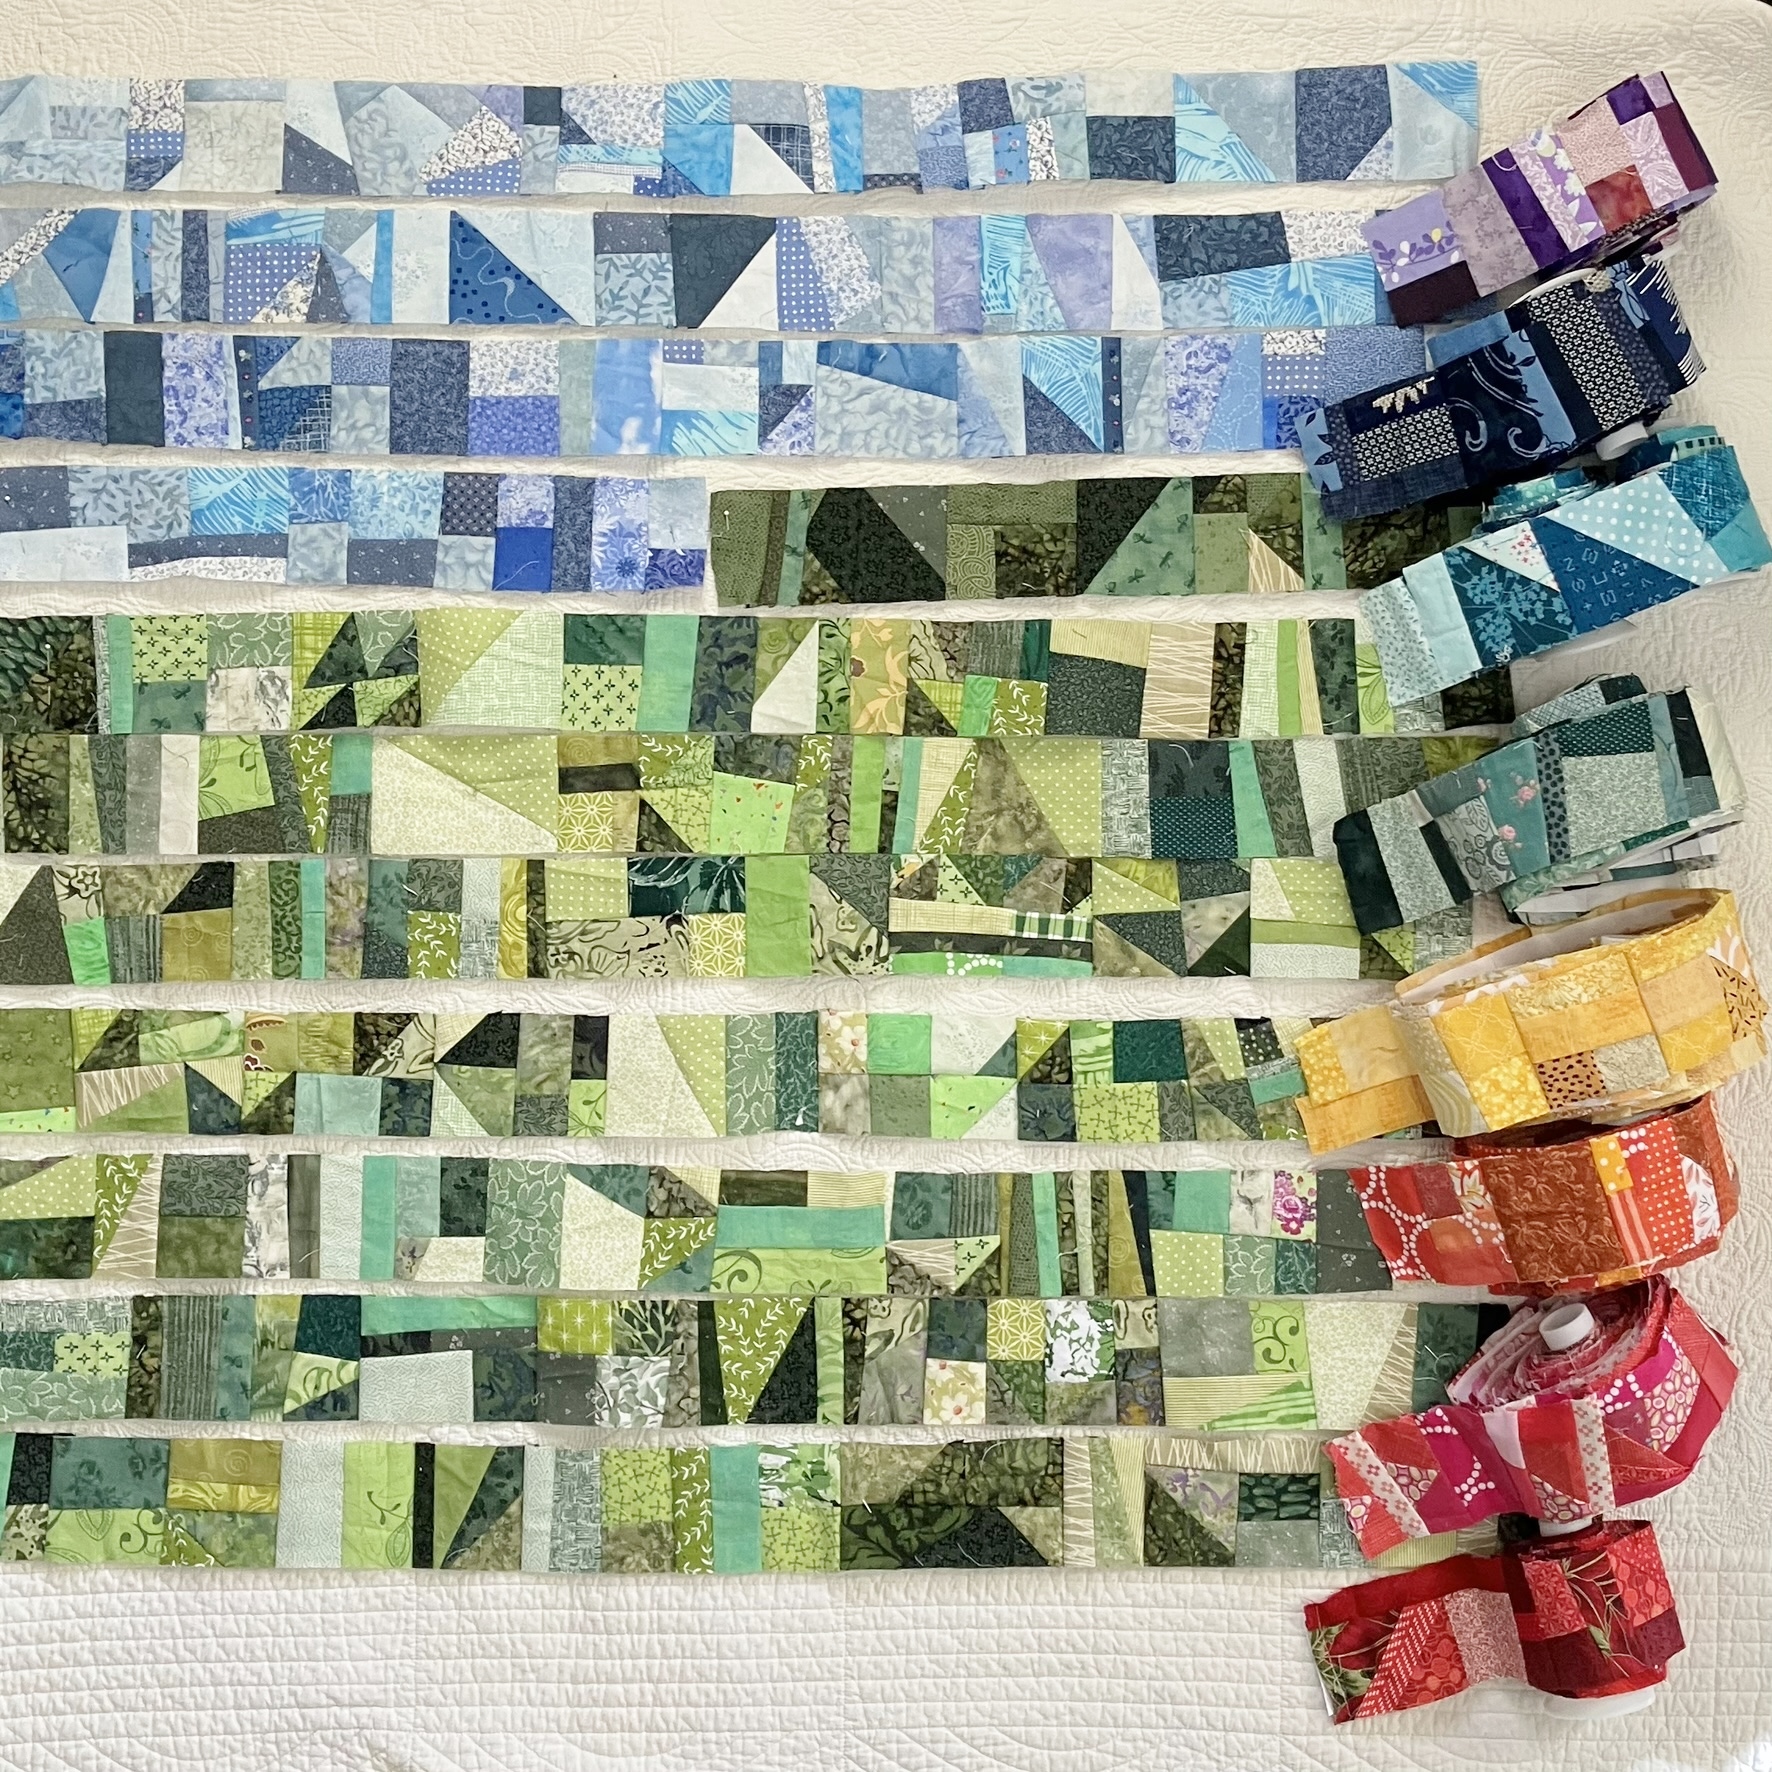
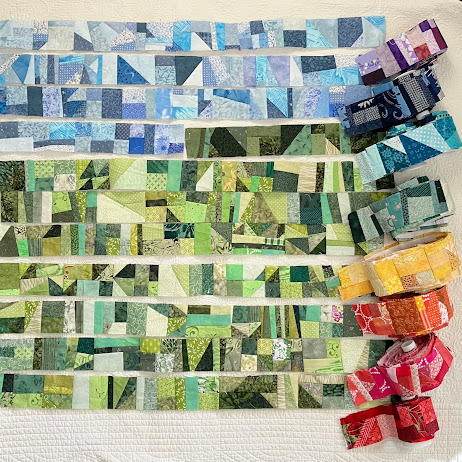
I really wanted to make them entirely from stuff I had on hand, so instead of batting, I used an old blanket that I had set aside for possible donation to an animal shelter. (Don't worry, I have other ones to donate.) All of the fabric was from my adding machine tape project and old leftover pieces that never seemed to find their way into other projects, and the thread was some quilting thread that I didn't care for.
I wanted the bags to be close to the size of a paper grocery bag, so I measured one and then planned a rectangle. I cut my blanket pieces (one for each bag) at 36 by 20 inches and did Quilt-As-You-Go along the long edges of the fabric strips leaving 1/2-inch seam allowance. You can see the batting with the quilting on the inside of these two bags-in-process. This was as far as I got before I got sick. So this past week I rushed to complete the project. I made these bags the simplest I could. After making one big rectangle I used a different method to box the bottom. You can see how I did it on a tutorial for Magic Market Bag at Epidastudio. Instead of sewing the side seams and then pinching the fabric and sewing a triangle, you fold the rectangle right sides out and then fold back from the short edges half the width of what you want for the width of the bottom of the bag. I wanted mine to be 7-1/2 inches, so I folded each side back 3-3/4 inches, then sewed the side seams. So easy. Just two seams to make the outside of the bag. Sorry for no photo, but the link shows you how to do it. Here's how it looks from the side on the completed bag.
I used my favorite color strips to make outsides of the four bags, but still had enough adding machine strips left for more. I decided to use the less favorites to make the lining (without the blanket batting), and had enough strips to make almost two bags worth. Then I added bigger chunks of old fabric for the rest. There are some really old fabrics in there. (Some are older than my daughter who is--gulp--in her 40s. No, she's not old. It's just old for fabric. Ha!) I wouldn't trust them in a quilt, but they were perfect for these bags. The lining pieces were 37 by 21 inches, including seam allowance. You can see some of the linings peeking out here.
 |
| Raided my pantry for grocery models. |
I also scrounged around for longer strips to make handles. I cut them 24 inches by 4 inches, pressed over 1/2 inch on the long sides and then folded in half and sewed along the edges. When I put the bags together (just by sewing the outer bag and lining right sides together--so easy), I inserted the handles 5 1/4 inches in from the side seams with 1-1/2 inches sticking up above the raw edge. I left an opening between the handle ends on one side for birthing the bag right side out, then sewed it together and topstiched around the whole top edge.
 |
| That yellow lining fabric is one of the really vintage ones. |
To reinforce the handles, I sewed an X in a square just below the top edge. (I just realized that step is also in the Market Bag tutorial.)
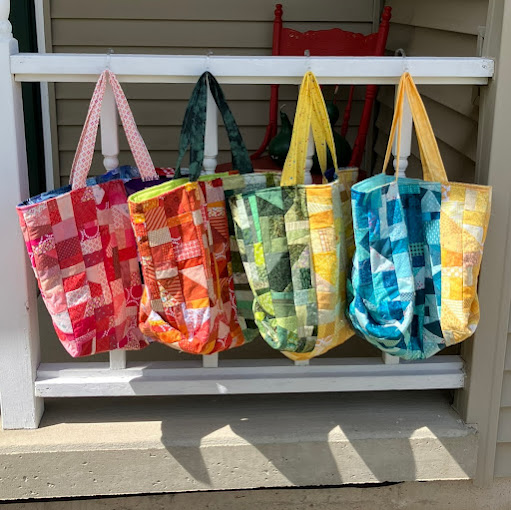
I really like how these bags turned out. The blanket batting makes them sturdy enough to stand up. The boxed corners are kind of thick because of the batting, but they help the bag stay open for filling.
The completed bags are approximately 14 inches tall, 12-1/2 inches wide, and 7-1/2 inches deep. (Sizes are approximate as I wasn't real precise in my sewing.) We have already used them for a grocery run, and my bagger husband gave them two thumbs up. Here they are ready for their next run.
I can't resist a few more glamour shots.
It occurs to me that this is a really haphazard post (I'm going to blame it on Covid brainfog), but it's done and that makes me happy, because now I can move on to another quilt!! I will try to be more conscientious about photographing as I go so I can be more organized in describing my projects.
Anyway, stay scrappy, stay healthy, and keep sewing.