Showing posts with label Painted Daisy Quilt. Show all posts

Wednesday, July 26, 2017

Summertime Potpourri

Summertime seems to be a time for bits and pieces. And that's fine with me. So this post will be a potpourri of what's keeping me occupied these days. Some things related to quilting, but also a little travelogue of a bike ride--but I promise that even that has some relevance to needlework.

So here goes. First up--I've finished my improved fabric storage organization. If you've been following, you'll know that I've been folding my fabric onto comic book boards to store (mostly) in drawers and (a little) on a shelf. I ended up buying 4 (yes, 4!!) packages of 100 boards each. I used a few of the boards as they were to fold larger pieces of fabric, but I cut nearly all of the boards in half to fit in the drawers. That's nearly 800 different pieces of fabric. Wow! It's a bit hard to show all of the drawers, but here they are:

Some of the drawers are no longer full (especially the black/gray/white drawer), but I'll keep them as they are for now. This was a good exercise in getting to know my fabrics all over again and seeing what I'm lacking. I tried to group the colors by value. (That's why most of the ones showing look lighter.) It will be so much easier to audition fabric without making a big mess on the bed. (I hope.) The few pieces that were big enough for the full size boards are now on a shelf in the closet, folded horizontally so they fit the space.

My yellow scrap bins are a bit more full now because anything that didn't fit on a board got tossed in, but those bins will take a lot before they overflow. Hopefully, I'll make a scrap quilt before that happens. The only fabric that did not end up on a board was my collection of Kona solids and any fabric that I win in giveaways for donation quilts. (They have their own yellow bins.) I have a few boards left. I'm sure they'll get used eventually.

Speaking of fabric, in the past week or so, I've received two happy quilty mail packages!! Yippee!
The first was this bundle:
This is from Paintbrush Studio fabrics through Jayne at Twiggy and Opal. It was a giveaway during the Patriotic Palette Blog Hop. I love me some solids and have used the Painter's Palette line before and really like it. I have some plans for these, but they will have to wait awhile. Thanks so much to both Twiggy and Opal and Paintbrush Studios!!

Then I got this fun package from Louise at My Quilt Odyssey in a giveaway to celebrate her recent windfall of fabric. Read the story about the windfall here. It will warm your heart.
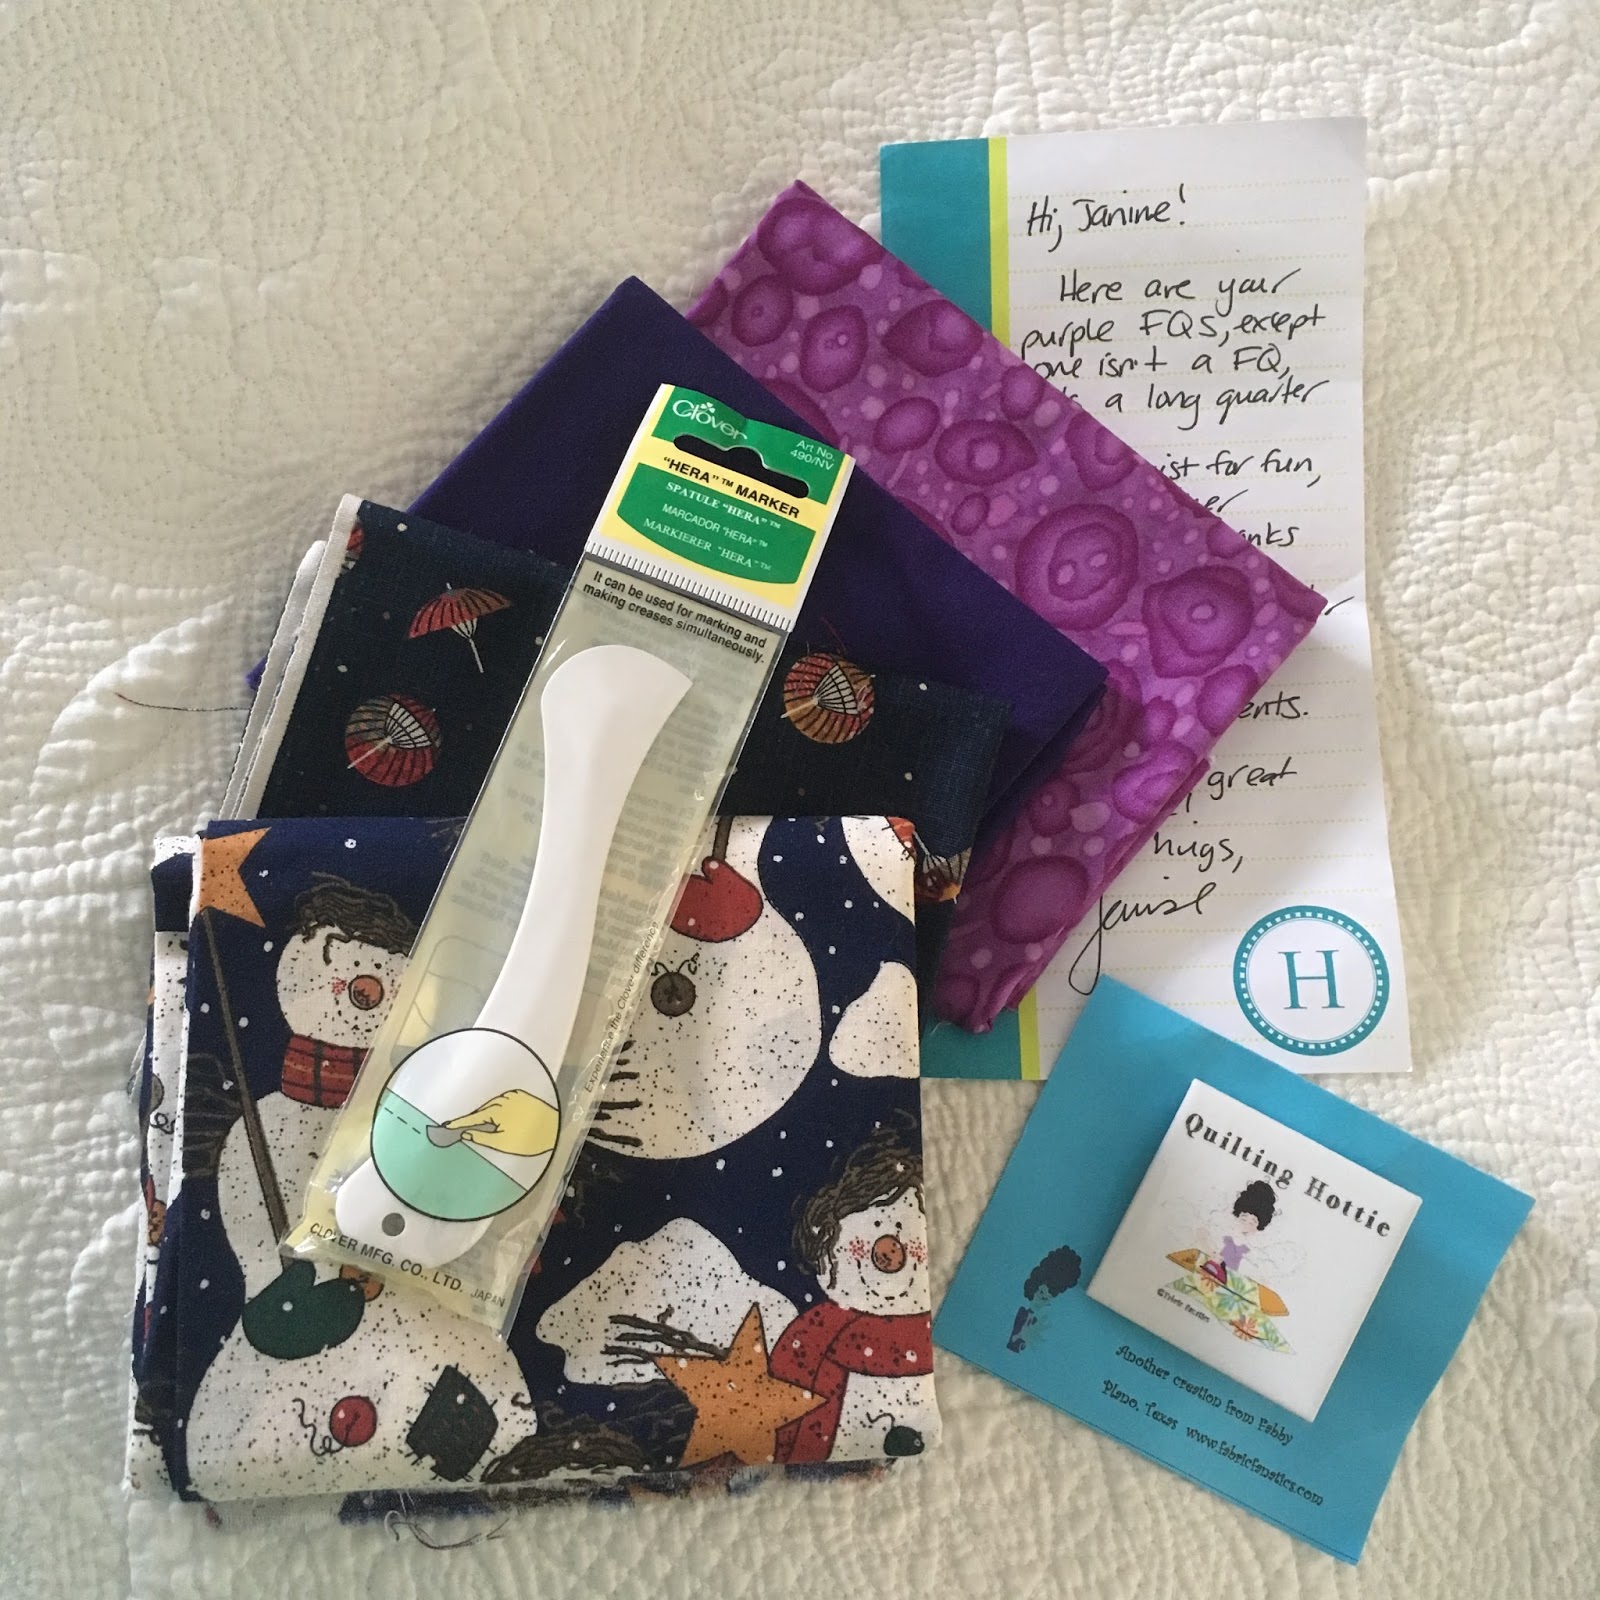

In addition to fun fabric (purples to boost my stash, umbrellas, and snowmen--Christmas in July!), there's a "Quilting Hottie" magnet. That made me laugh because I had just finished pressing a quilt top and backing in the basement, trying to stay cool during some really hot weather. I didn't want my iron to heat up the house and fight with the AC. And then, the Hera marker. I got a Hera marker in a swag bag at a quilt conference years ago, and it was getting really dull. I had thought of buying a new one, but never got around to it. Imagine my surprise to get the Hera marker from Louise and find out that the one I was using all these years was a miniature one. I love how the new one feels in my hand, and I know I'll use it a lot. So thanks to Louise, too!! All of these new fabrics will go into the bin for donation quilts.

Let's see. What else?
I treated my Painted Daisy Quilt with UV fabric protection spray this week.
I found two types online. One was a solvent-based spray and one was water-based. Both got mixed reviews. I decided to go with the water-based one. I'll let you know at the end of the summer how it's doing. Hopefully, it will slow down any fading. The early morning sun is harsh on my front door. But if the quilt fades, I'll just have to make another one, I guess. Sometimes, it's just so hard being a quilter. Ha!

I basted my Deconstructed Coins quilt over the weekend and did quite a bit of the quilting on Monday using my walking foot--straight lines in the dark blue areas and wavy lines in the rest of it. I'm still working on smooth waves. 
I think after spending all that time making the top, I could have come up with a more imaginative quilting plan, but it's time to wrap this up and get on to other things. The curves and widely spaced lines will make it a soft quilt, though, and that's important for this one. Hopefully, by the end of next week I'll have a finish to share. 

Meanwhile, I've started planning a new quilt so that I have something to hand quilt in the evenings or when I'm on vacation. I love cottage gardens (even though my own gardening is hit and mostly miss) and the old-fashioned look of hollyhocks. So I'm planning to make the Hollyhock pattern from Ruth McDowell's Pieced Flowers book. I spent way more time than I should have scanning the patterns from the book and then fiddling with them to get the percentage of enlargement right (it would have been easier to go to the library and copy them, I was too lazy to get in the car and it was too hot to walk), but the fiddling paid off, and now I have the master pattern to piece the parts with freezer paper piecing.


I'm hoping to use my newly organized stash for this, but we'll see what happens as I get into it. I know I have another WIP to finish (Lake Michigan quilt), but I think this project will mesh well with that one.

Summer isn't all sewing. Sometimes we go for long bike rides on the rail-trails in our state. 
Yesterday was a gorgeous day for a ride. The scenery was lovely, as always.
But this time, I was interested in details in three towns along the way. For example, here is what I found in the restroom at the trailhead where we started our ride.

Isn't it adorable? All those tiny stitches. It's obviously old. I wonder about the maker and when it was made. Little did the maker know the work would become restroom art. But it's just right for this cute little trailhead in a cute little town. I've shown pictures of this trailhead here before, but this is a new addition. (That post I linked to is a long post, but coincidentally, it also shows pictures of my sewing closet revamp last year, so it kind of relates to my first item in this post.)

At the other end of the ride was a larger town. We roamed around just enough to know that we need to go back and take a closer look. The businesses in the downtown buildings have changed over the years, but the buildings are still intact with beautiful architectural details and the pavement is red brick for several blocks. On one corner, we found a Little Free Library (I love those!!)
Towns along the trail all have similar street names that give a glimpse of the past. 
I love imagining what these towns were like when the railroads ran through them. There is one town along the way that was a lumber/saw mill town in the 1800's. From the few pictures I've found of it online, it once had an apparently busy downtown district with elaborate brick storefronts. Now that area is almost a ghost town. There is a small post office (open a few hours a day), an insurance agency, a village office in a simple modern building, and a funeral home. There are large gaps where buildings once stood. Most of the rest of the buildings are closed up and crumbling, some with crude siding covering the fronts. A couple have been subdivided into apartments. I've taken pictures here before, but haven't looked closely. Here are the two sides of the street. 

Do you see that gap in the lower picture? Something made me cross the street and take a closer look. Here's what I found:
I think my heart skipped a beat. Two rooms with the exact same tile pattern. What do you suppose was here? How old are these floors? I wanted to ask someone about them, but the post office and village office were both closed and there was no one else around. When I got home, I tried to do some research online. I found a business directory from maybe the late 1800's or early 1900's. It did list a millinery and a dressmaker (no addresses). I'd like to think that maybe one (or both) of those were here. Most of the towns we go through on our rides appear to have seen better days in terms of downtown shopping districts. Residents drive to larger towns for shopping or other services. The closing of the railroads that ultimately gave us the lovely bike trails had a big impact on the towns we ride through, but most of them retain some vitality. And most of them are hubs of the agriculture community. But this town was probably also affected by the downturn in lumbering. It just looks sad to me and gives me the strangest feeling of nostalgia for a time and place I didn't even know. Maybe I'm overly sentimental for a time and place that might not even have been as I imagine. And I know that no town stays the same over time. Anyway, finding this little gem of a floor makes me want to save something of that past before this floor disappears in the weeds. Wouldn't this make a great hexie quilt pattern? Too bad I don't like to do EPP or I'd be on it in a minute. I do hope to find out more about this floor and whatever used to be here. There is a little historical museum in the town over the river. I think a visit is in order. I'll let you know if I find out anything.

Before returning home, we made one more little stop in a town we've ridden through on our bikes before. This town has been building a rest stop on the bike trail and we wanted to see the progress. Oh, my. Adorable!! They have built it to resemble the train depot that used to sit on the same property. That depot is still in existence, but it was moved a number of years ago several miles out of town to become a private residence. (I'm glad it wasn't torn down.) This new rest stop has a picnic pavilion where the baggage room would have been. The room with the "witch's hat" roof will be a museum.
This bike trail is fast becoming one of my favorites in the state, mainly I think because of how the towns along the way have embraced it and added to the sense of history and the enjoyment of riding. 

Well, that's how my summer's been going and my newest discoveries. What little discoveries have you made? Quilting/sewing inspiration is everywhere and in the most surprising places!! 
I'm linking up today with Sew Fresh Quilts for Let's Bee Social.

Friday, July 14, 2017

Quilt Finish and Top

A finish and a half today. First up: the Painted Daisy Quilt, or as I've also referred to it, Big Stitch Project. I wasn't sure if I was done, but some helpful comments on my last post said I was. Thank you. I never know when to quit. I still need to find a UV resisting spray for it so I can hang it on my front door for the rest of the summer, but here it is:

And the back:
The back and binding are from scraps.

Here are the details:
Pattern Daisy from Ruth B McDowell's book Pieced Flowers
Size Block:12 1/4 by 10 1/4 inches (width/height)
         Quilt: 18 1/2 by 17 1/4 inches (height/width)
Fabric Mostly BasicGray Grunge by Moda. I'm sorry, I didn't keep track of the color names. Thanks to Jayne at Twiggy and Opal, I will now try to keep track by taking pictures of bolt ends when I'm shopping. The flower center and binding are Free Spirit Joel Dewberry True Colors Woodgrain (that's a mouthful, isn't it?)
Batting Scrap. Your guess is as good as mine. 
Quilting Big Stitch (1/4-inch stitches) with DMC embroidery thread (four strands) in various colors. Cross hatching is at 1-inch intervals. I didn't use a hoop. If I did this again, I probably would to keep it smoother. I found that I still prefer tiny-stitch quilting, so I'm mulling over another quilt top to use that technique. After all, now that this is done, I need something else for a take-along project.
Binding Cut 3 inches wide and then folded in half for a 1/2-inch finished width. I wanted the binding to stand out well against the door, and I'm happy with how it turned out.  I used to use this width all the time when I learned to quilt. I might use it again, especially on quilts without borders (most of them these days). I know that it's popular to use narrow bindings, but I tend to stretch them too much (I think that's the problem), and they end up wavy. This is nice and flat, with much better corners than when I use narrow bindings. If I use it on quilts again, I'll have to remember to cut my backing and batting wider than the quilt top so that I don't cut off points. That wasn't an issue with this one.

Here are a few more pictures, then I'll show you the half-finish.
I did the hand sewing part of the binding at an outdoor summer carillon concert at our local university. The music agreed with me--I got 3/4 of the binding on. I'm not usually that fast. Those concerts are such fun. People spread out with picnic suppers on the lawn under the hundreds-of-years-old trees. It's a casual affair. This week there were crows, cicadas and a distant drum line (summer camp on campus) to accompany the carillon. Such a fun part of our summer.


Ah, and here's the half finish for the week. I got the top of the Deconstructed Coins quilt done. Yippee!!
I didn't spend a lot of time balancing colors, and it's not pressed or de-threaded, but it's done! After some dithering, I decided that instead of buying a piece of printed fabric for the back, I'm going to cobble together the leftover solids. It's more work but saves a lot of money and uses a good chunk of stash. And, let's face it, it's me. I did order a bit more Kona Prussian for the binding. I was going to go with a lighter color, but I feel like that border needs to be contained. I hope I like it. I already have a plan for simple wavy lines for the quilting. Hopefully, I'll have a true finish to share in the not-to-distant future. 

If you want to see previous posts of both of these quilts, click on the Painted Daisy and Deconstructed Coins labels on the sidebar or at the bottom of this post. 

I'm linking up today with Crazy Mom Quilts for Finish It Up Friday and with JANDA Bend Quilts for TGIFF. I hope you are having fun with your finishes and half-finishes!

Wednesday, July 5, 2017

Summer Stitching

I have banished the squirrels and am back to my current projects. There are lots of fun non-sewing things to do in summer, but I made a surprising amount of progress in a short time on my Deconstructed Coins quilt. I made sashing rows and joined them with the coin rows this week.

My plan was to add one more sashing row to the top and the bottom. But that will make the quilt an awkward almost-but-not-quite square. So I'm thinking now of adding a narrow dark blue strip to each end and then put sashing down the sides as well: the same three patterns of three stripes with a tiny rectangle, two stripes, and squares. It doesn't seem like a lot to do, but really, it's almost as many sashing pieces as I've already made. Oh, well, the fabric supply doesn't seem to have diminished much except the aqua. I'll just keep sprinkling that in. 

So here's the basic plan, minus the details:

Meanwhile, I've been having fun with the big stitch quilting on my little door quilt. And I mean BIG stitch. I figured that since my usual hand quilting is with tiny stitches, I had to make it really different. So these stitches are about a quarter inch--maybe even a smidge more. It's a relaxing take-along project, or deck project, or sit and watch TV project, but I think I prefer tiny quilting stitches. And I'm having trouble deciding if I'm finished. Does it need more? More lines in the petals? More lines in the crosshatching? I don't know. So I think I'll do the binding next and then decide. It might just be time to hang it up and be done. Of course, then I'll have to piece another little something because I'll be out of take-along projects for the rest of the summer and fall. What a problem to have, huh? (I won't call that a squirrel because take-along projects are essential.)

So, what else besides summer stitching? Yesterday we celebrated Independence Day with a lovely rails-to-trails bike ride between two towns a little northwest of where we live. It was a gorgeous ride--much of it through a recreation area where there are no roads to cross. It alternated between well-packed crushed limestone and asphalt, so an easy ride. Both towns have old rail stations. One has been turned into a hair salon. The other is a museum run by the town's historical society. The museum was closed when we parked our car there at the beginning of the ride, but by the time we got back it was opening. The members of the historical society were eager to take us on a tour to share the station's story as well as all the local items they have collected over the years. And at the end, there was ice cream!! What a fun way to end our ride. I love tiny towns and exploring their history. 

Here are some pictures of our ride:
Lots of bridges and views of the river that meanders near the trail. 
And tiny details we saw along the way:

And the train stations:
The station on the top left is the one that is now a hair salon. I peeked in the window. It looks pretty much as it probably always did inside--except for simple cabinets with salon chairs. I'm glad they haven't modernized it. Glary picture through the glass, but look at that floor. Hexie inspiration, anyone?

The caboose was parked at the station turned historical museum. Look, a barn caboose quilt!


Railroad Crossing block, of course! It turns out there is a barn quilt trail in the three counties nearby. I had no idea, but the historical society had a brochure with a map to find them. (Of course!)

I'm linking up today with Sew Fresh Quilts for Let's Bee Social. Happy summer quilting, everyone, if you live in my hemisphere, and cozy winter quilting for the rest of you! 


Wednesday, May 17, 2017

Mulling it Over

I've spent the last few days walking past the design wall. I don't have much to show, but I'll show it anyway while I mull over the sashes for the Deconstructed Coin Quilt. I started out with bits and pieces (leftover from cuttings) divided by skinny strips and squares.

Here's how they look from far:

Thinking that was maybe a little too choppy, I subbed in longer pieces

and added skinny pieces to those


plus the little squares.


I tried fragmenting things a bit

and then a bit more.

Here's a close up:

This is a little closer to what I was imagining. I think maybe a combination of longer and shorter pieces, some of those skinny strips with little squares and some other bigger squares. Maybe a few more longer pieces than what are here. We'll see. I'm thinking it's starting to have just the barest hint of Piet Mondrian--even some of his early colors, which is fine with me. I have lots more playing around to go. I think my next step is to cut some long pieces of each color and lay those out and start whittling them down a bit from there. My goal is to have something interesting without overwhelming the printed coins. 

In the meantime, I've been working on the Painted Daisy Quilt. Since my last post about it, I tried out various threads for Big Stitch quilting. 

I was hoping to use Perle Cotton #8, but I couldn't find any locally. Well I finally did, and it was beautiful, but an expensive brand and not in the colors I wanted. I didn't want to order any, so I tried out some threads I had on hand. The yellow line of stitches above is Perle Cotton #5. I liked how it looked, but it was a lot of work to pull through the fabric (especially the knots). The next line (dark green) is four strands of embroidery thread, and the rest are various greens done with three strands. I decided that doing Big Stitch with four strands of thread and a big embroidery needle was good enough for me for this project. I bought a few more skeins of thread and did another sample to try them out on the various fabrics of the quilt. 


I tried out four shades of green and then one row of stitches with all four shades (one strand of each).Then two shades each of pink and red and one row of stitches with all four of those shades (one strand of each) on the pink and red fabrics. This little test showed me that there's not a lot of difference between different shades and that there really needs to be a lot of contrast (either much lighter or much darker) for a thread to really show up. Oh well, embroidery thread is cheap so it was an inexpensive lesson. 

After I made my little samples, we took off to my daughter and son-in-law for a week to do daycare while their usual daycare provider was on vacation. We had a blast!! Spending extended time, both day and night, with the Grands is such a treat. They were so sweet to take care of and play with. I took my little quilt along to work on in the evenings, but didn't really expect to spend much time with it. I did do a little outlining on the flower, and I have finished that part since I've come back home. 

This piece is so small that I've found it's easiest to do without a hoop. I used threads that matched the fabrics most closely to do the outlining. I also did some cross hatching in the center. I think next I'll add some veins in the petals, maybe with more contrasting thread, and then I'll have to figure out the rest of the background. I'm enjoying it well enough, and it will be a nice little diversion when I need some handwork, but so far I'm not enjoying it as much as my usual hand quilting with regular quilting thread. It's hard for me to think of it as quilting and not embroidery. Maybe I'd enjoy it more with Perle cotton #8. 

Here's a close-up:

The temperatures are in the 80s this week, so I've been sidetracked from quilting to plant flowers. Two weeks earlier than I usually do!! The "rule" where I live is no planting until Memorial Day to ensure no danger from frost, but it's just too nice out to wait. Here are some pansies and violas I planted just before we left to do daycare:
Blue flowers make me swoon!
There was frost predicted for while we were gone, but my husband moved the pots up against the house and the flowers came through just fine. Not much else is blooming in the perennial garden, except the candy tuft

and some of the columbine.

We also have iris ready to pop. Eventually the other flowers will find their way into this blog. For now, I'll keep walking past that design wall and experimenting with fabric pieces for my sashings. And maybe I'll also sit out on the deck with my hand quilting so I can enjoy my fabric flower and my real flowers at the same time. 

I'm linking up with Sew Fresh Quilts for Let's Bee Social this week. I hope you are having a beautiful spring/fall. Keep quilting!

Saturday, April 29, 2017

Quick Painted Daisy

I recently went on a tiny vacation, and during that time, I realized that I didn't have a hand sewing project to work on in the evenings. That just won't do. So I set about making a quick little wall hanging--actually a door hanging. I've been a hand quilter for a long time, but for this quilt, I'm going to try big stitch. I want something that won't take a lot of investment in time. It will be a summer quilt, so it needs to be finished fairly soon. Also, it's going to hang on my front door where it's likely to fade pretty fast, so it's not worth spending months quilting tiny stitches. I'm just a little apprehensive, though. I have a feeling that getting used to making big stitches might actually take me longer at first than traditional hand stitches. But we'll see.


I chose a daisy pattern from Ruth B McDowell's book Pieced Flowers. This book is fabulous if you enjoy freezer paper template piecing (hint: if you love making puzzles, this might be the technique for you). The book has a summary of the technique, but it's probably best to have her Piecing Workshop book handy as a reference. I needed it to refresh my memory since it's been a little while since I've used freezer paper templates. 

I was too lazy to scan in the pattern for enlargement or to go to the library to enlarge it on the copy machine, so I just used a ruler and graph paper to enlarge the measurements by 300%.
Master pattern

The flower is made in two identical halves, which are joined by a diagonal seam. I chose to alternate two colors for the flower petals, so my halves varied with opposite petal colors. For example, on one half, piece A1 is pink and on the other it is red.

I traced my master pattern onto the shiny side of freezer paper, then turned it over to label sections and colors and to make registration marks for piecing. I usually spend a lot of time color coding my registration marks, but for this little project, I just quickly marked with a pencil. Probably a little hard to see here. 
Freezer paper pattern (I made two, one for each half of the flower)


I turned the freezer paper pattern over and cut the templates apart following the lines on the shiny side. Then I used a hot iron to press them onto the back side of my fabrics--three Moda Grunges and a Free Spirit Joel Dewberry True Colors Woodgrain print. (I used bright colors since they will need to be seen from the street.)

I cut them out with a quarter-inch seam allowance using my rotary cutter, and then it was just a matter of stitching them all together like a puzzle. I can't believe I didn't take any in-process pictures. You'll have to forgive me. I was in the zone because this was a DrEAMi (Drop Everything And Make it) project. (There's a post here with a picture of that step on a different quilt if you'd like to look.) 

After I pieced the daisy, I added some more of the green Grunge fabric to extend the background a bit. The finished block is about 10 1/2 by 12 5/8 inches and the whole top is about 17 1/2 by 19 inches. Now all I have to do is baste the quilt, pick out some thread/needles for doing the big stitch, figure out my quilting plan, and sit back and enjoy stitching next time I go out of town. I'm not sure what kind of thread is available at my local stores, but we'll see what happens. 

Here's a close-up of the quilt top. I love how the seams are planned so they don't have to match up perfectly at intersections. So easy. I got this done so fast--the prep takes the longest with freezer paper piecing, but everything goes together so smoothly. It's really satisfying. This picture makes me think it would be fun to do this pattern really big with just a partial flower. 


I'm linking up with Sandra at mmm! quilts for her monthly DrEAMi linky party. I think I once said that I don't do many of these squirrely projects, but this link-up has shown me that I really do. Or maybe I'm doing them so I have something to post during the party?? Who knows? Who cares? The fact is I keep having these moments. So I'm finally putting up a button for this party.  

I'm also linking up with Crazy Mom Quilts for Finish it Up Friday because for now, this is a finish.

Okay, now back to my regularly scheduled quilting. Have a great quilting week, DrEAMi or not.