Monday, December 26, 2022

A Bit-by-bit Year

At the end of each year, Cheryl Brickey of Meadow Mist Designs hosts a linky party for us to share our best posts from the past twelve months and offers suggestions for listing them. I like to share my finishes, and since those would be more than five posts, I divide them into five categories. That way I meet the spirit of the party and keep all my finishes together in one year-end post, and you can decide which links you might like to explore further.

For me, this was a year of small projects. They were the best fit for this season of my life. But the neat thing is that small projects do add up to finishes, bit-by-bit. 

1. Placemats I made these all year long going according to Angela's Rainbow Scrap Challenge colors at SoScrappy. I will be donating them to Meals on Wheels during a spring collection. I used mostly leftover strings as well as other scraps (and an orphan block), pieced batting, and pieced backings or small bits from my stash. Perfect project for limited time, with the satisfaction of a finish. Most (or maybe all?) were quilt-as-you-go. If you'd like to read more about them, click on the "placemats RSC22" label on the right sidebar.


2.Throw Quilts I did finish three biggish quilts. All were long term scrap projects, so the bulk of the work was done last year. Two were Confetti quilts from the pattern by Rachel Hauser of Stitched in Color and the other was a Year of Scrappy Triangles, a pattern by Leila Gardunia. If you want to see more, there are labels with both names to click on the right sidebar.


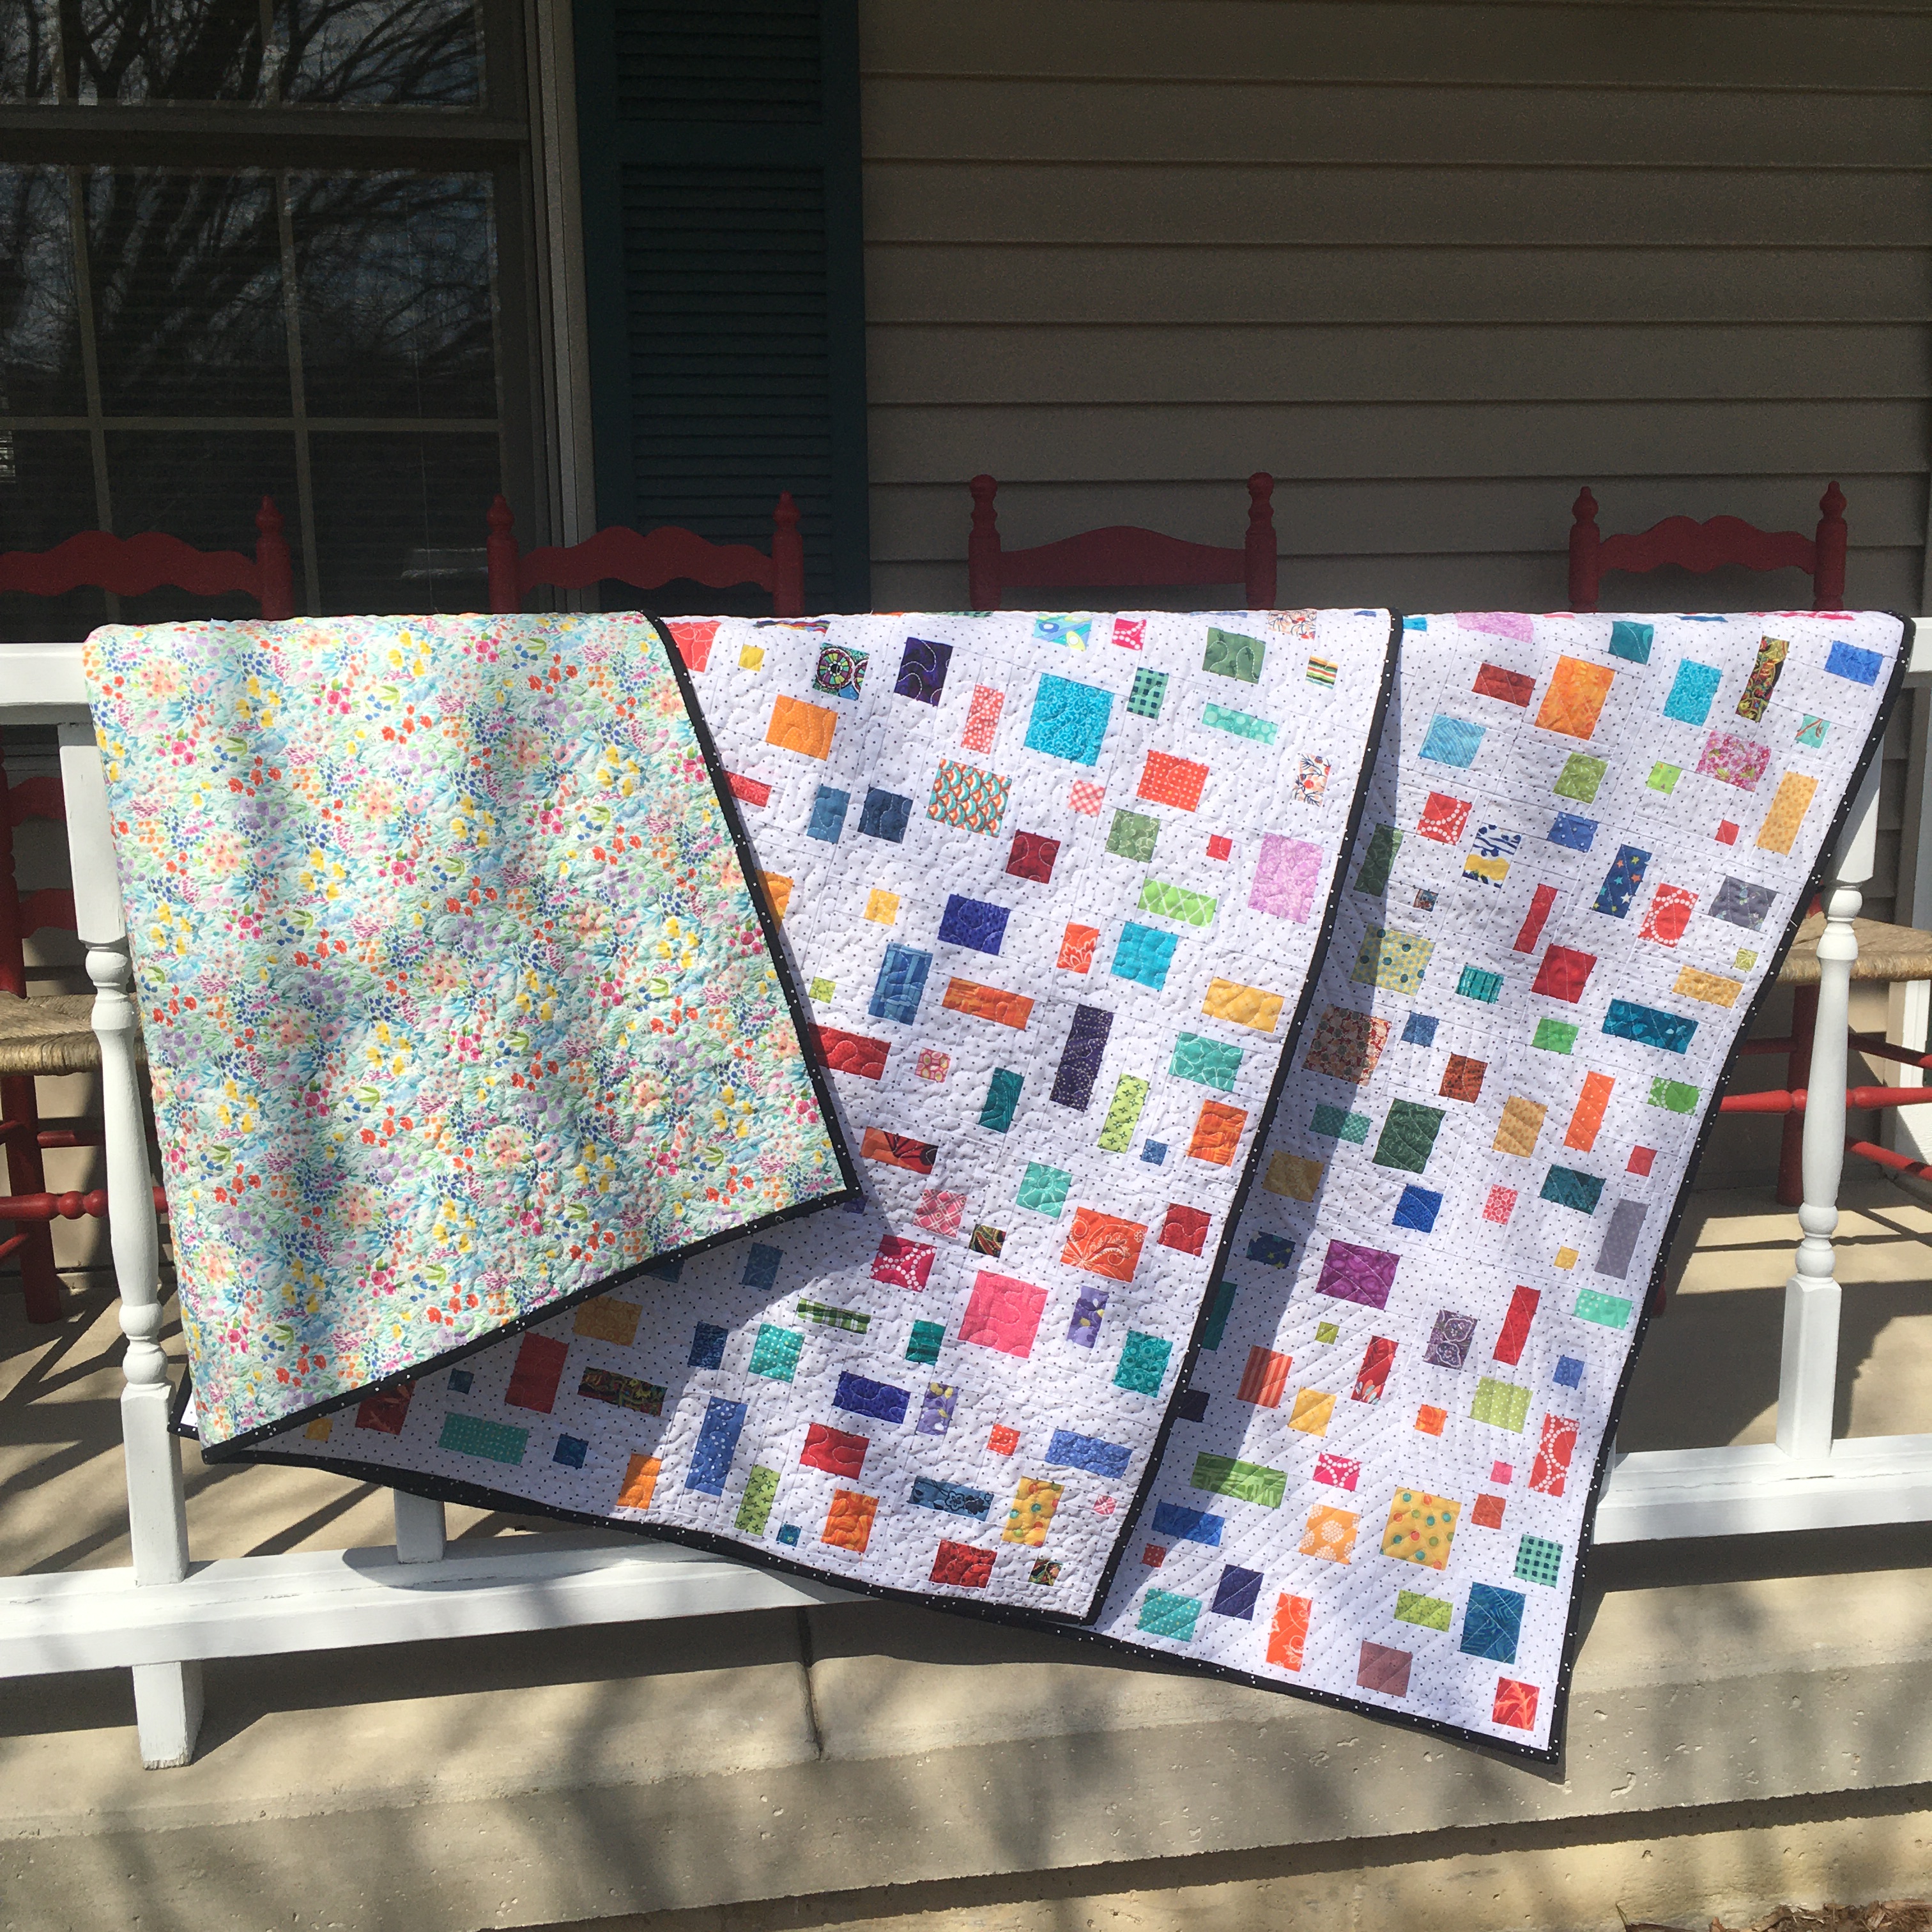
I donated these to Margaret's Hope Chest for the Mother and Baby Program (for mothers experiencing postpartum depression and other perinatal distress).

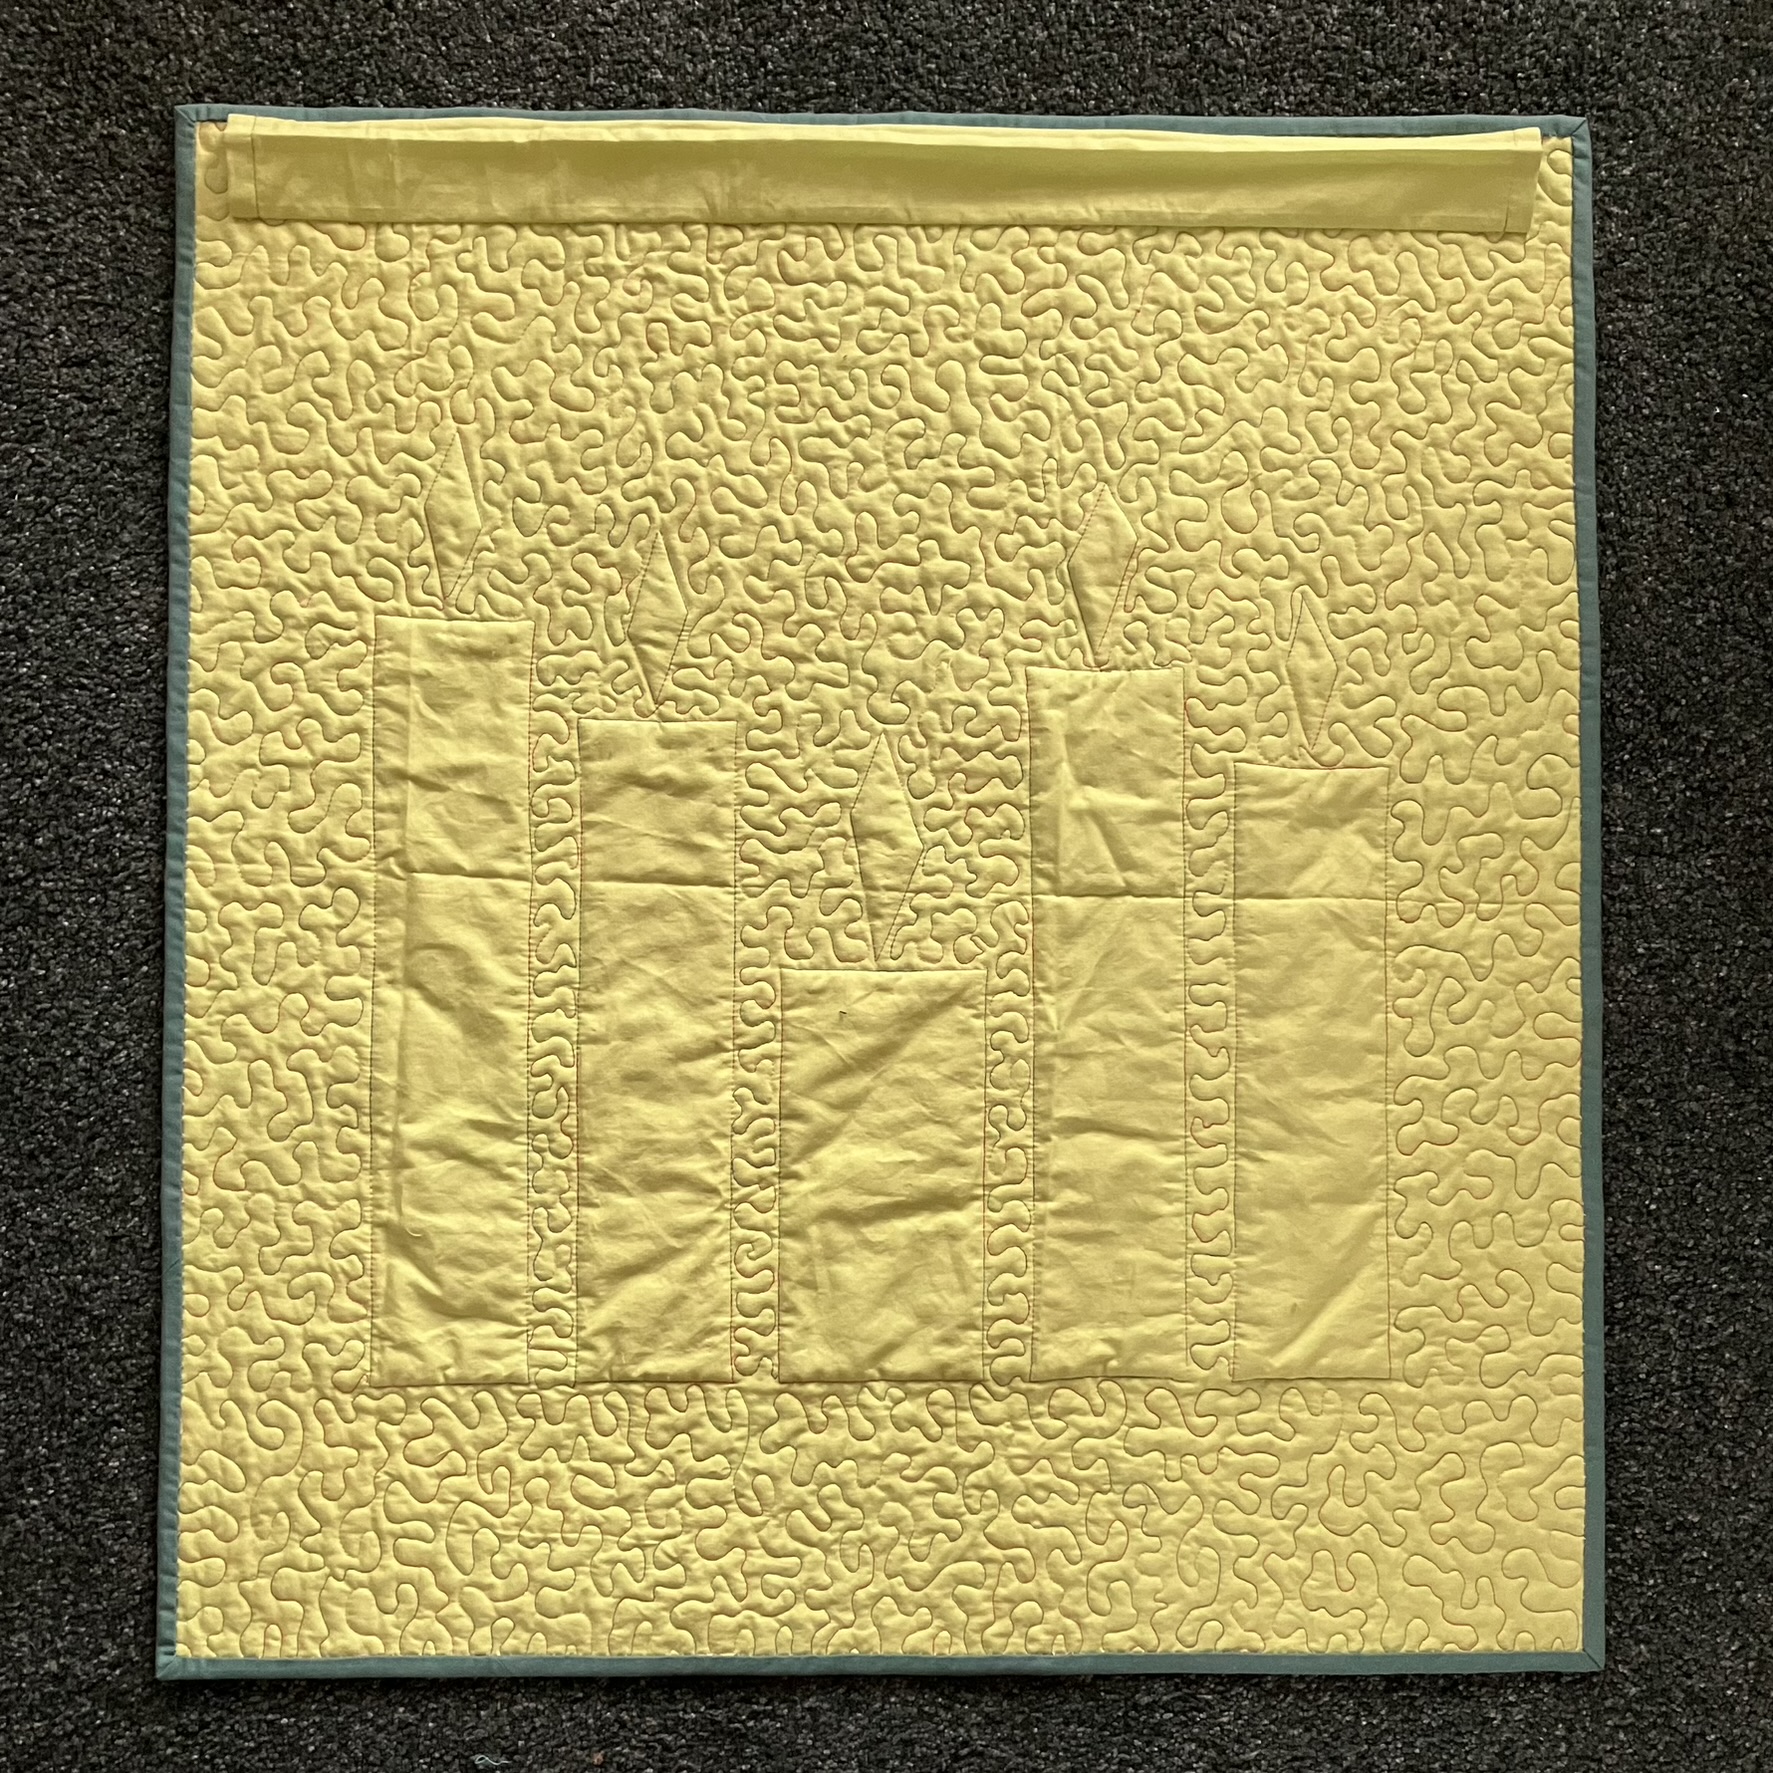
3. Wall Quilts Both of these projects were squirrels. You know, those projects you just suddenly have to make, so you get right to work and keep going until you are done no matter what else you've been working on. The first was an attempt to quilt through my feelings over the plight of Ukraine, and to send a message to the world--or at least my neighborhood--in support. It was my front door quilt for much of the year. You can read more about this quilt, which was more of an obsession than a squirrel, here.


The other was my most recent quilt, made while I was decorating my living room for Christmas. You can read more about Advent Candles here

4. Other Quilting Projects I got a new phone this year, just a smidge bigger than my old one, so it needed a new sleeve, just a smidge bigger than the old one. You can read about it here.

I also transformed a queen sized quilt into two bunk quilts. A unique way to recycle, repurpose, reuse. You can read how I did that here.


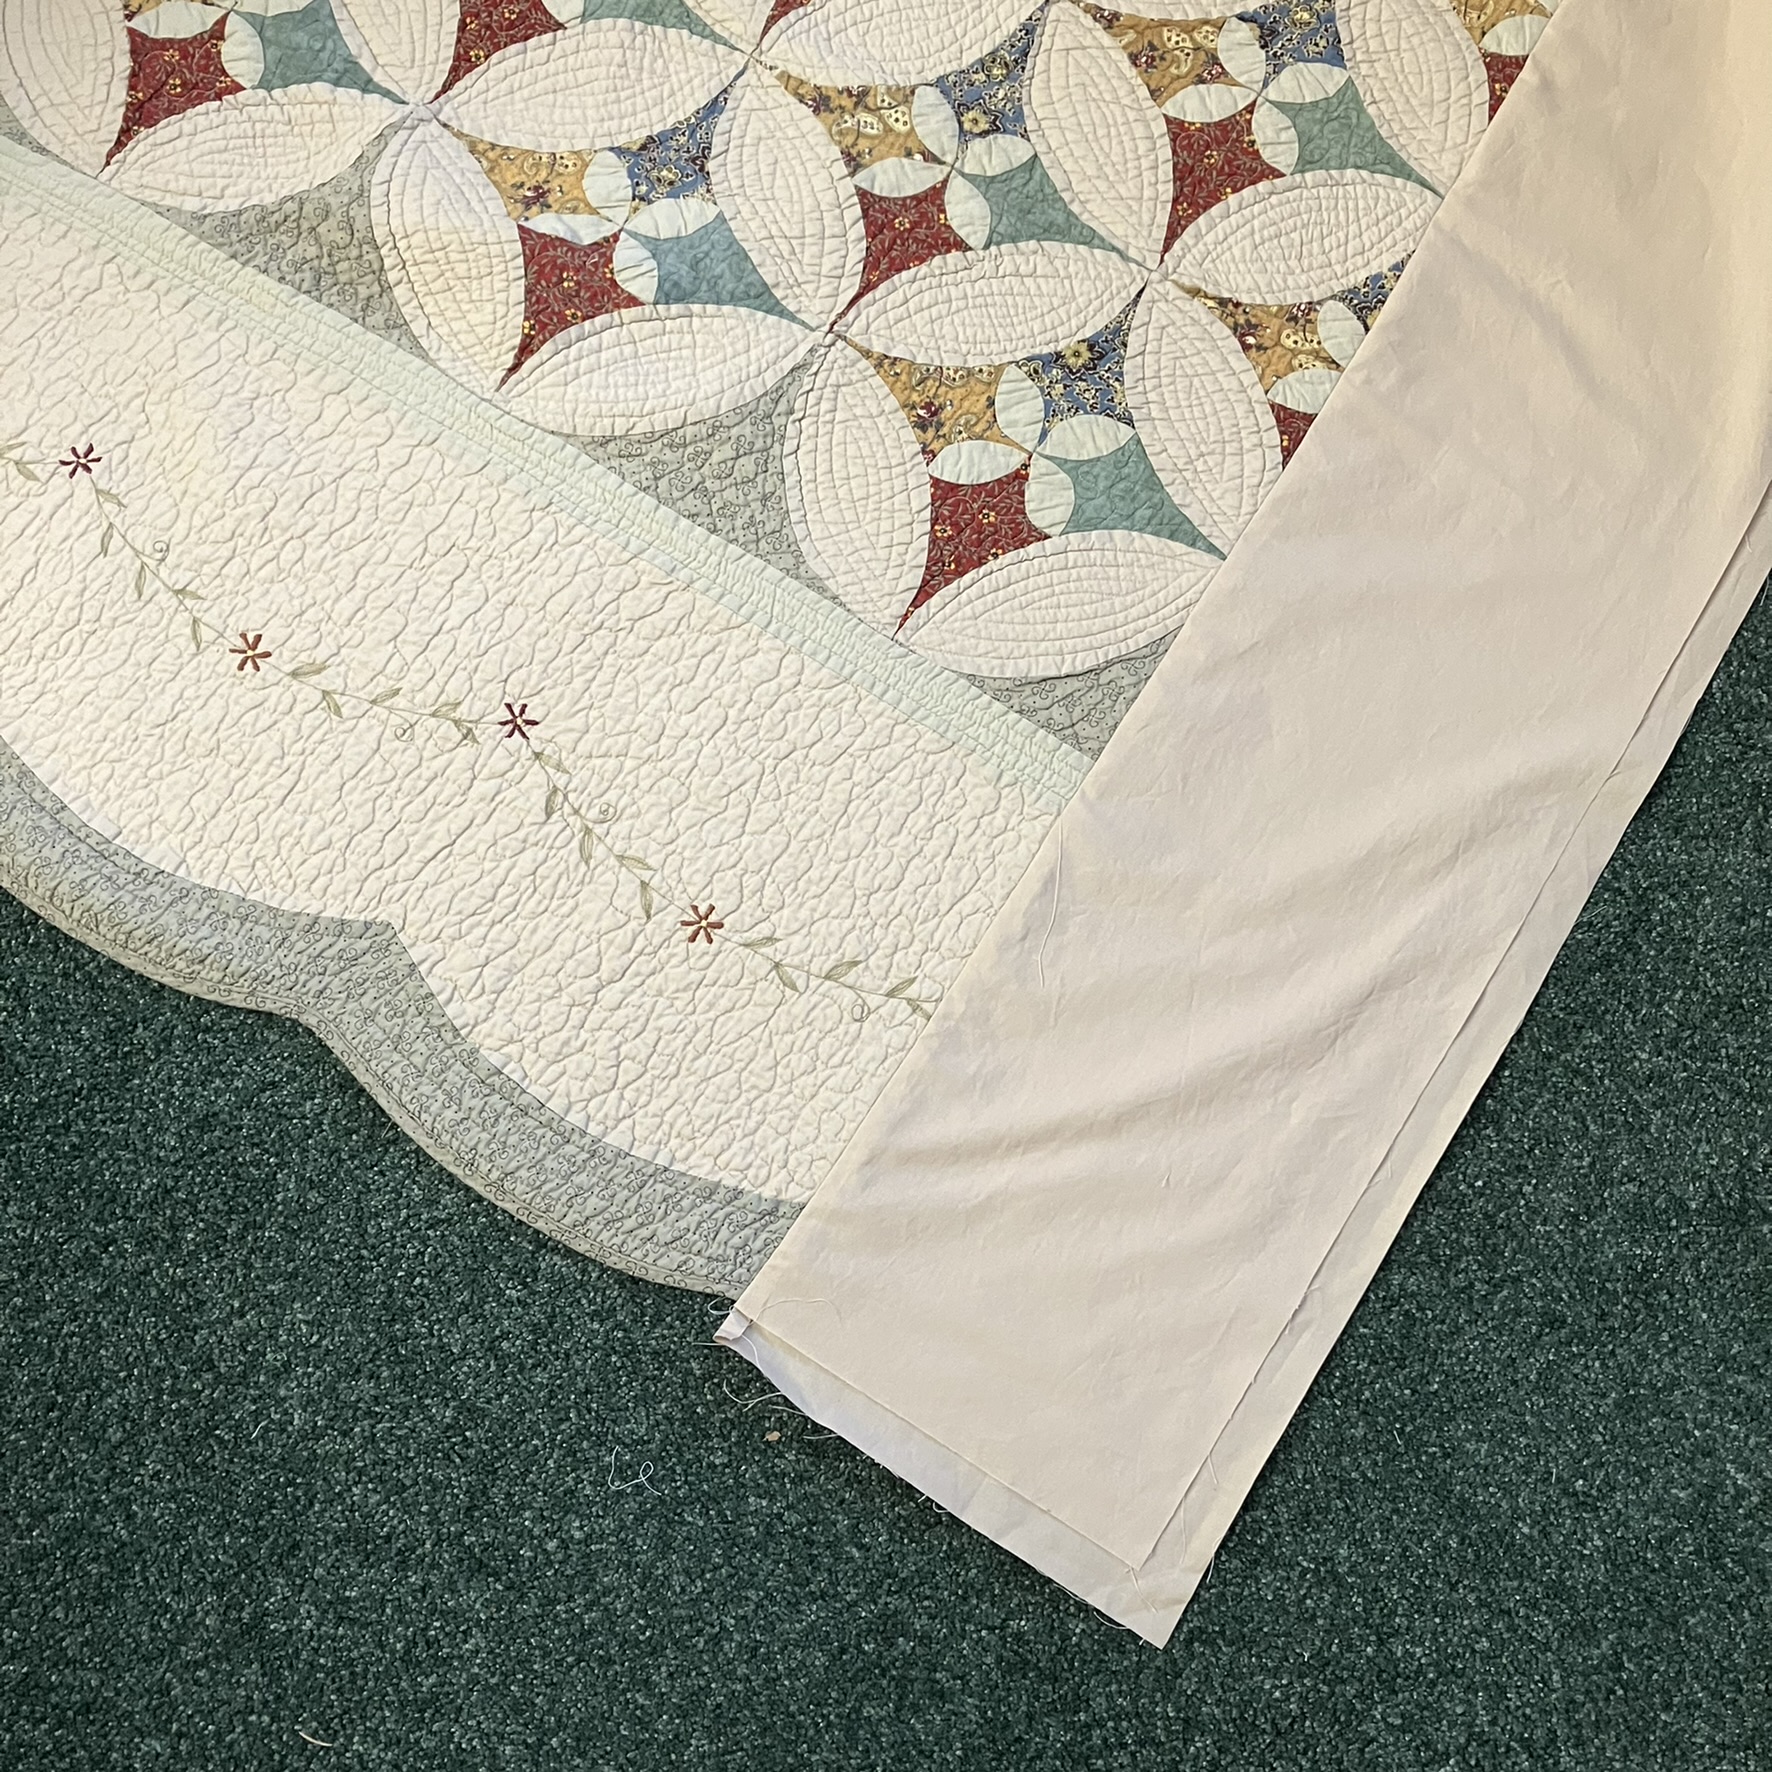
5. A top This was supposed to be a finished quilt, but got squirreled by the Advent Candles quilt. It is basted and ready to quilt, and there are a few days left in the year, so maybe an almost finish? I picture myself hand sewing the binding on New Year's Day. No link yet, but hopefully a post soon.


There are several other projects in progress that I hope to finish this coming year including my Bear Paws quilt and the adding machine tape project. Oh, and there's that four-patch hand piecing quilt that gets pulled out from time to time. But first, I have a baby quilt to make! In fact, I've already ordered (and received!) my fabric this week after spending way too much fun time figuring out a pattern and the colors. Since babies don't wait until other projects are done, guess which project will get priority? 

I hope you've enjoyed another year of quilt making and that the new year will bring you more inspiration, relaxation, and opportunities to brighten someone else's world with your creativity in color and cloth. 

I'm linking up with Cheryl's Best of 2022 Linky Party, with thanks to her for hosting every year.


(Just a reminder: I'm not affiliated with any company, so when I mention products, services, or stores I'm just documenting what I used or liked.) 


Friday, December 16, 2022

Advent Candles

It started out as a normal day. I had been hanging holiday decorations and had just taken down the autumn leaf quilt in my living room. I was planning to hang my winter quilt, but suddenly got distracted by a December-sized squirrel (yeah, they are big and chunky). I just had to have a holiday quilt.  Something that blended with my living room and didn't call too much attention to itself. And it had to be simple and fast. Hmmm. What about candles? And I was off and running to my fabric drawers and bins. Everything else stopped. My mind raced through possibilities. Prints? Grunge? And then I had it. Advent candles. Simple design, colors that are in my living room year round, solids. And in just a few days, I had a new wall hanging. 


Well, you know me. I can't stop there. So if you want to see how I made it and some close ups and how it looks in the room, keep reading. 

I started by drawing a plan on graph paper. My plan was to make it the same width as the autumn quilt I had just taken down so I wouldn't have to rehang the Command hooks to hold it on the wall. 


I labeled the order of piecing and listed the sizes of pieces. (Check marks were added as I sewed each part. I planned to paper foundation piece the flames and drew the patterns on separate pages, varying the way I did them to keep the flames from looking too much alike. 


I had fabric scraps in all the colors I needed, but the background green was only 23 1/2 by 37 1/2 inches with a few ragged inches more at one end. I made a graph paper drawing of that fabric and carefully planned out how to cut all of the green pieces I needed except the parts for the foundation backgrounds of the flames. They all fit with some irregular leftovers for the flame blocks. After cutting out the main green parts, I realized that I was literally cutting it very close to get the rest of the pieces I needed. And you know how foundation piecing can eat up fabric. So I ended up making templates for each piece rough cutting a bit extra to each for seam allowance. Then I laid them all out on the green leftovers to see how they'd fit. So much for simple, huh?  This game of fabric chicken really had me sweating it. 

But I won!! It's a good thing that solid fabric doesn't have a right side, because I really had to play with each template to get them all to fit. What you see here is every last bit of the green fabric. After spending all that time cutting out templates, I decided I might as well do no-tear paper foundation piecing. I traced my patterns on newsprint, not freezer paper, but since the blocks were simple that was no big deal. (I did trace them in reverse of my original drawings because I wanted the flames to point the same way as my drawings.) I'm no good with a glue stick so to attach the yellow flames to the pattern I did a few quick large stitches, and then sewed everything the usual way for no-tear foundation piecing. Piecing the flame blocks took the longest and then the rest of the quilt top came together in less than an hour. 

I pieced together three long strips of waste batting and found a garish piece of yellow-green (I think it's Kona Cactus) in my bins. I had bought it for a quilt a few years ago and then it didn't work. It is also the backing of a coleus quilt I hang in the summer, so it is getting good use anyway. 


This fabric is about as close to sunlight we've seen in days! When I pieced the quilt I pressed every seam under the candles and flames to try to bring them out. Then I stipple quilted only in the background. The candles look a bit wrinkled here, but that's just the harsh lighting. I had thought of quilting with tan or off white but didn't care for either. It turned out that I had a good amount of variegated thread from my last quilt, and--I kid you not--the colors are pink, blue yellow and green. Perfect. The quilt still looks simple until you are right up close to the front.


(I forgot to sign while I was quilting, so I embroidered my initials and the date afterwards. I wish I had used two instead of three strands of thread.)

The back is a little more wild and festive. 


I used a scrap of grayish green for the binding. I didn't want anything that stood out too much, and of course, didn't have any of the other green to work with. 

Here's a close-up of a flame. 


Here's how the quilt looks with the too-bright LED lamp nearby. At least you can see the texture here, but I rarely use that lamp. The light's much too strong to suit me. 


I've waited more than a week for bright daylight in the living room to get a last photo, but I'm giving up. We have had 30 seconds of sunlight. No, I'm not kidding! So this is the best I could get, and I know there are weird shadows, but this is the quilt above my sewing table. Look how the candles echo the vases. You'd think I had planned this all out ahead of time instead of chasing a squirrel.

The Stats:

Pattern: My own

Size: 28 1/2 by 31 1/2 inches (I added 1/2 extra inch to the narrow side of the bottom strip) before quilting. 28 by 31 1/2 after quilting. Not washed.

Fabrics: Scraps, mostly Kona

Batting: Hobbs 80/20

Thread: Superior Masterpiece in Granite for piecing; Coats and Clark quilting cotton in Gumballs for quilting and machine part of binding; Superior Treasure in Antique for hand binding.

Machines: Singer Featherweight for piecing; Singer 115 Treadle for quilting and binding.


I'm linking this up with Cynthia at Quilting is more fun than Housework for Oh Scrap because this is leftovers all the way. And at the end of the month, with Sandra at mmmquilts for DrEAMi (Drop Everything and Make it) because squirrel!

I hope you are enjoying the holidays and that maybe you have a little sun now and then. 

(Just a reminder: I'm not affiliated with any company, so when I mention products, services, or stores I'm just documenting what I used or liked.) 


Saturday, November 26, 2022

Bunk Quilts

Squirrel!! Yes, I know I have two quilts to finish up if you read my last post, but something else distracted me this month. Here's the back story: We recently ordered a bunk bed set to keep our grandkids a bit more comfortable when they come to visit.  After we put the beds together, I started thinking about what to do for bedding. The twin bed that the bunk beds replaced had a rather inexpensive store-bought quilt, an odd square size meant for a queen bed. On the twin bed it had draped down to the floor with the excess stuffed against the wall out of sight.  Even though I'm not fond of store-bought quilts for several reasons, I do like the pattern and quilt design on this one. It's a bit skimpy for a queen bed, though, and wouldn't work in our other guest room. So, what to do? It seemed wasteful to make two new quilts and send this one to the back of a closet (although I could have donated it). Well, why not cut it in half and add a bit to each piece to make them big enough? So I did...

So that's it. That's my squirrel. Unless you'd like to see how I did it. (Well there is another squirrel at the end of the post, but first things first.

So, first, I found one of my Kona fabric swatches that was a pretty good match, and my big box fabric store had it in stock and substantially on sale.Yay! Well, I guess Khaki is a pretty commonly stocked fabric. I bought about 1/2 yard more than length of the quilt, pre-washed it, and sliced it lengthwise down the middle. With a bit of measuring, I figured that I could make a border along one side of each half-quilt about 9 inches wide. From each strip, I cut a border 9 1/2 inches wide (border width plus 1/2 inch seam allowance) and 10 5/8 inches wide (border backing width plus 1 1/8 inches allowance for fold-over binding plus 1/2 inch seam allowance). I made sure that I also added the binding allowance to each end of the border backing fabric. Sorry, no photos of the cutting. I was just making it up as I went to make the most efficient use of fabric, but I think you'll see from the next pictures what this looked like. 

To attach the borders, I first pinned the backing to the raw edge of the back of the quilt, extending it over the ends by 1 1/8 inches. (I pinned from the front here, which wasn't necessary.)


Then I pinned the border front to the right side, sandwiching the quilt edge and aligning the border with the ends of the quilt.

Pardon the shadow of my camera. I was working under strong LED light in my basement.

I sewed a 1/2 inch seam along the quilt edge. Here you can see the two border parts after sewing with the border backing pulled out away from the quilt.


And with the borders right sides together. You can see the extra fabric showing on the backing.


I drew a line on the backing to show the extra fabric. Then I cut batting the same size as the front border and carefully laid it out on the wrong side of the border backing overlapping the seam allowance. I had initially thought of laying it up to the seam allowance, but this seemed to ensure a neater transition from the quilt to the added border. My batting is pieced, as I was using leftover bits from other quilt projects.
Corner pulled back to show the line on the backing.

I basted the batting in place to keep it from shifting over the edge.


After that it became a typical quilting project. I pin basted, then quilted a straight line a generous quarter inch from the main seam (with walking foot) and then free motion meanders similar to the ones in the border of the original quilt. I forgot to photograph the binding process. I folded the border backing toward the front all the way to the seam line (behind the seam allowance) and then folded it again to form the binding on the front. I could have machine sewed it down, but I love to relax and hand sew a binding, so that was what I did. Mitering the corners was a bit fiddly with those layers, but it worked.  


So here are the finished quilts, as much as I can show on my living room floor. They look different sizes here, but they are exactly the same size.

I know they are a little strange. I admit that for a second at the beginning, I considered trying to match the border to the original quilt, scalloping it and even doing some embroidery. Luckily, because this was a squirrel project, I quickly came to my senses. Because the whole point of this addition is to make sure the quilt is wide enough to be comfortable to the person under it. When the bed is made it's tucked down on the side of the bed against the wall and no one will ever see it. So no need for a fancy finish. I'll be interested to see how the quilts look after washing, when the meanders crinkle up a bit to match the rest of the quilts, but I don't plan to wash them until they've had some use.

Here's a close up of the quilting and transition. You can see that there is real applique and hand-guided quilting on the original quilt, which is why I like it, although someone was probably paid pitiful wages to do this. (Come to think of it, that is always the quilter's lot, isn't it?)


And one last one of the beds ready for the kiddies. By the time you read this they will have been slept in. 


If you think I was done with squirrels after this, you would be wrong. I won't bore you with the details, but this bedding project also included cutting and hemming a huge thermal blanket (it must have been meant for a king size bed--which we have never had-- and it was always drooping off our queen sized one), to make two bunk blankets, and reworking an old contour twin sheet (truly Frankenstyle, adding material to the corners and then recontouring them) for one of the bunks. It had shrunk so that it was somehow too tight for even a bunk mattress. Recycle, Repurpose, Reuse!!!

And...one more little project I have to show you because it's soooo cute! And fun! I was making my usual Christmas ornaments for the kiddies' stockings the other day (inspired by their Halloween costumes), and suddenly had the urge to make just one more. I had seen this fabric origami star by zencrafting and just had to Drop Everything and Make it. It was such fun, and only took a few minutes. It's made with a freezer paper lining which keeps it nice and crisp. Since vintage fabric designs seem to be trending now, all I had to do was look through my drawers of fabric, which have become vintage without even trying. I used 4-inch squares for my ornament parts as 5 inches seemed a bit larger than I wanted. A quick look through my button jar yielded just the right buttons to finish it off. This ornament will top off a holiday gift. Now I might have to make one for myself. Ooh, was that another squirrel calling?

Front (convex side)

Back (concave side)

I'm linking up with Sandra at mmmquilts for DrEAMi (Drop Everything And Make it) because that is all I've been doing this month. I hope you are having fun preparing for whatever holidays you celebrate at this time of year. Next time you read this, I just might have gotten back to the sewing I was planning to do.

(Just a reminder: I'm not affiliated with any company, so when I mention products, services, or stores I'm just documenting what I used or liked.) 


Saturday, November 5, 2022

Blues, Greens and Soul Restoration

Hello. It's been awhile. My sewing and blogging this year have been scattered--a little at a time, just enough to keep going as family matters have been a priority. My dad began hospice care in March, and left this life at the very end of August at the age of 98 years, 8 months. We are so thankful to have had him in our lives for so many years--all of them with incredible mental sharpness, curiosity, and good humor, even in his last days when he was heavily medicated for pain. Dad lived independently until his last three months when he decided to move from his condo to assisted living, so you can kind of imagine the practical things that needed to be taken care of during the summer to sort and dispose of belongings, save mementos and sell the condo. But everything went well, and we were able to spend lots of time just enjoying each other. Our memories of those last months with Dad are sweet.

It has been strange in a way to live without concerns for Dad's health and to find a new rhythm of life this autumn. Shortly after Dad's funeral (an outdoor service at his request on a spectacular day), we found a last-minute cottage booking for a week-long vacation on the shore of Lake Michigan. And in the last few weeks, we've taken some hikes and have spent more time with our kids and grands during little breaks from school. So I'm taking my time getting back to sewing projects, and that's okay. We've had a glorious autumn, with long-lasting brighter-than-usual color. (I hope that isn't really a harbinger of more serious climate concerns.) There will be time enough for more sewing when winter sets in. 

Meanwhile, I do have some bits of sewing to share, as quilting has remained a relaxing and therapeutic activity during this season of my life. I have caught up on my RSC color sewing for September and October--light blues and yellow-greens. I made one quilt-as-you-go placemat each in blue and green, and then after making my adding machine strips, I still had enough green to make one more placemat. The strips were a bit wider (probably some were binding bits), so it went fast. I also used large scraps for the backs as well as frankenbatting, which greatly reduced my scrap collections. These photos show fronts and backs. All of the placemats are 14 by 18 inches and will go into my Meals on Wheels pillowcase for donation next spring.


In all, I made about 10 1/2 feet of light blue adding machine tape strips and a little over 23 feet of yellow green. I have only a handful of green scraps left, and a little more blue than that, but not enough to bother me. I've always had way too much blue fabric, so I knew that would be the case. Here are the strips with all the other ones I made this year--around 172 feet altogether.

I think this will be it for RSC adding machine tape for now. I still have most of one of the rolls of tape, so eventually another project will pop up. I've been thinking of maybe making these strips into grocery tote bags. During the pandemic, we were not allowed to use our own bags at the grocery store. Lately, we've been using kraft paper bags and recycling them--I really don't want to add to the plastics problem. But now that it's okay to use our own bags again, I'd really like to have washable totes. Our old totes weren't washable, and I sort of shudder to think of how gross they might be. 

I did not make more Bear Paw blocks in the blue and green families for RSC as I decided I had plenty of blocks for a quilt. I want to play up the black and white a bit, so I ordered some black and white 1/4 inch striped fabric which will become part of the some sashing as well as binding. 

I think I might discontinue my RSC projects in the new year after I complete the current ones. I'm a bit tired of stretching a project out for a whole year--and besides, my scrap bins are pretty depleted by now. I do have some bins that still need attention. There are lots of multi-color scraps yet as well as a bin of neutrals (white, black, brown, gray) and a bin of solid color scraps. I'll still be working with them, but on my own time frame. Maybe it's my age? Maybe it's dealing with my Dad's stuff? But I feel the need to move things along more quickly. 

So let's see, what else? I did finish a quilt top over the last couple of months, and while we were on vacation, I discovered that a quilt store I used to order from online had a brick-and-mortar store near where we were staying. I decided that I would visit that store to buy the backing fabric I needed for that quilt. We happened to have a couple hours of rain one afternoon, so it was the perfect time to make that little visit. I found just the right fabric, and there was just enough on the bolt. Yay!! I also found a couple of fat quarter sale pieces. Hmmmm. They would have worked in that quilt, too. Here's everything stacked up. You'll have to wait to see the whole quilt a little longer. It's basted, but with guests here off and on, I've put off quilting it.


One other thing I've been working on off and on is my handsewn car quilt top. I've been sewing the four-patches I made into 16-patches. I took this project on vacation to sew in the evenings.


So, that's it for the past two months. I'll leave you with (more than) a few photos from our vacation and our autumn hikes during October. Being by the lake and walking among colorful trees has been real soul restoration. 

Along Lake Michigan...

Muskegon lighthouse

On the beach by our cottage

Bike ride along Muskegon Lake

Cottage beach

Duck Lake State Park

Hoffmaster State Park (When we took childbirth classes years ago, and I had to visualize a calming scene, this was always the one.)

Cottage bluff

Postcard view from our living room

And closer to home...

Esker Landing (near our neighborhood--I've never seen this much color there before,)

Lake Lansing Park North

Lake Lansing Park North

Lake Lansing Park North

The Ledges in Grand Ledge

View from the Ledges

I'm linking this with Angela at So Scrappy for ScrapHappy Saturday and with Cynthia at Quilting is more fun than Housework for Oh Scrap

I hope you've had beautiful Autumn/Spring weather wherever you are, and that quilting is an enjoyment for you through all the seasons of life.