Wednesday, June 28, 2023

Positivity Blooms

 Just one quick photo today. Here’s my progress on the QAL going on with Preeti at Sew Preeti Quilts and Bernie at Needle and Foot

If you know these women, you know they encourage us to make quilts to donate to special causes. This started as a collection for the Palliative Care Unit of Mercy Hospital in Sacramento, California, and for the last few years Preeti has designed a pattern and Bernie has done the promotion and link ups for the QAL. Quilters may also choose a different organization to donate to if they wish. You can read more about the QAL and collection on either of their websites. 

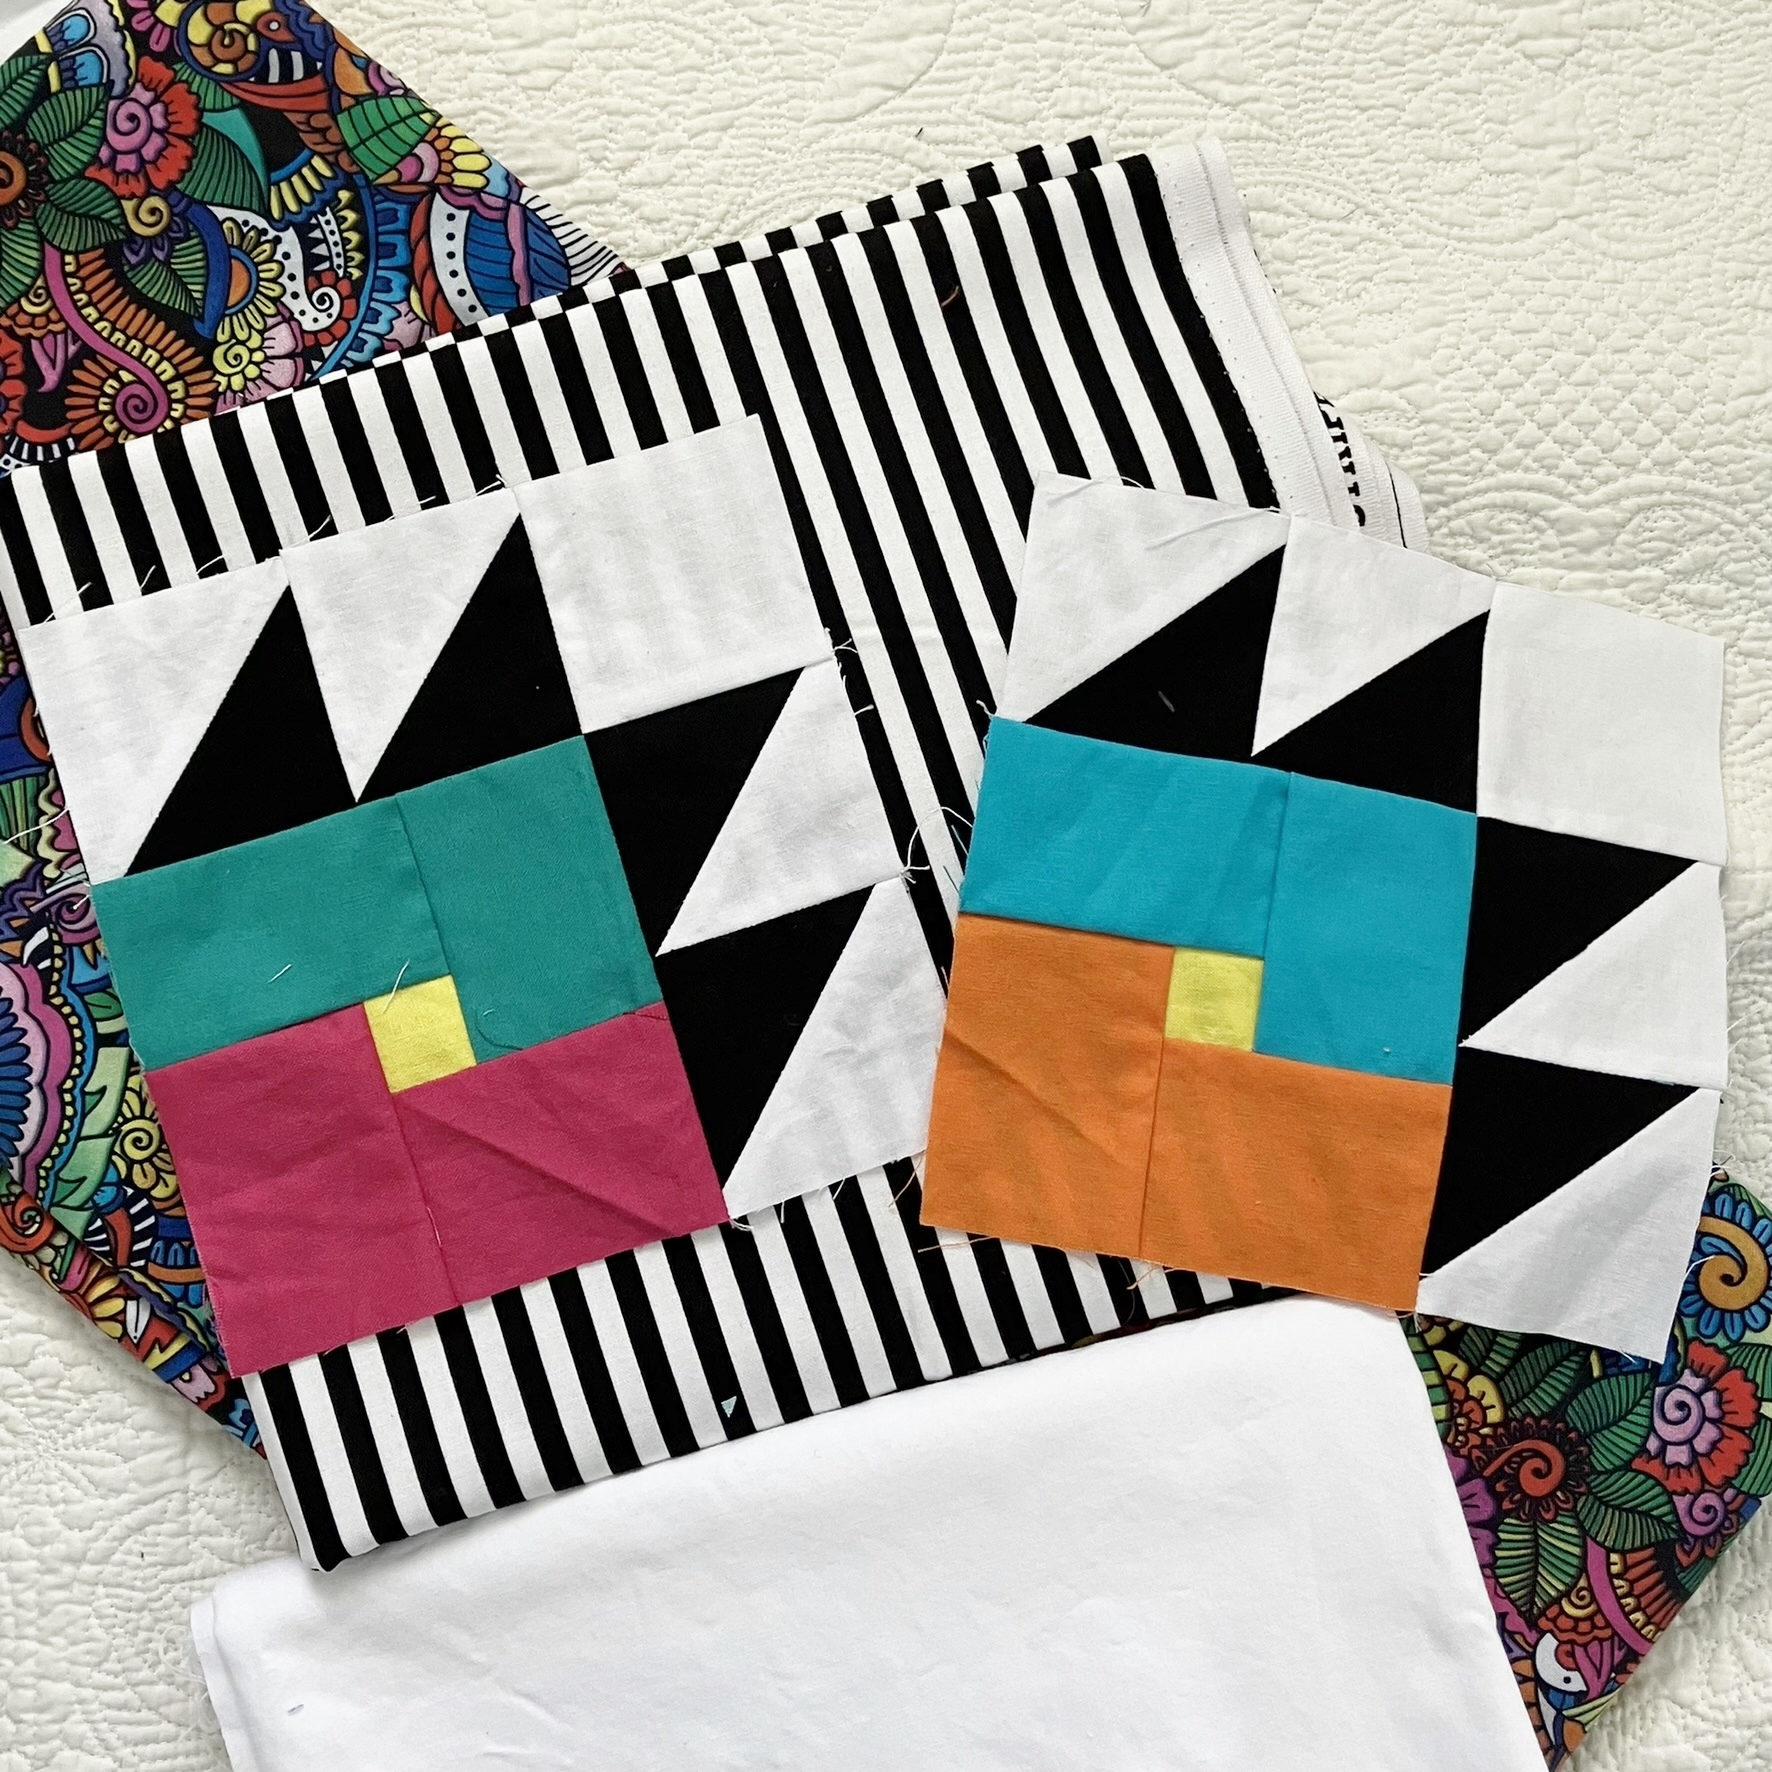
I’ve started my quilt just a bit late, but as we are having really bad air quality this week from wildfires in our neighbor to the north, I’m making good progress staying indoors and sewing. My quilt will be a bit smaller for a donation to an organization closer to home. I’ve also revised the sewing technique to suit my own style (foundation piecing) but I love the design. There is a choice of just leaves (Positivity Grows) or leaves and flowers (Positivity Blooms--the one I'm making) and even a bonus quilt if you make the quilt following Preeti's technique. 

My leaves are all done. Today I’ll make the stems and sew the blocks together. Maybe even the flowers—it’s that easy! In a later post during the QAL I’ll share how I made my blocks. Right now I need to get back to sewing. 

In the meantime, check out these links to learn more:

Merciful Quilts tab and the link-up for quilt progress this week at Needle and Foot.

The tab at Sew Preeti Quilts for the schedule of the QAL (it goes on most of the summer for nice, easy sewing), sponsors, and instructions, and Preeti's design and quilts here and here

Have fun sewing this week and I hope you can breathe easy!

(Just a reminder: I'm not affiliated with any company, so when I mention products, services, or stores I'm just documenting what I used or liked.) 

Friday, June 23, 2023

Rainbow Bear Paws

 This quilt has been a long time coming. 


It all started with a block I made during the Quilter's Color Quest workshop led by Rachel Hauser during the pandemic in 2020 (that seems SO long ago) following her Quilter's Field Guide to Color book. 

At the time I didn't have a clear plan for the block. It was supposed to be inspired by a personal story. (You can read about it here.) I knew I wanted to make more of this style block eventually. 

During 2022, I made lots more blocks following the colors of the Rainbow Scrap Challenge hosted by Angela at SoScrappy. I chose yellow for the centers and each month paired the designated color with a variety of other colors from my rainbow solids bin. I bought some Kona cotton in white for the backgrounds. Then I discovered that I had actually made the original block with Kona Snow, so I had to do a little surgery to replace it. By the end of the year, I had enough blocks for a quilt and knew I wanted to use a black and white stripe in some way with more solid white to make a quilt. I already had a fun retro 60s/70s print for the backing that I had bought in February 2021 as an option for another Bear Paw quilt. I chose a 1/4 inch stripe to make sashing strips 1 1/4 inch wide. 


I put the blocks up on my design wall pretty randomly. I may have made a couple of changes after taking this photo, but it's about how the layout ended up. 


Then I cut about 24 sashing strips 6 1/2 inches by 1 3/4 inches (to finish at 6 by 1 1/4) and sprinkled them around here and there. A "rule" I set for myself was to not place any striped fabric at the outer edge because I wanted a white border with a striped binding. I ended up using 22 of the strips. I didn't want to go crazy with the stripes and detract from the blocks. This seemed like the right amount. 


To plan the rest of the sashings I drew the quilt blocks out on graph paper.


After making the drawing, I decided I wanted the outer sashings to be a little wider for the border. (I avoid long pieces for borders when I can. I prefer to incorporate them into the blocks.) I drew a rectangle around the interior blocks and then marked out the sashes for those: 6 1/2 by 1 3/4 inches (to finish at 6 by 1 1/4 inches) and 7 3/4 by 1 3/4 inches (to finish at 7 1/4 by 1 1/4 inches). I needed to resize some of the sashes on the edges making them extra long, extra wide or both. Some were cut 8 3/4 by 2 1/2 inches, some 8 3/4 by 1 3/4 inches, some 7 3/4 by 2 1/2 inches and some 6 1/2 by 2 1/2 inches. It sounds complicated but I just calculated them from my drawing and scribbled the sizes and how many I needed along the edge of the page. This is truly my kind of improv (hard to explain): precise in numbers but plan-as-I-go. Anyway, it all turned out well when I laid it out.


Then it was just a matter of making the blocks, each with two or three sashings around them and sewing all the blocks together. No borders needed.

One little tip I have about cutting the striped fabric: I made sure that my seam lines landed somewhere in the middle of the black stripe so that there was always black at the seam--even if only a smidge--to set it off from the white sashing.


I did a meander for the quilting. There was already so much going on both on the front and the back that it seemed easiest. Then the fun of the striped binding...

I love it against that retro back. 

And just like that it was done and ready for the garage.

I'm always amazed how a pattern appears on the backing from the repeat of a large print. I'm glad I took the time to pattern-match the seam because it would have bothered me if it was off in the photo--even though that would not be noticeable any other time. 

Close up.

Here's the block that started it all...

And my initials and date...

On the driveway...

But we really need some glamour shots. We took a walk to the gardens at our Veteran's park and were surprised at how fast the flowers have come out, even with the pretty awful drought we have going on. (We have some great flower volunteers to make this happen in our township.) So here are some pretties along with the Stats.

Pattern: My own spin on the Bear Paw block, with a little square in the paw made with partial seams, and sashes around it. 

Block size 6 inches finished, and varies in size with the attached 1 1/4 inch finished width of the sashes in the interior and a 2 1/4 inch finished width on the outer edges of the quilt. 

Fabrics Variety of solids (mostly Kona, but some others, including maybe a few solid backsides of some prints), Kona white (background), Stripes by Riley Blake, and retro print fabric from Joann.

Thread Piecing: Superior Masterpiece in Granite; Quilting: Coats and Clark Machine Quilting Cotton Thread in Nugrey; Handsewing on binding: Superior Treasure in Antique.

Quilt size 54 by 61 1/4 inches pieced; 53 1/2 by 60 1/2 quilted; 51 by 57 3/4 washed.

Machines Singer Featherweight for piecing; Singer Treadle 115 for quilting and machine work on binding. 
This quilt will be donated, but I haven't decided where yet. 


I hope you've been tickled by a finish this month. I'm going with quick and easy this summer, so I'm not tied to my machine (unless I want to be). Having said that, it looks like I might be doing at least one (maybe two!) QALs. I'm starting behind on one, but I think it will be easy to catch up. Stay tuned.


(Just a reminder: I'm not affiliated with any company, so when I mention products, services, or stores I'm just documenting what I used or liked.)