Showing posts with label pillow. Show all posts

Wednesday, March 24, 2021

Squirrels and Such

It all started with a little redecorating project I intended to do maybe five years ago. We bought two little vintage ('40s, maybe?) chairs for our living room. They had some more recent, but still old, scratchy upholstery on them which I planned to replace with some vintage-y looking fabric. Which then sat in my closet. For years. I finally got around to recovering the cushions a few weeks ago. 

Old -->New
And that's when a squirrel named Pillows sneaked up on me. I did not see it coming. I had plans to quilt my Blue quilt. But you can't ignore a squirrel. And just like that I was rummaging in my drawers for bits and pieces of leftover fabric from past projects. You know the rest of the story. 

I drew a design on graph paper--I wanted something that might pass for '40s/modern? Who knows? I don't know that much about decorating eras. My fabric told me not to overthink it. Besides, I had to go with the sizes of the pieces. So I just laid them out until they looked right to me and cut rectangles that made the most of each piece.


I already knew I wanted to try matchstickish quilting. I found some yellowish print pieces that kept missing the cut whenever I planned quilts, so I pieced them together for the linings. One took five seams to get enough fabric for the size of a pillow. I took a page from Ann at Fret Not Yourself and did the quilting by following some major seams lines and then subdividing each section in half until the pillow front looked done. I drew some lines with a Hera tool, but eyeballed most of them. They vary a lot, but I like the texture. The batting was leftover scraps.

Finish One

Finish Two

By then, the squirrel's allure was leaving me, so I whipped up quick envelope backs with the remaining pieces. I didn't have enough fabric to keep it simple, so some additional fabric-dictated piecing needed to be done. Still quick, though. I couldn't decide how to overlap them, so my husband in his wisdom to keep me from dithering said, "Do one of each." So I did. The quilts would have looked more professional if I had quilted the backs, too, but they're done and I like them.

Back One

 
Back Two

I popped the old pillows that had been on the chairs before into their new covers and that was that. The best thing? This little pillow decorating upgrade cost $0. And I used up some more fabric and batting scraps. 


I like this little vignette in my living room, with old treasures and sweet memories.


I did get my Rainbow Scrap Challenge (RSC) Year of Scrappy Triangles project done this month. All the greens.


Here they are with the blocks from January and February. Still lots of crazy going on. I suspect the look will change some as I add colors--but I bet it won't calm down at all.


And I did order some new fabric in the month's color for my ongoing "Spark up the Stash" project. Third time this year from Lark Cottons.


Oh, and there was one other little squirrel this month. I decided to participate in the Instagram Quilt Fest that Amy from Amy's Creative Side put on this month, where we post something every day according to a prompt. I don't usually do these things, but this has been surprisingly enjoyable. I like looking back through old blog posts and photos and thinking about my quilts a little differently. It's also been a wonderful squirrel to get lost in all the posts of other Instagramers.

So that's it for the month. Maybe now I can focus on the Blue quilt?

Have fun with your squirrels and scraps.

I'm linking up at the end of this week with Sandra at mmm quilts for DrEAMi (Drop Everything and Make it), with Angela at So Scrappy for ScrapHappy Saturday and with Cynthia at Quilting is more fun than Housework for Oh Scrap.

(Just a reminder: I'm not affiliated with any company, so when I mention products, services, or stores I'm just documenting what I used or liked.) 

Monday, March 2, 2020

Daycare DrEAMi

"Gramma, did you bring your sewing machine?" It was the first thing my granddaughter asked when we arrived at her house last week to help out with a bit of daycare. But I didn't have my machine. We had taken the train and had packed super light. Turns out, we didn't need it.

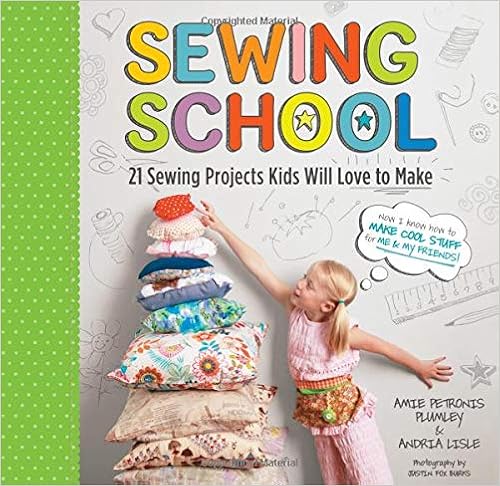
L had checked out this book from the library:
                                     
What a neat book! I'm not affiliated with any company, so when I mention products, services or stores, I'm just telling you what I used or liked, but this book has wonderful, kid-centered projects that are presented so clearly, with minimal required materials and steps. And they are all the kinds of things kids would find useful for themselves or for gifts. Pillows, stuffies, purses and bags, wallets, pin cushions, needle holders, etc.. My granddaughter's favorite part is the quotations from actual kids with their projects.

Anyway, she wanted to make a pillow, and there were directions for hand sewing, so the next evening away we went with her mom for a girls' night out to the big box store for all things sewing related. I recommended using fleece for her project so we wouldn't have to worry about frayed edges. She did a great job (by that, I mean she didn't dither for hours like I would have) of picking out a fleece print she liked from the thousands (or so it seemed) of options. Corgis!! We made a quick stop in the notions department for a pack of chenille needles, a needle threader, and a hank of perle cotton, and then grabbed a bag of filling, and we were done. 

On Friday, while her brother was having squishy-bat-and-ball spring training baseball batting practice in the basement with Grampa, L made her pillow. There are patterns in the book, but L wanted her pillow to be larger than the one included, so she drew an oval pattern on a big piece of paper--folding the paper in quarters first--and cut it out. I helped her cut a section of the middle of the pattern out so she could position it around the corgi she wanted on her pillow. She carefully safety pinned the pattern to the fleece and cut around it. Then she flipped the pattern over and positioned it around a different corgi for the back, and used that as a guide to lay her first pillow piece upside down to cut around for the back. That way there would also be a dog centered on the back. (I wish I had taken more photos.) Here she is cutting the back side of the pillow. I laid my hands on the fleece to keep it from shifting; otherwise, the work was all hers.

Before sewing, she made a "bobbin" to wind her thread. I showed her how based on my experience with using scrap boxboard and then discovered that the directions are in the book. The authors have really thought of everything!! L basted the pillow with safety pins to keep from getting poked while she sewed. The book does a great job with photos to show how to thread a needle, tie a knot and sew a running stitch or a whip stitch. I recommended a running stitch for her first hand sewing experience since we didn't have to worry about fabric fraying. So, in no time at all, L was stitching the pillow together right sides out so the edge of the pillow would be a decorative edge--no turning right-side out needed. Pulling the chenille needle through the fleece was a bit labor intensive, but with encouragement--and a couple of snack incentives for getting halfway and finishing the sewing--she made it all the way around the pillow. 

Then came the stuffing part, feeling it for cushy-ness, and sewing the last bit of the edge closed. And here is the proud owner with her new pillow. The front:

And the back:
This was a quick project that could be completed in a morning. So satisfying. And L was able to do it herself with just a bit of guidance and support with the end knots. She has enough fleece left for some other projects, so maybe a stuffie or two will join her pillow. 

Although this is not a quilty post, this was a DrEAMi (Drop Everything And Make it) of the best kind because, you know, sewing and grandkiddie. It can't get better than that! So I'm linking up with Sandra of mmm! quilts for the DrEAMi link party. (Our train was late getting home on Saturday night, and yesterday I was tired, so this is late linking up, too.)

You might have noticed I have been absent from the blog this year until today. We were sick the entire month of January with post holiday viruses, and until recently I had no energy to do any sewing or much of anything else. I didn't even get anything made for RSC, and I've not kept up with other people's blogs. I'm back sewing again now, but my current project is one I can't share quite yet, and it's taking me longer than expected. Hopefully, I'll get in the groove again with other projects, but until then, blogging may be spotty. I do have a lot of quilty blogs to catch up on. I did catch one the other day and was saddened to discover that Paula B had passed away a few weeks ago. She was such a sweet quilter and blogger. I enjoyed reading about her projects and donations, and receiving her insights and encouraging comments. It looks like there's going to be a special blog hop to celebrate her legacy. To learn more, go over to Janice's blog here.

Okay, time to link this up. I hope you are having a good quilty week.

Friday, May 11, 2018

L's Sewing Lesson

We spent last week at my daughter and son-in-law's home doing daycare for the Grands (mostly our grandson--our granddaughter was in school most of the day) while their usual provider was on vacation. So much fun!! Also, sew much fun!! I had recently made a quilt for my daughter and son-in-law to top their bed quilt (you can see it here), and there was a lot of fabric left over. So I decided that the week was a perfect opportunity to do some sewing with my granddaughter. I wanted a project that was low stress (after all, we'd be sewing after a busy school day) but still useful. I bought a small pillow form (12 by 16 inches) and packed up the Featherweight, a few sewing notions, and small pieces of batting and foundation fabric for our week. During our grandson's naptime on the first daycare day, I cut some strips and squares from some of the leftover quilt fabric.

Here's what we she made: 

I didn't take pictures of the steps--too busy with the project itself, but I'll tell you what we did.  When it was time to start sewing, I layered a piece of batting and a piece of white fabric a little larger than the pillow form and put the gray sloth print on top, smoothing them out (no pins). Then L chose strips one at a time to sew on stitch-and-flip and quilt-as-you-go style. Other than a quick tip about color contrasts and alternating prints with solid looking fabrics, the order of fabrics was up to L. While I pressed the power pedal (to control the speed of the machine), L guided the fabrics under the needle. We used a walking foot to help her feed the fabric smoothly and to put a little more machine between the needle and her fingers. 

We divided up that part of the pillow into two evening sessions. Seams were not always straight, but we agreed that doing our best and having fun was better than perfect. 

QAYG was fun for L, but I also wanted her to have an introduction to sewing patches together. So for the back, she made two nine-patches. During the third session, she laid squares out in the arrangement she wanted for the nine-patches. She had had gymnastics class that evening, so we opted to limit sewing that day. I told her that some of the side patches would end up smaller in the back, so she chose her favorite fabrics for the middle columns that would show the most. During the fourth session, we continued to use the walking foot to sew the blocks together, and L was really impressed by how quickly she was able to sew the seams with chaining. We did use pins to hold fabric in place while sewing double hems in the nine-patches for the envelope closure. L got a kick out of taking them out as she sewed. During the last session I layered the parts of the pillow case and sewed with a long stitch length to join them. After checking that the case was the right size (we didn't worry about perfection with the corners), L went over my stitching with a shorter stitch. 

Here she is with her completed pillow and a smiley face to protect her privacy. She was so proud of herself!

And the back:

Here's how the pillow looks with the bed quilt and Mom and Dad's new throw quilt:


And with the other decorative pillows on the bed. 
This project worked out so well. It was fun to be able to spend some special time with my granddaughter after doing daycare with her brother during the day. Here's what I learned:

--Doing the project in little bits (probably no more than twenty minutes at a time) was just right for a little girl who had been in kindergarten all day and had bits of homework or other activities in the evening. 
--I'm glad I cut the strips and squares before we started the project. L is deliberative, and making too many decisions about fabrics before sewing would have really bogged her down. She did have fun picking out each strip as we sewed and arranging the nine-patches. 
--Using a walking foot worked really well to hold fabric together and keep patches aligned and feeding smoothly without having to use pins.
--Doing more than one kind of sewing technique (QAYG and chain piecing) held L's interest without overwhelming her.
--L learned a beginning lesson about sewing/quilting to give. She was fine with putting the pillow on her parent's bed (although I think she really hopes they will let her borrow it sometime).

I do have to say, L was unimpressed with pillows as decor. She couldn't understand why Mom didn't sleep on the new pillow. Mom said that Dad definitely agrees with her that pillows for decor are pointless. Ha! I'm sure many of us have heard that opinion. 

It remains to be seen whether L will become a sewist or quilter. Doesn't matter. Just doing this project together was enough. And sew much fun. I left the leftover scraps with her. We'll see if they do their magic. I know she will at least use them in her art work. A maker she is!

What kinds of sewing have you done with Grands or other special kids? Do you have any tips to share or other project ideas?


Have a great weekend, no matter who you are sewing with!

Friday, January 2, 2015

New finish for a New Year

One more nursery project. When my granddaughter was born three years ago, I made a little pillow for the rocking chair in her nursery. My daughter used it for back support during many night-time feedings. In recent months my granddaughter has taken it over for her personal pillow, so it's still getting a lot of use. 

The other day my daughter mentioned that she would need to get a new pillow for the rocker for baby number two. Duh. I forgot all about that. So yesterday, I whipped one up with leftover fabric from grandbaby's quilt. I made a pillow form from the fiber of an unused bed pillow, foundation quilted a top to some leftover batting, and made an envelope closing. Such fun!


Looks pretty good on my rocker, doesn't it?
It's a little finish, but it's a new finish for a new year.

Oh, and since my last post about the quilt, I used a Magic Eraser to easily remove the metal smudge marks left by the sewing machine, and I washed it. It turned out nice and crinkly. 

I'm linking up today with Crazy Mom Quilts for Finish It Up Friday and with Confessions of a Fabric Addict for Can I Get a Whoop Whoop.

(Update: I forgot to add (for my own documentation) that the washed quilt now measures 46 by  52 inches, 2 inches shrinkage in each direction from before washing.)