Squirrel!! Yes, I know I have two quilts to finish up if you read my last post, but something else distracted me this month. Here's the back story: We recently ordered a bunk bed set to keep our grandkids a bit more comfortable when they come to visit. After we put the beds together, I started thinking about what to do for bedding. The twin bed that the bunk beds replaced had a rather inexpensive store-bought quilt, an odd square size meant for a queen bed. On the twin bed it had draped down to the floor with the excess stuffed against the wall out of sight. Even though I'm not fond of store-bought quilts for several reasons, I do like the pattern and quilt design on this one. It's a bit skimpy for a queen bed, though, and wouldn't work in our other guest room. So, what to do? It seemed wasteful to make two new quilts and send this one to the back of a closet (although I could have donated it). Well, why not cut it in half and add a bit to each piece to make them big enough? So I did...

So, first, I found one of my Kona fabric swatches that was a pretty good match, and my big box fabric store had it in stock and substantially on sale.Yay! Well, I guess Khaki is a pretty commonly stocked fabric. I bought about 1/2 yard more than length of the quilt, pre-washed it, and sliced it lengthwise down the middle. With a bit of measuring, I figured that I could make a border along one side of each half-quilt about 9 inches wide. From each strip, I cut a border 9 1/2 inches wide (border width plus 1/2 inch seam allowance) and 10 5/8 inches wide (border backing width plus 1 1/8 inches allowance for fold-over binding plus 1/2 inch seam allowance). I made sure that I also added the binding allowance to each end of the border backing fabric. Sorry, no photos of the cutting. I was just making it up as I went to make the most efficient use of fabric, but I think you'll see from the next pictures what this looked like.
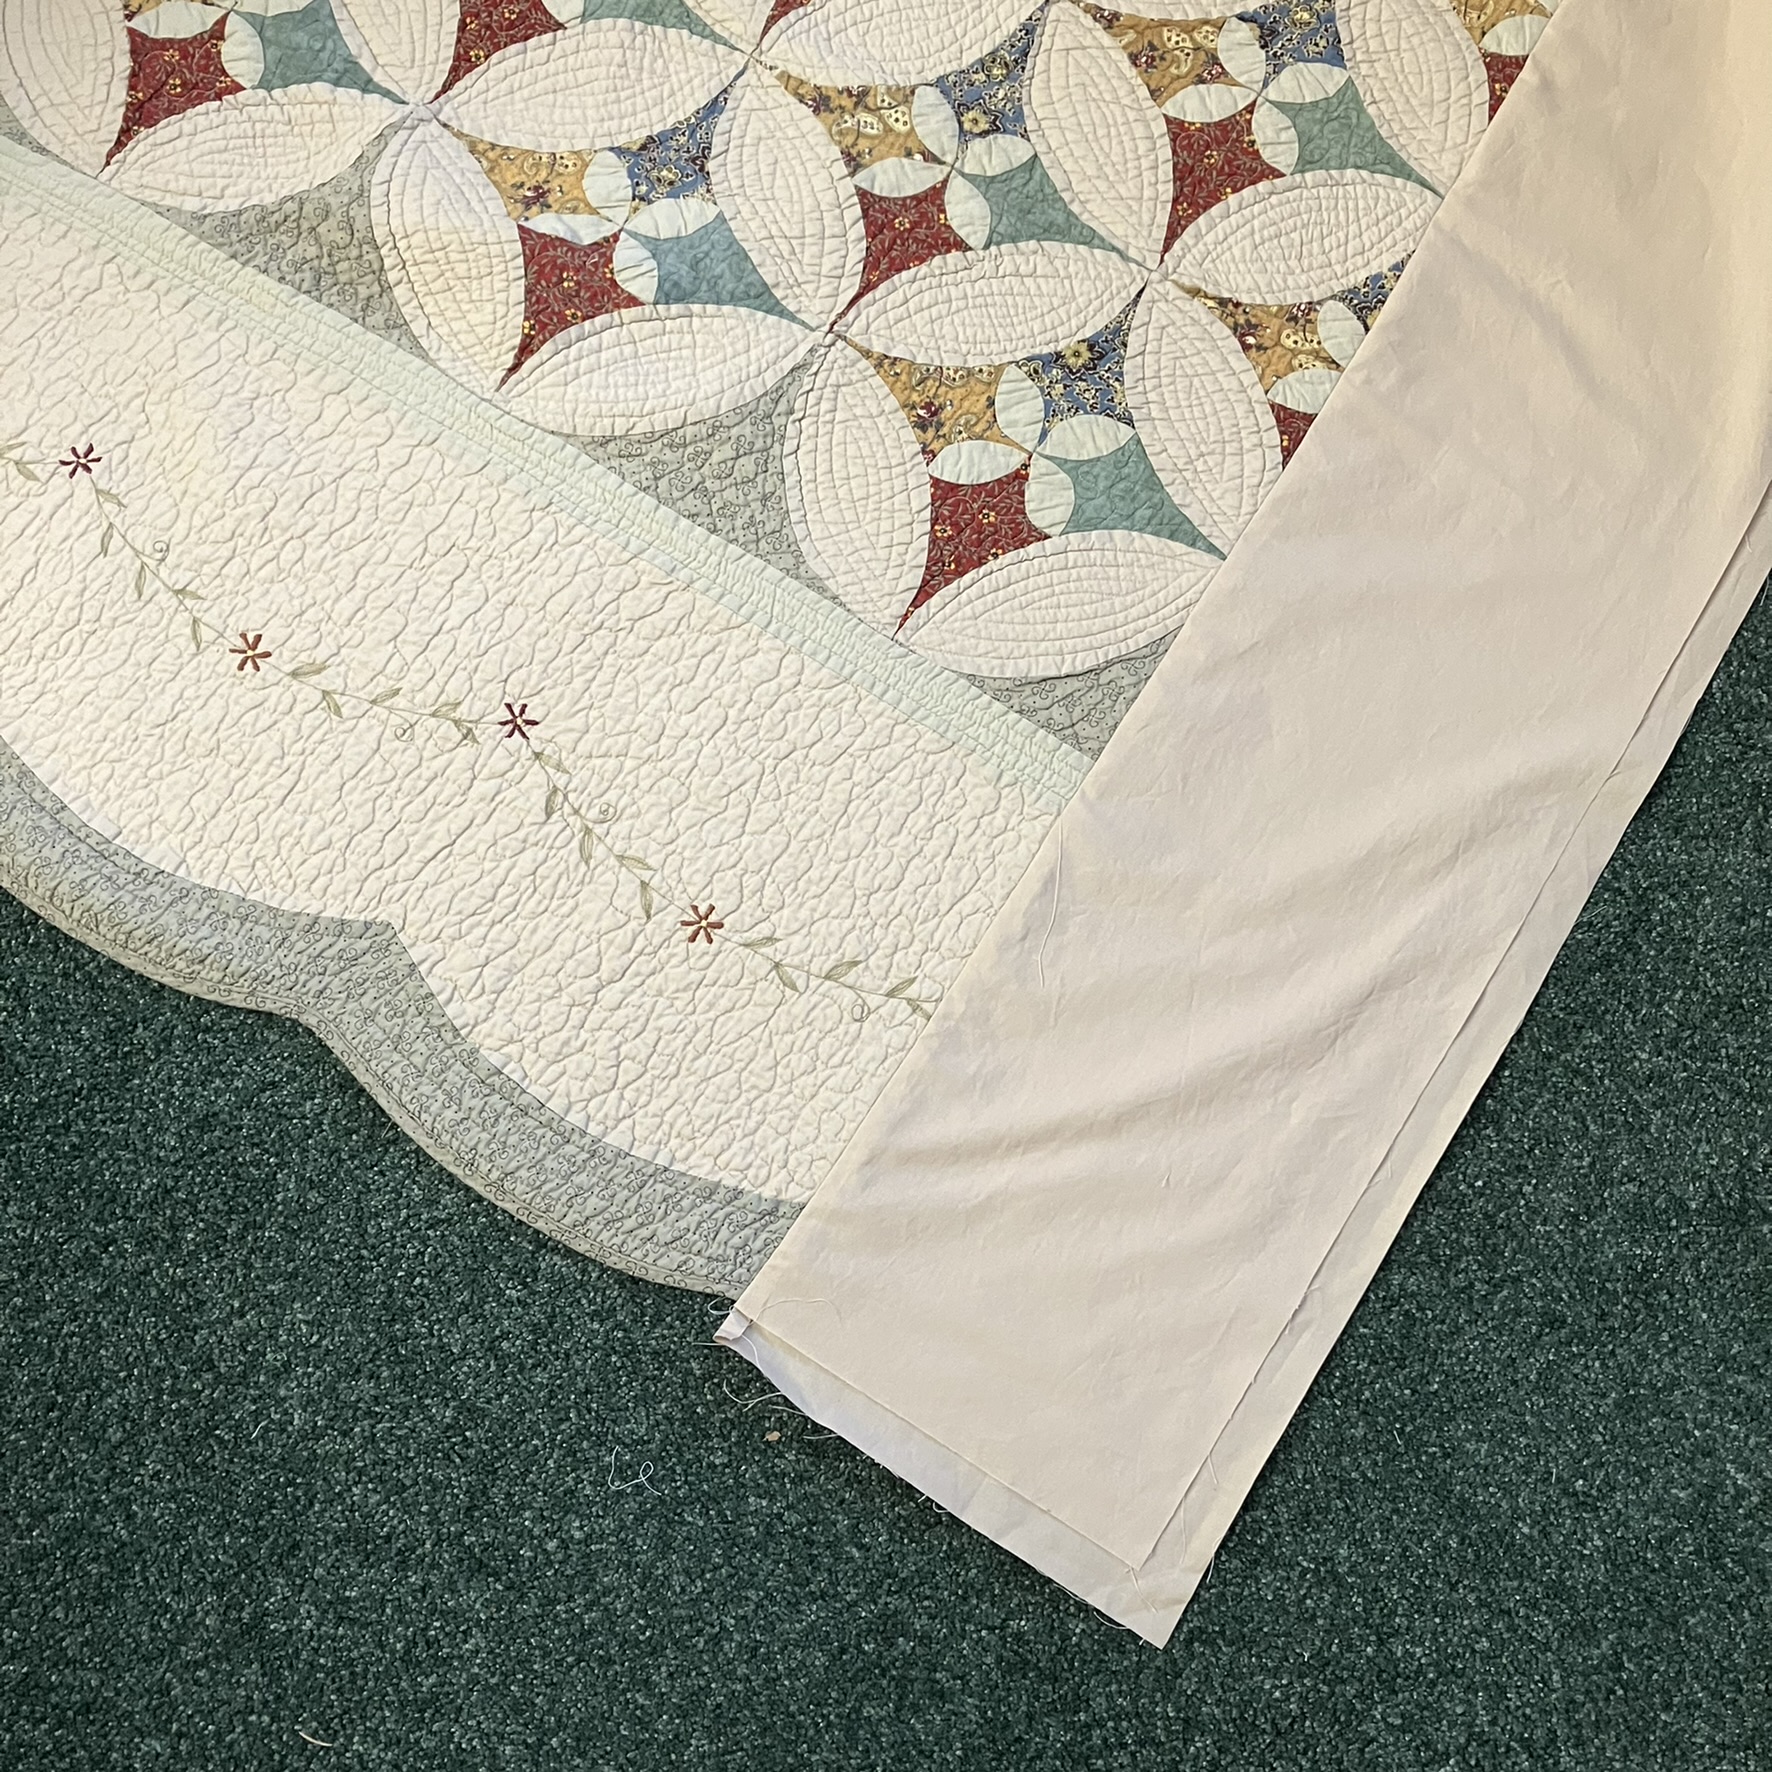
To attach the borders, I first pinned the backing to the raw edge of the back of the quilt, extending it over the ends by 1 1/8 inches. (I pinned from the front here, which wasn't necessary.)

Then I pinned the border front to the right side, sandwiching the quilt edge and aligning the border with the ends of the quilt.
 |
| Pardon the shadow of my camera. I was working under strong LED light in my basement. |
I sewed a 1/2 inch seam along the quilt edge. Here you can see the two border parts after sewing with the border backing pulled out away from the quilt.

I drew a line on the backing to show the extra fabric. Then I cut batting the same size as the front border and carefully laid it out on the wrong side of the border backing overlapping the seam allowance. I had initially thought of laying it up to the seam allowance, but this seemed to ensure a neater transition from the quilt to the added border. My batting is pieced, as I was using leftover bits from other quilt projects.
 |
| Corner pulled back to show the line on the backing. |
I basted the batting in place to keep it from shifting over the edge.

After that it became a typical quilting project. I pin basted, then quilted a straight line a generous quarter inch from the main seam (with walking foot) and then free motion meanders similar to the ones in the border of the original quilt. I forgot to photograph the binding process. I folded the border backing toward the front all the way to the seam line (behind the seam allowance) and then folded it again to form the binding on the front. I could have machine sewed it down, but I love to relax and hand sew a binding, so that was what I did. Mitering the corners was a bit fiddly with those layers, but it worked.

So here are the finished quilts, as much as I can show on my living room floor. They look different sizes here, but they are exactly the same size.

Here's a close up of the quilting and transition. You can see that there is real applique and hand-guided quilting on the original quilt, which is why I like it, although someone was probably paid pitiful wages to do this. (Come to think of it, that is always the quilter's lot, isn't it?)

And one last one of the beds ready for the kiddies. By the time you read this they will have been slept in.

If you think I was done with squirrels after this, you would be wrong. I won't bore you with the details, but this bedding project also included cutting and hemming a huge thermal blanket (it must have been meant for a king size bed--which we have never had-- and it was always drooping off our queen sized one), to make two bunk blankets, and reworking an old contour twin sheet (truly Frankenstyle, adding material to the corners and then recontouring them) for one of the bunks. It had shrunk so that it was somehow too tight for even a bunk mattress. Recycle, Repurpose, Reuse!!!
And...one more little project I have to show you because it's soooo cute! And fun! I was making my usual Christmas ornaments for the kiddies' stockings the other day (inspired by their Halloween costumes), and suddenly had the urge to make just one more. I had seen this fabric origami star by zencrafting and just had to Drop Everything and Make it. It was such fun, and only took a few minutes. It's made with a freezer paper lining which keeps it nice and crisp. Since vintage fabric designs seem to be trending now, all I had to do was look through my drawers of fabric, which have become vintage without even trying. I used 4-inch squares for my ornament parts as 5 inches seemed a bit larger than I wanted. A quick look through my button jar yielded just the right buttons to finish it off. This ornament will top off a holiday gift. Now I might have to make one for myself. Ooh, was that another squirrel calling?
 |
| Front (convex side) |
 |
| Back (concave side) |
I'm linking up with Sandra at mmmquilts for DrEAMi (Drop Everything And Make it) because that is all I've been doing this month. I hope you are having fun preparing for whatever holidays you celebrate at this time of year. Next time you read this, I just might have gotten back to the sewing I was planning to do.
8 comments:
Brilliant solution to the bedding dilemma for the new bunks!!
Very nice repurposing and with the straight edge to the wall who would know. Love the star. xx
That is a cute quilt! Great resourceful use of what you have, too.I can relate, as I did something similar when I went to college--cut a huge bedspread in half, then my roommate and I had matching bedspreads.
So genius to do what you did with that quilt. I think it is the perfect solution and as you said no one will even see it...the secret is safe with us! Love the little ornament, too. Am thinking of making some, but last year I did cards for Christmas and now trying to decide if I need new ones!
looks great - as you say no one sees the side you chopped off and kids won't care anyhow!
Love the repurposing! I’m a big fan! Bunk beds are hard to find linens for! You solved the dilemma all around! We’ll do e!
These are fabulous squirrels to chase Janine! I love the bunkbeds (we bought the same ones several years ago, and they've been terrific) with their twin quilts (twin in more ways than one!) on them. Nice and cozy. That star ornament is calling me...I've just put up our tree today (long story, but it involved renovating my yoga/Brady's room when he stays with us, ripped out paneling and ceiling tiles - yay - lots of mudding and dust and then painting). All got moved back into that little bedroom/yoga room so I could finally put up the tree! Have a wonderful holiday albeit a bit poignant without your dad, with your family.
I am catching up on blog posts and this is just fantastic. I am a huge proponent of the reuse, recycle philosophy. I did just the opposite of this once. I had the boys in bunk beds and they had (purchased) gray and black plaid comforters. It wasn't long before they were way too tall for the beds. So I ended up opening the length on one side of each comforter and somehow sewing them together. I don't exactly remember how I did it. But it worked and became the comforter for one of the boys beds (a queen size bed). He used that for years. They had matching sheets so I was able to make shams and pillow cases to match (not that the 15 year old cared about matching pillow cases, or ever even making his bed)!
Post a Comment