I forgot to take a picture of the very first bib I made. (It's already been used and covered with drool). The first picture is pretty close in style. For that bib, I cut some bib shaped pieces for a front and a back. I turned the neck edges and shoulders under and then layered them with a piece of batting and a tee-shirt that I had cut to fit the same contour. I left a little of the back of the tee-shirt in place. On the first bib, I put the top and back fabrics right sides together on top of the tee-shirt and put the batting on top of those and then sewed around the outside edge (leaving the neck/shoulder open). Then I turned them right side out so that the order was top fabric, batting, tee-shirt, back, and I topstitched around the neck edge and finished with more topstitching around all edges. (On the second bib, I got the order "wrong" so that the back fabric was inside the bib layers and the tee-shirt was on the back. But no matter. Both ways work. You just have to fiddle with it.) I hemmed the back edge of the bib and sewed a little fabric "badge" on the back to weigh it down a bit.
The first bibs turned out a little loose around the neck and some drool still escaped. Also I didn't like the look of the floppy tee-shirt back, so for the second pictured bib I cut a slit in the back of the tee-shirt and added extensions to the bib parts (more like typical baby bibs). Because I was winging it, I cut these pieces separately from the bib fronts and ended up with kind of bulky shoulder seams. But the construction was basically the same, with the addition of velcro closures.
For the third pictured bib, I made the pieces of the bibs continuous, eliminating the shoulder seams. I liked that one the best, so I made the fourth one the same.
These bibs all work pretty well, but my daughter-in-law had mentioned bandana style bibs, so of course I had to try one of those. I found a pattern I liked here on Project Nursery.
This made up in a snap. I used flannel for the front and back and batting as a filler (the size of the back, not the front) and used velcro for a closure. It was adorable on baby E, so I made a couple more...
These are cotton on top with both flannel and batting layers inside (size of the back) and a soft jersey knit back (recycled tee-shirt material from the rag bag).
Even though I had fun making the tee-shirt neck bibs, the bandana bibs win hands down for the cool factor. And I like the last ones best.
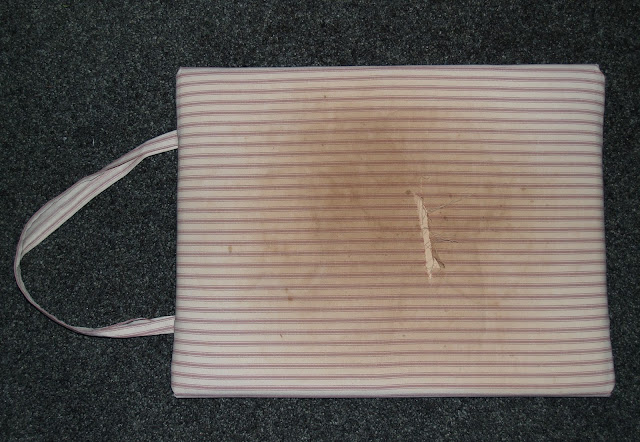
Just have to share one more project--not baby related, but it does relate to quilt-making. Years ago, the quilt guild I belonged to at the time had a workshop for making mini pressing boards out of cutting boards. We were supplied with the board, several pieces of batting and muslin to layer on it, a piece of ticking, and some feet. As I recall, all we had to supply was a staple gun and staples to put it together. That board has been a great tool even though it has looked pretty grim for awhile now. And then a few weeks ago, the point of my iron went right through the ticking.
Here's the back:
The ticking isn't quite as hefty as the old ticking, so it might not last as long, but I have enough left over to redo it again if I need to. I can't wait to put it to work.
Okay, enough about side projects. Time to get back to quilting. Hopefully I'll have a finish to show you next week.
I'm linking up today with Freemotion by the River for Linky Tuesday. Have fun quilting and making those projects on the side!


5 comments:
Enjoyed this post so much! Got tickled reading about the drooler and the "copious drivel" - lol! I love the evolution of your improvised bibs and your perseverance in finding a method for one you liked. They are all darling! And I have never seen a bandana bib - I love yours. I may surprise my daughter with one for upcoming little girl.
Funny you mention side projects - I've been crocheting this week. Haven't done that for a long time and am shocked at myself. ;)
The one piece pattern without the shoulder seam really is ideal and probably quick to make! Aughhhhh nothing like a freshly covered ironing board!! ENJOY!
Good idea for the drool bibs, They look quite easy to make. I'll behave to try a few for new grand baby arriving soon.
Great post Janin. Really interesting to read about the progression in your process with the bibs. I agree that the Bandana bibs definitely have the cool factor. They are adorable. I bet those bibs last for a long while. Good job Grammy.
I had a drooler too (though he's over it now) and can appreciate all your lovely bibs. Like you, I like the last ones best. I'm also really taken with your little pressing/ironing board. I haven't seen one like this before but it would be really handy!
Post a Comment