Wednesday, March 16, 2016

Progress...and a Store-bought Quilt

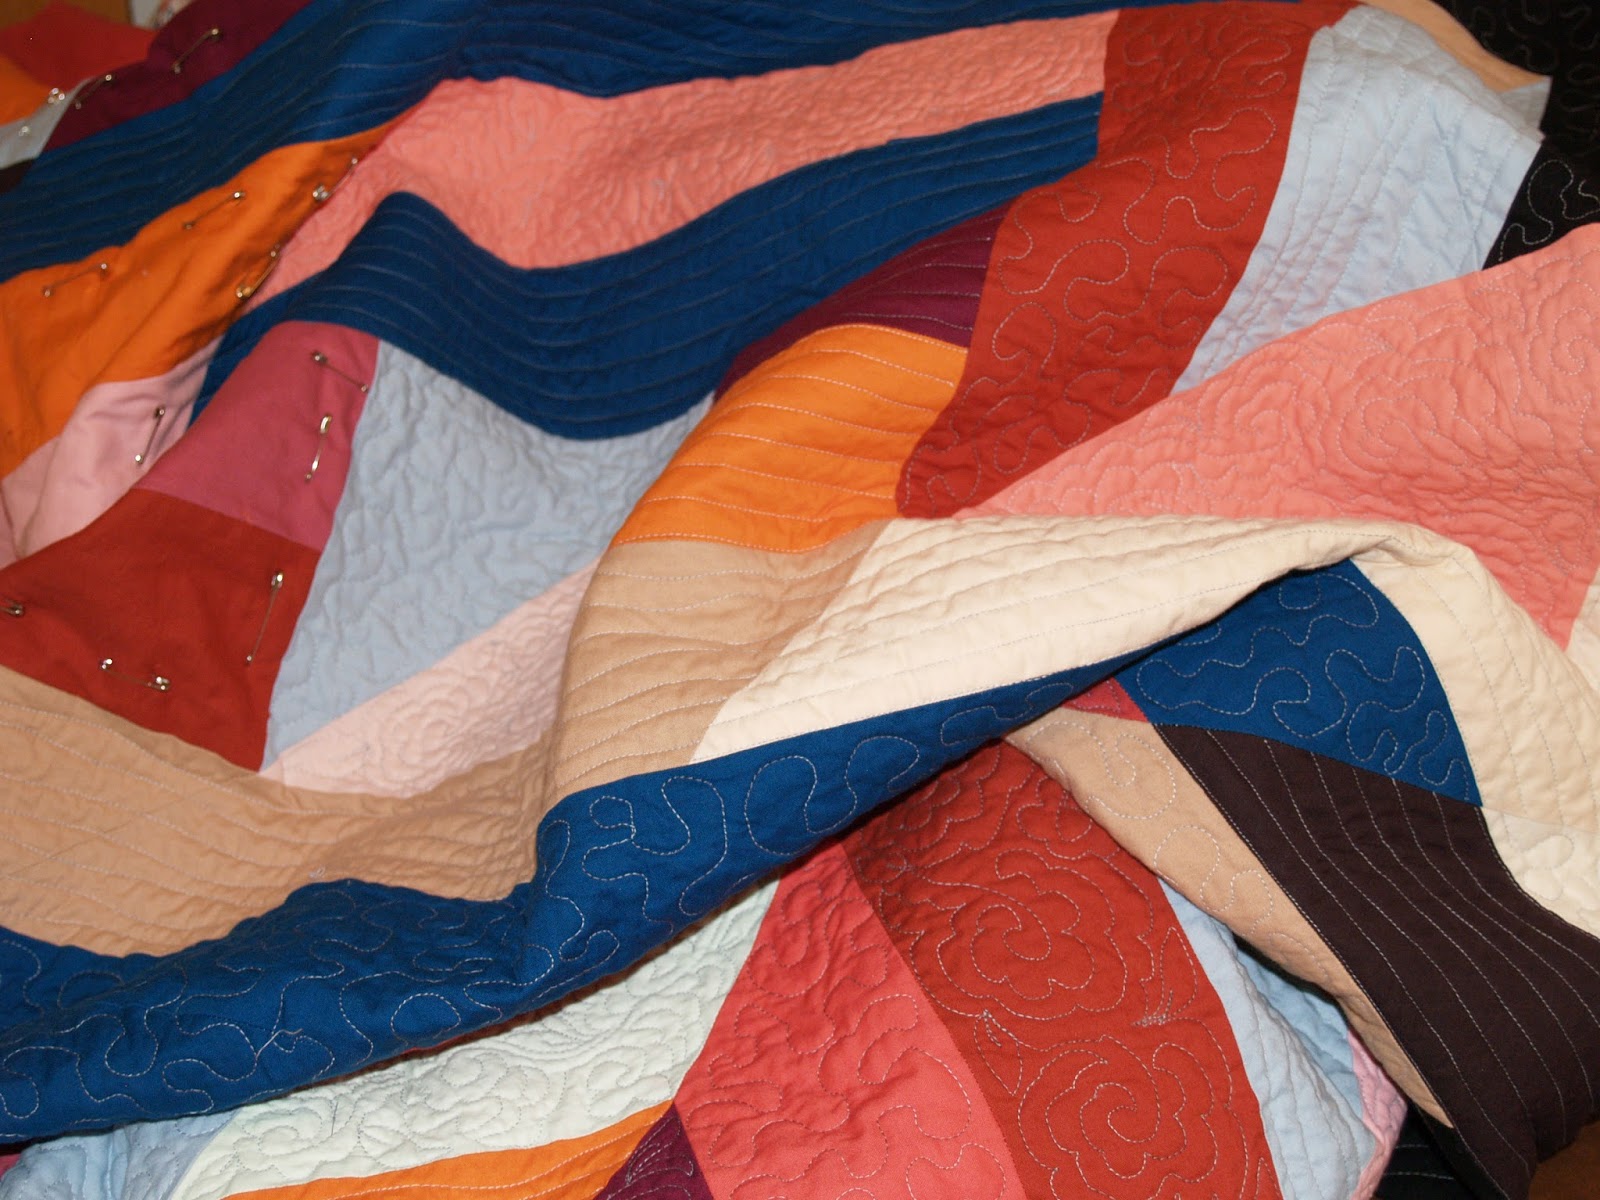
I've been working like crazy on the Big Quilt this week. I've decided that I need to get this quilt done before the weather turns warm, and I'm happy to say that I've finished all but two corners. They're big corners (40 inches square each) but should go relatively fast. I've already quilted parts of them, and I won't have to wrestle the quilt as much because there will be very little quilt in the harp space of my machine. Also, I'd like to think I'm getting faster at machine quilting.  Of course, my most important reason for finishing (aside from the fact that it's now a very much overdue gift for my son and daughter-in-law) is that a year is plenty long to have been blogging about my slow progress. 

Here's what I got done in the last few days:

And a little closer:

So anyway, I'm getting there. 

In other news, our bedroom painting project is finished. It is now green instead of off-white--a huge difference for us, but we like it. The whole look is more vintage-y than what I was first aiming for, but this color looked best with our carpet, wood trim, and antique furniture, and it will work well with lots of colors in further decorating. 

If you remember, I blogged awhile back about needing to replace our bedspread as it was literally fading away. Now that our walls are green, I decided to (GASP) buy a quilt in off-white. Then, to add some color without committing a year (or 13) to making a quilt, I plan to make bed runners as the whim hits me (I'll call them quilting practice quilts.) So here's what part of the room looks like now:


The carpet is actually forest green, not gray. It never photographs well. I put the throw quilt from the family room at the end of the bed to add a bit of color for the picture. For future bed runners, I hope to explore some more modern designs and colors. I'm also planning to make some different window treatments--something lighter than the old valances. But they'll do for now. 

About the store-bought quilt. I got it on sale at a big box store. It's not bad for store-bought, but it's not big enough to be a bedspread, so I'm using the bed skirt I used with our old quilt. The size is really odd--118 inches by 102. There's a ton of quilt tucked under our pile of pillows. It would probably fit perfectly if I put it long-way across the bed, but the scallop edge only goes around three sides, so that doesn't work. Maybe once it's washed the size will be a bit less cumbersome. It must be difficult to determine what size commercially made quilts should be nowadays with all the variations in the sizes of mattresses. I had looked at coverlets, but they were way too small for our bed. The quality of the quilting is okay--definitely done by computerized machine. There are some thread ends here and there, but I've come to expect that with big box store merchandise. The border quilting is a little sparse for my tastes; maybe I'll add lines between the lines that are there. 

Here's a close-up of the main quilting:

But here's the thing: a part of me feels really guilty as a quilter having a store-bought quilt as the covering for my bed. I do have several other commercially made quilts that we use as blankets. I bought them several years ago. They are densely quilted and well made, and because they are cotton, there's no static or itchiness that comes with polyester blankets. I don't feel bad about having bought them--maybe because I call them blankets. But buying the covering for my bed just doesn't feel right somehow. I probably need to get over that. Maybe when I make some bed runners, I'll feel better. But I'm curious. How do you feel as a quilter? Do you have a commercially made bed covering? Does it bother you if you do?

Well, now it's time to get back to quilting. Or blog reading. Or looking out the window at the silly Mallard couple who are house hunting by the unused tarp-covered pool next door. They are pretty sure that the snow-melt water on the tarp is the perfect private pond for them. There are two or three perfectly fine lakes a few blocks away. I don't know what they're thinking. 

I'm linking up today with Sew Fresh Quilts. Have fun quilting, whether your progress is fast or slow. And I won't hold it against you if you bought your bed quilt. 

Tuesday, March 8, 2016

Signs of Spring

This week we are guests in our own home. We are (slowly) painting our bedroom, and it's easier to just move into the guest room than try to sleep in the midst of chaos as we move furniture back and forth. We picked a great week for painting. The temperatures reached 70F today, so the windows were open and we could hear the birds singing for the first time in months. Spring fever, for sure! (The downside is that the quality of light is fantastic which means I can see all of the dust from the winter EVERYWHERE, so this is also turning into a major spring cleaning.) We're half done--maybe a little more considering we've got the two more difficult walls (lots of trim and a little alcove) done. Here's how it looks so far:

Paint paraphernalia 
Still life? What an assortment of stuff on the dresser--vases, lotion, paper towel, dust rag, my husband's Carlton Fisk statue. You know how it is when you're painting.

One more quick picture:

Maybe this is a little closer to the true color. I spent a lot of time trying to find a green that was neither too yellow nor too blue and that looked good with our light trim and dark furniture. I think I did pretty well. What sold me on it was a picture of it on one of those websites where you could see it in a virtual room. On the bed were pillows in light turquoise, yellowish green and salmon. Delicious. And now I have a color scheme for a bed runner. 

But I'm getting ahead of myself. I still have some other quilts to finish first. I did do a tiny bit of quilt work this week. 
If you look closely, you can see three bits of dry sand I added between the wet sand and the beginnings of the dunes. Hey, it took longer than it looks--there was some seam ripping involved. 

I also worked a bit on this pile of quilt:

That's all I could manage. After all, our guest room  my sewing room is in use at the moment.

(By the way, does anyone have any ideas for what to do with left over thread cones? 


I'm going through a lot of thread. I used one to wind some binding that was waiting for a quilt, but what else might I do besides recycle them?)

I got so pumped up for spring today that I did take the little decorative snowman sign out of our yard (the two big snows of the last two weeks miraculously disappeared overnight so the snowman just had to go), and I replaced the little winter quilt on the front door with another one I found in a closet. It used to be in our half-bath--matched the Susan Winget wallpaper border (quilts on a clothesline).. 


I also took down my Poinsettia wall hanging and put up this one:
Sorry, crooked picture--I'll blame it on spring fever.
I know, technically it's a snowball quilt, but it IS in spring colors. And there are flowers in the quilting.

After we finish painting this week, I'm going to concentrate on the Big Quilt and the Lake Michigan Quilt. Then I'll work on something for the bedroom, and if that's not incentive to finish the other projects, I don't know what is. 

I'm linking up with Freemotion by the River, Sew Fresh Quilts and My Quilt Infatuation this week for their linky parties. Buttons are on the right. 

Have a great week, and I hope that you are enjoying whatever the seasonal changes are where you're living.

Thursday, March 3, 2016

Throwback Thursday: A Wedding Quilt

These first Thursdays really come around fast don't they? On this cold, snowy day, I'm thinking it might be fun to look back just a little bit to October 2012 and a quilt with a sunny, warm weather theme I made as a wedding present for my niece and her new husband.  

I had no idea of what kind of decor the couple would end up with. They were on the move quite frequently finishing up their schooling. But I knew they'd be in California for awhile. I also knew I wanted to make something "modern," which to me at the time meant lots of white negative space and maybe some wonky blocks. I looked through pictures on Pinterest, and a pillow popped up that attracted my attention. I think it had originally been on an Etsy site that is now closed. Anyway, the designer was Neressa Bennett, and you can see the pillow on this website

I immediately liked the color scheme, and it fit my idea of modern, but I decided to add lime and coral to the teal and yellow. I was going for a beachy (California?) feel. I got to work making lots of wonky square-in-a-square blocks. It was a real challenge for a planner and measurer like me to make sure that my blocks were actually wonky. But I enjoyed it. 


I had shamelessly copied someone else's idea, but I figured that was okay because it was a gift within the family. However, I wanted to add a little something extra of my own that would also make it personal for my niece and nephew. At the time, they were both surfers, so as a symbol of their interest and their beginning marriage I designed a little block with two surf boards in the sand. Here's the pattern I made:


I think I used a combination of foundation paper piecing and freezer paper piecing to construct the block. Those curved seams were a real pain, but I was determined stubborn, and persisted in sewing them together even though in hindsight, applique would have been a much better choice. I also fussy-cut the water at the shore line to kind of resemble waves. 

That corner looks wonkier here than it really was. I think.
I was still a hand quilter when I made the quilt. I liked the way the pillow had been quilted, so I pretty much copied the style and kept the quilting minimal. Here's the back:


Judging from the size of the surfboard block (4 1/2 inches finished before adding a little background edge), I'm guessing that the blocks were about 5 inches and the quilt measured about  31 by 41 inches overall. 

I've forgotten what the colorful fabrics are but I'm pretty sure the background is Kona snow. The batting is probably Cream Rose cotton by Mountain Mist.

My niece no longer surfs, but she still likes the beach; she's a rower now. And her sister is getting married this summer. Time to think about another wedding quilt. 

And Neressa, I don't know if you are still out there in Quilt Land, but if you are, or even if you aren't, thanks for the inspiration when I was just beginning to try "modern."

I'm linking up today with Jenn at A Quarter Inch from the Edge for Throwback Thursday. What are you sharing for Throwback Thursday?

Wednesday, March 2, 2016

Wednesday Randoms

Having just finished a project, I'm getting back into other things, so I have some randoms to share today.

First some cool pictures. We recently took a trip from Chicago to Colorado by train--my favorite way to travel. I didn't take any pictures on the train (much of our travel was during the night), but I have some indelible images in my mind of two breathtaking sunrises--one against the mountains turning the snow pink and a neon orange and gold one over the plains on the way home--and a nighttime view of the landscape in the plains illuminated by a full moon. I did take some pictures at Union Station in Denver while we were waiting for our return trip. The station was restored a few years ago. The lobby, surrounded by restaurants and hotel rooms, is a delightful place to while away an afternoon; my husband found access to the hotel's Wi-Fi and I was content to quilt. 

Here's the station's exterior. (I was too close to get the whole thing in one picture, so imagine these three stacked as one): 


Lots of quilty inspiration here!! And here's the inside:


Delightful! (No other word for it.) It's hard to get good pictures in such an open space. There were little seating areas all around (I should have got pictures of them), but I just wanted to keep looking up at all of the beautiful moldings and light fixtures. 

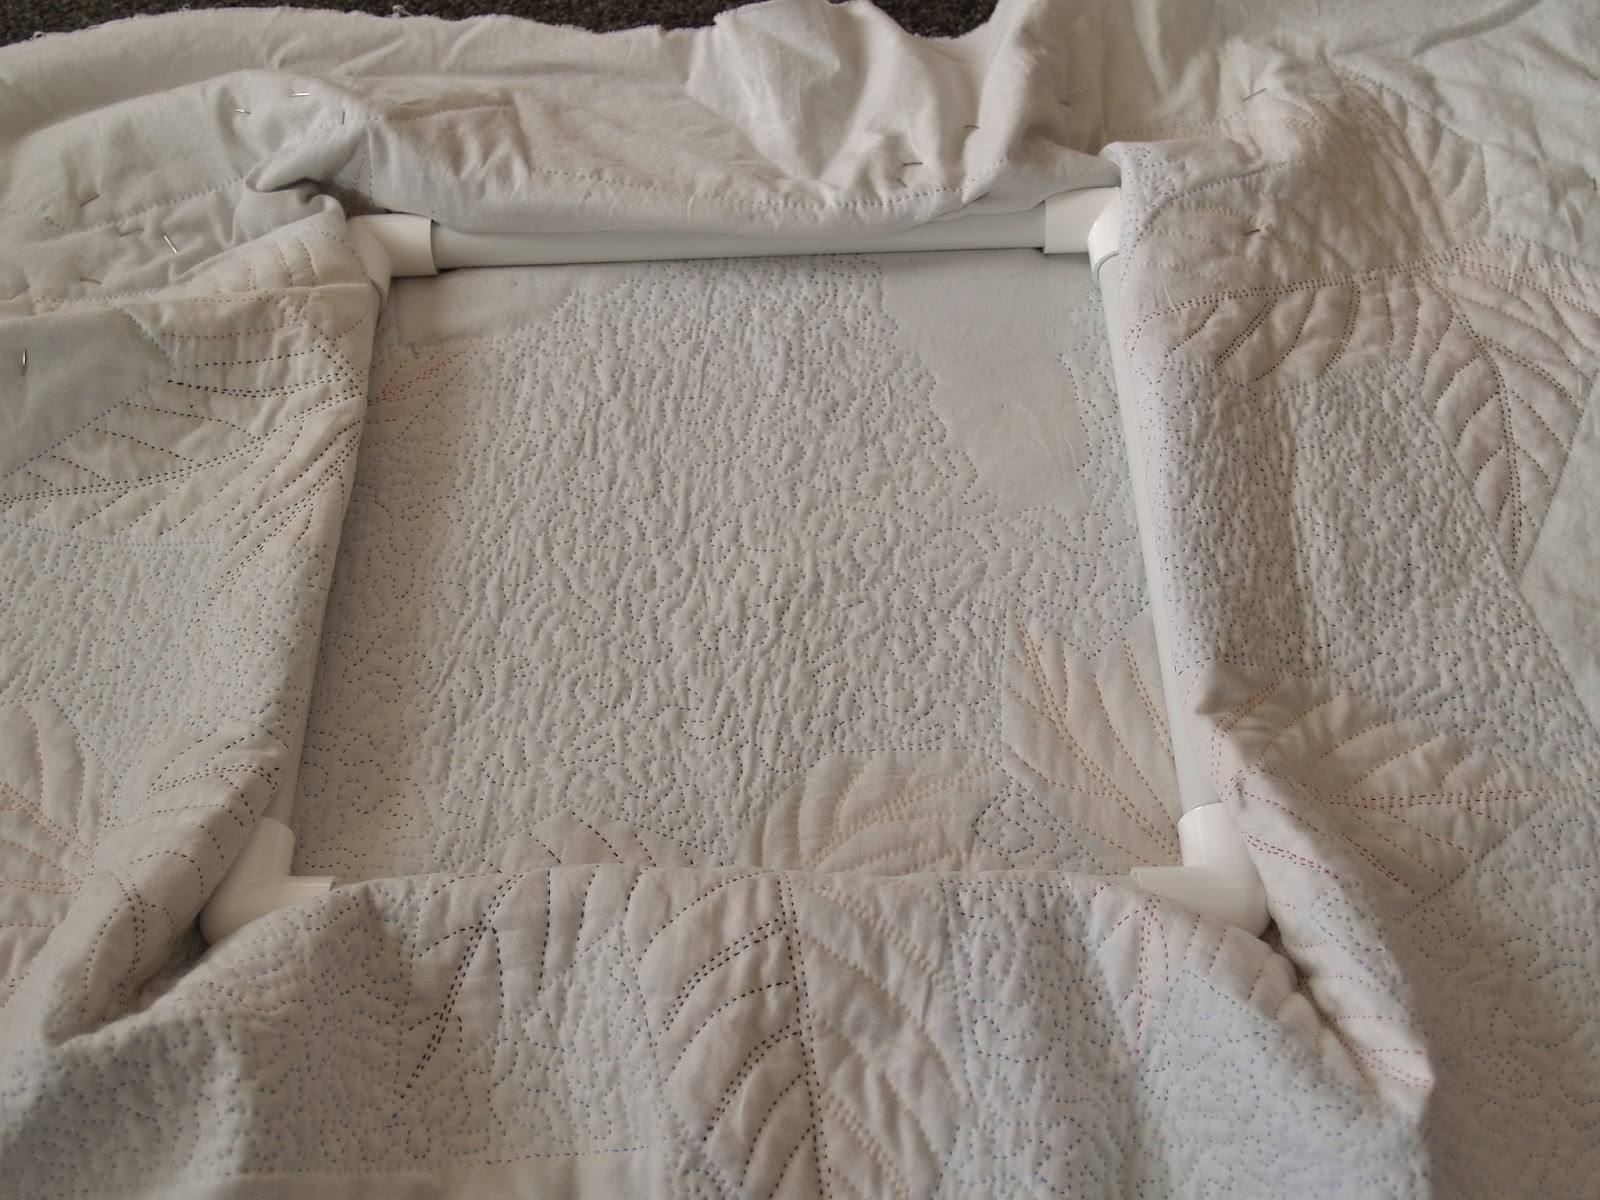
When I packed for the trip, one of my top priorities was leaving room in my luggage for a small quilt and a collapsible PVC quilt frame so I could do some hand quilting on the train and in our hotel during the evenings.) So here's what I was working on:


Most of my quilting on the background of this quilt is from the back. It's stippling and doesn't really show on the front, so it's much easier to do it from the back where I can see what I'm doing. 

Oh, and while we were on our trip, I got an email from Hawthorne Threads letting me know that I had won a bundle of fabric!! Yea! I have been entering their giveaways for a long time, but this was my first win. By the time I got home, my package had arrived.

Here's my bundle:


Paperie by Amy Sinibaldi for Art Gallery Fabrics. Silky smooth and delicious! They also sent me three of their digital fabric sample strips (Roam, Forest Fables and Norwegian Wood):


Aren't they great?! I don't think it will be long before they find their way into some special quilts. 

So this week, I'm back working on other projects that are waiting for a finish. Our weather's the same as it was last week. Schools were off yesterday and again today. I didn't take any pictures this time. Just look at my ones from last week. They look the same. The weird thing, though, is that between last week's post and this week's, the snow melted almost completely. (Actually, that's kind of typical for this time of year.) Perfect weather for quilting. And painting. After  days weeks months  years of dithering about paint colors for our bedroom, I finally picked one (and even bought the paint). I forced the issue by painting splotches on the walls to audition them. Good plan, don't you think? So sometime in the next few days there will be more painting than quilting. 

In the meantime, I added some beach bits to my Lake Michigan quilt.


It's a slow process. I think I need to add a little "dry" sand between the wet sand and the dune. (Seam ripper time, but that's okay)


Have a great week. And if you've never taken a train trip before, do consider it. If you're in the US, it's a great way to see America's backyard and to get some perspective of the vastness of our country. There are lots of little stories I could tell you about the microcosm of a coach car, but you just have to experience it for yourself. (And don't forget to take a little quilt project with for some slow stitching.)

I'm linking up with Sew Fresh Quilts today for Let's Bee Social.


Friday, February 26, 2016

Random Part Two

Whew! I made it. I was on a deadline (well, I don't like to use that word, so let's just say a tight timeline). I had promised two quilts to an organization by March and thought I had plenty of time to make them. I finished one in January (you can see it here), but then suddenly my time at home in February was very short. 

Let me first of all say thank you to everyone who expressed sympathy after my tribute post to my sister-in-law, who passed away at the beginning of this month. Last week we traveled to Colorado to be with family and celebrate her life at a memorial service. We had a wonderful time. It might warm your heart to know that the quilt she used is on its way to the cancer center where she was treated so someone else can enjoy its hug during treatment.

I had finished the top of the quilt that needed to be completed this month before we left on our trip. You can see it in my Random Experiment post here. We got back Sunday night, and I knew that I had to get right to work on the quilting on Monday with a design that could be completed in two days. (I even went on an internet fast so I wouldn't be distracted.) I had thought of just meandering on the quilt, but I wanted a little something more. I settled on meandering on the colorful patches in the main part of the quilt, but I changed to a back-and-forth line in the background patches. This didn't really take any longer, and it added some texture to the background. I could just keep treadling and treadling until I ran out of bobbin thread. 

But then, what should I do with those wide borders? I decided to continue the "random" theme. I used some masking tape and my hera marker to make a simple grid to help with spacing and then FMQ'd half-flowers connected with a wavy line all the way around the quilt. They worked out well. I intended to make another pass and quilt a couple more petals to complete each flower, but I kind of got carried away with a sort of scallop and pretty much forgot about making the scallops actually look like petals when I got to the flowers. I completed the design with a couple more rows of scallops until the flowers were pretty much unrecognizable unless you know where to look. Then, around all that randomness, I did more back-and-forth lines as filler. No real planning, just treadle, treadle, treadle until the bobbin thread ran out. Done in two days. Yippee!

On Wednesday I sewed the binding on, first by machine and then by hand as I caught up on TV shows. And yesterday I washed and dried the quilt. Twice, because there was a little bit of color run the first time through.

And here's how it all came out (lots of pictures):


On our bed--more about that ivory quilt another time.
After washing--more texture-y

As I said in the last post on this quilt, the pattern is Now and Later from American Patchwork and Quilting. It's made from 2 by 4 inch rectangles and 2 inch squares (plus seam allowances for all patches). When I first attached the borders, they were about 7 1/2 inches wide, but I trimmed them to 6 3/4 inches as I neared the end of the quilting. The total size was 56 by 43 1/4 inches before washing and approximately 53 1/2 by 41 inches after washing. 

The colorful fabrics are a variety of half-yard cuts I ordered from the Fat Quarter Shop with a gift certificate I won in the Art Quilt category of the Fall 2014 Blogger's Quilt Festival put on by Amy's Creative Side. I've lost track of the exact fabric names. The background fabric is Moda Bella Solids in Feather. I had ordered it (and then rejected it) for another project. It's a very pale gray, sort of like the color of recycled paper. 

I used Hobbs 80/20 batting and Superior King Tut Cotton quilting thread in Temple. As usual, I pieced the quilt on my Singer Featherweight and FMQ'd it on my Singer 115 Treadle. I also attached the binding with the treadle--so much easier!

Well, you know me. I always try to record what I've learned on a quilt. For this one, it was all about the randomness. I absolutely loved doing the random placement of the colorful patches. It was good for me to let go of a lot of planning.

I also enjoyed the randomness of the FMQ. What I found out with the FMQ is that when you plan to wash a quilt, a carefully planned, neat design isn't always that important. It all turns crinkly and you do lose some of the design anyway. I guess if I had made my flower designs more simple with wider spacing between the lines of quilting, they might have shown up more as flowers. The way I did them, they pretty much just look crinkly and--well--random. Also, the back-and-forth lines--because they were so close together--turned into texture. It really didn't matter if they were neat or not. They don't look like lines, just texture that allows the flower areas to stand out. That means that when I do this kind of quilting, I definitely don't need to stress about how neat my work is. But I will remember that if I do want an element to really stand out, I probably need to plan a little bit more and quilt more sparsely--something that I find hard to do. I just naturally quilt densely. 

Another thing I learned is that my favorite width for cutting binding is 2 3/8 inches. I've tried 2 1/4 and have had trouble with miters, and I've tried 2 1/2 inches, which seems cumbersome. Using 2 3/8 inches and using the edge of my walking foot as a guide for the seam allowance works just right for me. I've also learned that it works best for me to stitch off the edge on a diagonal at the corners when I attach the binding and then start my next stitching line right at the point where I turned the binding rather than at the edge of the quilt. I know everyone has their favorite technique but this is now mine and I'm putting it in writing so I remember it. 

Overall, I'm really pleased with this quilt and with the little time it took to make it. I do think, though, that with the fabrics I chose, it is best viewed close up. Some of the patterns are small and from far they tend to look solid. Nothing wrong with that, but they are more interesting close up--especially on the back. Of course, this quilt will mostly be viewed close up as someone snuggles up in it. 

Oh, and one more thing I learned? When I have nearly half a year to meet a timeline, it's probably best to start earlier rather than later. I can't believe I almost didn't make it.

I wish I could have done some outdoor pictures of this quilt, but while I was working on it this week, this was happening outside:
So much for our ornamental grasses


I had no desire to go out there. Not a huge, huge storm, but big enough, and a bit shocking after unseasonably warm weather (temps in the 70's) when we were in Colorado. We ended up with a little over a foot of the kind of wet, heavy snow that lets you know that spring is on the way. Pretty much everything was closed yesterday, and the schools are ending up with 2 1/2 snow days this week. 

I'm linking up this week with Crazy Mom Quilts for Finish It up FridayConfessions of a Fabric Addict for Can I Get a Whoop WhoopLisa in Port Hope for TGIFF, and Lizzie Lenard Vintage Sewing for Free Motion Mavericks because I need to celebrate a second finish in 2016!!

Have a great weekend, whether you're way ahead of your goal, a little behind, or just making your timeline. Or even if you don't care about timelines. (I usually don't.)

Tuesday, February 16, 2016

Time Out...For Bibs and a Pressing Board

We have a drooler. Yes, at three and half months old, our grandson can soak through several onesies a day. So over the past few weeks, I've been working on a remedy. More drooly bibs! I've made him (as well as his cousins) little flannel bibs like the ones in this post as part of their first wardrobes. They are fun to make, but I wanted to try something that would be a little softer. So I bought some tee-shirts in size 2T to 3T and set out to make bibs around them so that the neckline of the shirts became the neckline of the bibs. Each week I tweaked the design a bit until I had one I liked. When I work on a quilt, I usually have a pretty specific plan in place before I begin, but when I make little items for the babies in my life, I tend to just wing it--improvise. This can be a problem because I don't bother to take pictures and can't always explain how I made things. Oh, well. I'll show you a picture of what I made with a few notes copious drivel of how I tweaked the design, and then you can improvise to find what works for you if you are inspired to make bibs for a little one in your life. 


I forgot to take a picture of the very first bib I made. (It's already been used and covered with drool). The first picture is pretty close in style. For that bib, I cut some bib shaped pieces for a front and a back. 
I turned the neck edges and shoulders under and then layered them with a piece of batting and a tee-shirt that I had cut to fit the same contour.  I left a little of the back of the tee-shirt in place. On the first bib, I put the top and back fabrics right sides together on top of the tee-shirt and put the batting on top of those and then sewed around the outside edge (leaving the neck/shoulder open). Then I turned them right side out so that the order was top fabric, batting, tee-shirt, back, and I topstitched around the neck edge and finished with more topstitching around all edges. (On the second bib, I got the order "wrong" so that the back fabric was inside the bib layers and the tee-shirt was on the back. But no matter. Both ways work. You just have to fiddle with it.) I hemmed the back edge of the bib and sewed a little fabric "badge" on the back to weigh it down a bit.

The first bibs turned out a little loose around the neck and some drool still escaped. Also I didn't like the look of the floppy tee-shirt back, so for the second pictured bib I cut a slit in the back of the tee-shirt and added extensions to the bib parts (more like typical baby bibs). Because I was winging it, I cut these pieces separately from the bib fronts and ended up with kind of bulky shoulder seams. But the construction was basically the same, with the addition of velcro closures. 

For the third pictured bib, I made the pieces of the bibs continuous, eliminating the shoulder seams. I liked that one the best, so I made the fourth one the same. 

These bibs all work pretty well, but my daughter-in-law had mentioned bandana style bibs, so of course I had to try one of those. I found a pattern I liked here on Project Nursery.


This made up in a snap. I used flannel for the front and back and batting as a filler (the size of the back, not the front) and used velcro for a closure. It was adorable on baby E, so I made a couple more...


These are cotton on top with both flannel and batting layers inside (size of the back) and a soft jersey knit back (recycled tee-shirt material from the rag bag). 

Even though I had fun making the tee-shirt neck bibs, the bandana bibs win hands down for the cool factor. And I like the last ones best.   


Just have to share one more project--not baby related, but it does relate to quilt-making. Years ago, the quilt guild I belonged to at the time had a workshop for making mini pressing boards out of cutting boards. We were supplied with the board, several pieces of batting and muslin to layer on it, a piece of ticking, and some feet. As I recall, all we had to supply was a staple gun and staples to put it together. That board has been a great tool even though it has looked pretty grim for awhile now. And then a few weeks ago, the point of my iron went right through the ticking.


Something had to be done. I bought some fresh new ticking--blue this time. I took the old ticking off and used it as a pattern, then wrapped the board again sort of like a present (I reused all the old layers of batting and muslin and added one more extra layer of ticking), made a new handle, stapled it all back together and reattached the feet. 


 Here's the back:

The ticking isn't quite as hefty as the old ticking, so it might not last as long, but I have enough left over to redo it again if I need to. I can't wait to put it to work.

Okay, enough about side projects. Time to get back to quilting. Hopefully I'll have a finish to show you next week. 

I'm linking up today with Freemotion by the River for Linky Tuesday. Have fun quilting and making those projects on the side!

Wednesday, February 10, 2016

Random Experiment

Back in September, I pledged to give two quilts to an organization. I could pick the month that I would deliver them, and because I have an aversion to timelines, I chose March (the last month on the schedule for the quilt collection). I figured that would give me plenty of time without feeling too much pressure to get done. I didn't start the quilts until January but still thought I had plenty of time. I did finish one of the quilts by the end of January, but then life happened, and suddenly there wasn't as much time as I thought there would be. Because of other commitments, I knew that there would be a lot fewer days to make the other one during February. So, what to do? I needed a quilt I could make really fast.

I decided to try something that I had often thought about but had never had the nerve to let go and just do. You know how when you make a quilt that you want to look like the fabric placement is random, and then it takes forever to make it look that way? Well, I challenged myself to make a quilt that actually DID have really randomly placed fabric. I chose a simple pattern that I had received as a freebie in the mail from American Patchwork and Quilting along with an invitation to subscribe to their magazine. It's called Now and Later by Kathie Holland and is made from squares and rectangles. 

I had seven 1/2-yard cuts of colorful fabric and some yardage of a pale gray background fabric. I cut 110 rectangles (2 1/2 by 4 1/2 inches) from the colors and 110 squares (2 1/2 inches) from the background. Then I chain pieced all the rectangles with the squares. 

I cut the units apart, dropped them into a punch bowl, and WITHOUT LOOKING, pulled out 22 pairs of units and sewed each pair together in the order I pulled them. My rule for myself was to not reject any pair, even if the colors were the same. (Yup, living on the edge, my style.) I threw the sewn pairs into a tote bag.

I took those 22 units (pulled randomly from the tote bag) and added another unit the same way, grabbing the additional units from the punch bowl without looking. I repeated this until I had 22 strips of 5 units each. 

I threw all of the strips into the bag, then pulled them out one at a time and sewed them together. Same rule: no changes no matter what colors were together. It was really hard not to reject a strip sometimes when the same fabric kept showing up. But I persevered. (Sometimes I have to work hard at letting go.)

After they were all sewn together, I added 7 1/2 inch borders. (Borders? Me? Well, yeah, for this one. It reduced the amount of piecing I needed to do, and it makes the design float, which I rather like.) I'll probably trim them down a bit before I finish the quilt. This is how it turned out:


Sure, there's more of one color in one place, but that's balanced out by more of another in another place. And you know what? I like it. A lot. And I saved so much time. No agonizing at the design wall. No running up and down stairs between my living room, where I sew, and the guest bedroom, where I have my design wall. 

After I finished the top, I cut additional rectangles and sewed them together--again randomly, but this time my rule was that there couldn't be two identical fabrics right next to each other. Any other sequence was fine. I reserved this long strip for my binding:


(Finally found a use for a leftover thread cone.)
Without too much thought, I trimmed down the leftover fabrics and strip-pieced them to make a backing. 


What a super-fast quilt! I cut the shapes one evening, and it took only parts of two days to sew and baste it. Now I need to let it sit for a bit while I think about how to quilt it (any ideas??), but next time you see this, it should be done, and I will have made good on my pledge. Yea!

I think my random experiment worked out fine. I will definitely do random--really random--again. 

I'm linking up this week with Sew Fresh Quilts for Let's Bee Social and My Quilt Infatuation for Needle and Thread Thursday. The buttons are on the right. 

Have a good quilty week--random or not.