
We decided to make the twin size with one change. The pattern calls for an extra wide border on the pillow end of the quilt. We made the borders all the same size reducing the length by about 8 inches. Well, maybe another change: we went a little more scrappy/random, but not much.
Here is the fabric bundle we started with:

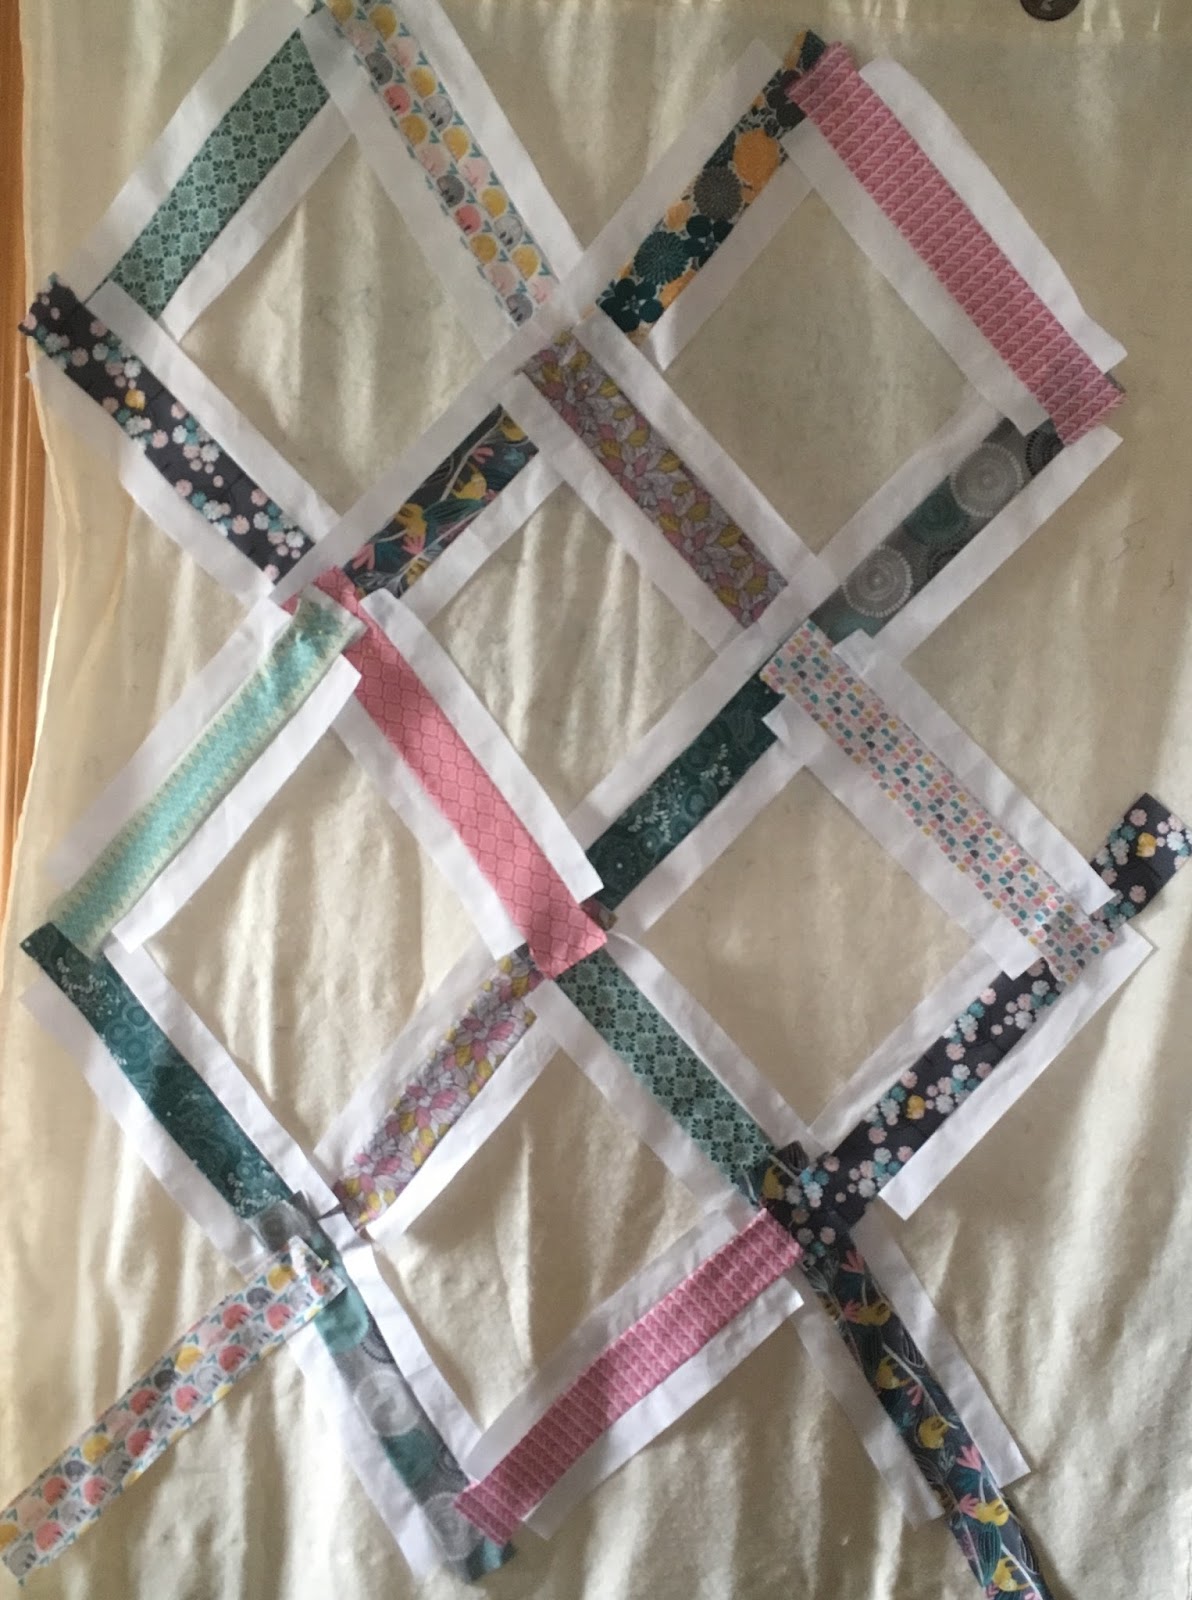
To plan the fabric placement (we used all of the fabrics except the yellow you see on the lower left), we chose the most highly patterned pieces for the largest strips and the lightest ones for the little triangles that meet in the corners. After she returned home, we continued making decisions by phone messages. What a fun way to plan! First, I cut the big strips, sewed the white strips that went with them, and tried them out on the design wall. Then I'd snap a picture to get feedback. This is an early layout of some of those strips. (Sorry about the hazy photos--poor winter lighting.)
Next I laid out the corner triangles:


The whole time, I was in touch with my daughter by phone.

I did some of the final planning on the wall but also quite a bit with my quilt design app (It's just easier than moving strips around). Eventually we got to this layout. If you look closely, you will see that there is a bit of symmetry: in the top two and bottom two rows of blocks, the biggest strips are placed in "reverse mirror" images of each other except for two strips. That seemed the best way to balance out colors and patterns while still keeping the look random. I loved how the neat pattern emerged out all the chaos of the strips when I started sewing the strips and adding in the lattice strips.
I really like how the blocks are constructed in this quilt. Instead of piecing to a foundation, the strips are cut generously, joined by matching the centers, and then trimmed to size. There is a template included with the pattern, and I taped it to one of my rulers so that trimming was a snap. All I had to do was line up the template lines with my seams.

I didn't think of it at the time, but having the lattice strips makes joining the blocks so easy--no bulky seams or seam matching. And no extra fabric in the quilt or paper to tear off.
I used leftover fabric from the front of the quilt for the back--using only the lighter fabrics so that nothing showed through the white on the front. I cut rectangles as large as I could based on the smallest piece of fabric I had left. I bought extra of one of the fabrics to fill in the area on each side of a central strip.


The last decision was how to do the quilting. My daughter liked the look of the quilting that was suggested in the pattern. I liked it, too, even though I knew that concentric squares would mean lots of quilt turning.

My sewing machine just happens to be in the best adjustment it has ever been in for walking foot quilting, so the work went really smoothly. I used a ruler and hera marker to extend lines onto the lattice strips and borders. Most of the quilting was in the ditch (Ha, in my case, near the ditch). I limited myself to working on just a few parts of the quilt a day to keep myself from getting too tired from quilt wrangling, but by the end I was quilting pretty fast. I had figured out the most efficient directions to turn the quilt to keep the bulk down. My first impulse had been to keep turning the quilt in one direction for each side of the square, but I found that it worked better to turn the quilt in one direction twice and then in the other direction to complete a square. Hard to explain, but it worked well. My favorite part of the quilting is the ghost quilting in the borders that repeats the in-the-ditch quilting on the blocks.

The pattern also suggested quilting in the ditch around each block, but I left that part out. I baste like crazy before quilting, so I don't need in-the-ditch quilting to stabilize and didn't think the quilt needed it as a design element.
So here are the finished back and some close ups of the front and back. I had to take all of these pictures inside as a spring snow storm was raging outside. Luckily the snow did brighten the lighting a bit (and soften shadows), so the colors are true. I did figure out how to extend the curtain rod on my design "wall" so that I could hang the quilt from it with skirt hangers. I don't know why I didn't think of that before instead of fighting the breeze and my neighbor's fence. (Lighting can be tricky, though.)


Early on, my daughter picked the binding from one of the quilt fabrics. I think it's perfect for quietly framing the quilt. It will look great against the gray quilting on their bedspread.


How about those sloths?! They show up in three of the fabrics. I love their whimsy. But I had to be vigilant about making them hang properly from their branches. In fact, I referred to one fabric as hedge hogs when talking with my daughter and she reminded me that they were sloths. Made a big difference in how I positioned them!


 |
| Relaxing on our bed after washing and drying |
Pattern: Front: Between the Lines by Denyse Schmidt; Back: Improv pieced
Fabrics: A variety chosen by my daughter. I don't have the specifics. Many of them did not have enough selvage on them to know. The background and borders are Kona white.
Fabrics: A variety chosen by my daughter. I don't have the specifics. Many of them did not have enough selvage on them to know. The background and borders are Kona white.
Batting: Warm and White
Thread: All Superior: Masterpiece in Granite for piecing; King Tut in Temple for quilting; Treasure in Old Lace for hand sewing on binding.
Binding: Cut 2 1/2 inches wide and folded in half; 3/8 inch finished.
Size: Quilt: 66 by 80 inches pieced; 65 1/2 inches by 79 1/2 inches quilted (almost no shrinkage); 63 1/4 by 76 1/2 inches after washing.
Machines: Singer Featherweight for piecing; Singer 115 Treadle for walking foot quilting. Thread: All Superior: Masterpiece in Granite for piecing; King Tut in Temple for quilting; Treasure in Old Lace for hand sewing on binding.
Binding: Cut 2 1/2 inches wide and folded in half; 3/8 inch finished.
Size: Quilt: 66 by 80 inches pieced; 65 1/2 inches by 79 1/2 inches quilted (almost no shrinkage); 63 1/4 by 76 1/2 inches after washing.
I'm linking up with crazy mom quilts for Finish it up Friday, Confessions of a Fabric Addict for Can I Get a Whoop Whoop and Celtic Thistle Stitches for TGIFF.
I hope you are having a great quilting week, whether you are quilting in collaboration or solo.
18 comments:
looks great - I have been cutting back on extra large quilts too
Fabulous finish and a wonderful collaboration, thanks for linking it up to TGIFF!
Beautiful, great design!
I love the look of this quilt! Varied fabrics all working together in a wonderful pattern.
What a wonderful quilt! I love the stitched signature and date. So neat! I'm sure it will be enjoyed!
I have been looking forward to seeing this finish Janine. The colors are really pretty. The quilt has an almost elegant look to it and I think it is the colors and the light background. Great finish. I bet your daughter loves it!
Your daughter's quilt came out beautifully! What fun to collaborate on it’s construction, making it a true treasure.
Love your quilt and the quilting is perfect!
This is a wonderful quilt Janine. I love the process that your daughter and you followed to make decisions about the quilt. Thanks for the links to the pattern.
Your quilting compliments your quilt top perfectly!!! Nice finish!
Love this string quilt! Sashes between the blocks is a great look.
Cannot say enough to let you know how much I love this quilt! The fabrics your daughter picked are fabulous, and ones I'd never have thought to put together. Those sloths!!! Like who even thinks that sloths would be good in a quilt fabric? BUT THEY'RE PERFECT! Yes I yelled that in glee. I saw it here and there on IG and wondered, though it was maybe an H2H quilt. You bet I love the ghost quilting that's extended into the borders! The binding is wonderful as is the back (but you knew I'd love that back right?!) Every time I read about you quilting on your treadle my grandma's treadle raises her head and wags her finger at me and says, 'Uh hello? Come ON, I want to run again.' I also just love the reminder of your sweet pea grandson you looked after while his parents were 'at the airport'!!
I love this quilt - and will look up the pattern! Beautiful job.
This sounds like such a lovely way to work with your daughter, and your finished quilt is lovely.
Janine this is one of the prettiest quilts I've ever seen! The fabrics and pattern are just perfect together. I love your quilting so much I'm saving this page for future quilting ideas. You did a wonderful job!
We have just the tiniest bit of internet left, but I had to let you know how much I LOVE this quilt!! It's gorgeous! The geometric quilting is so great, and the fabric pick and layout are perfect :)
What a great collaboration! It sounds like you really had a fun time designing this with your daughter and you did a wonderful job documenting it too! SUPER FINISH!! Oh, and I love the quilting too!
I’m revisiting this post because I think this quilt just might be on my list of winter makes this year. I love yours!
Post a Comment