I'll show you the finish first and then go back to some details. Here's how the quilt looks on my bed. It's a king size (104.5 by 131.5 inches) and my bed is queen size, so it's a good thing you can't see it puddling on the other side (although a tiny bit of my bedskirt is peaking out on that left corner). I'm not taking a picture outside (mosquito plague).

I spent a good part of the day Wednesday attaching the binding. I used my walking foot on my treadle machine, and the binding went on perfectly. I attached it to the front first, pressed it toward the edge, then folded it back to the back just up to the seam line and pressed again. I used Wonderclips to hold it in place and topstitched just under 1/8 inch from the seam line on the front, which easily caught the same amount of binding on the back. The original seam line looked like I had sewn "in the ditch" next to the binding on the back. I haven't done a binding exactly this way before, but it was so easy that I think it will be my go-to way when I want a machine sewn binding. I much preferred it to sewing the binding on from the back and then topstitching on the front.
 |
| Binding on the front (fabric below it is some of the backing fabric) |
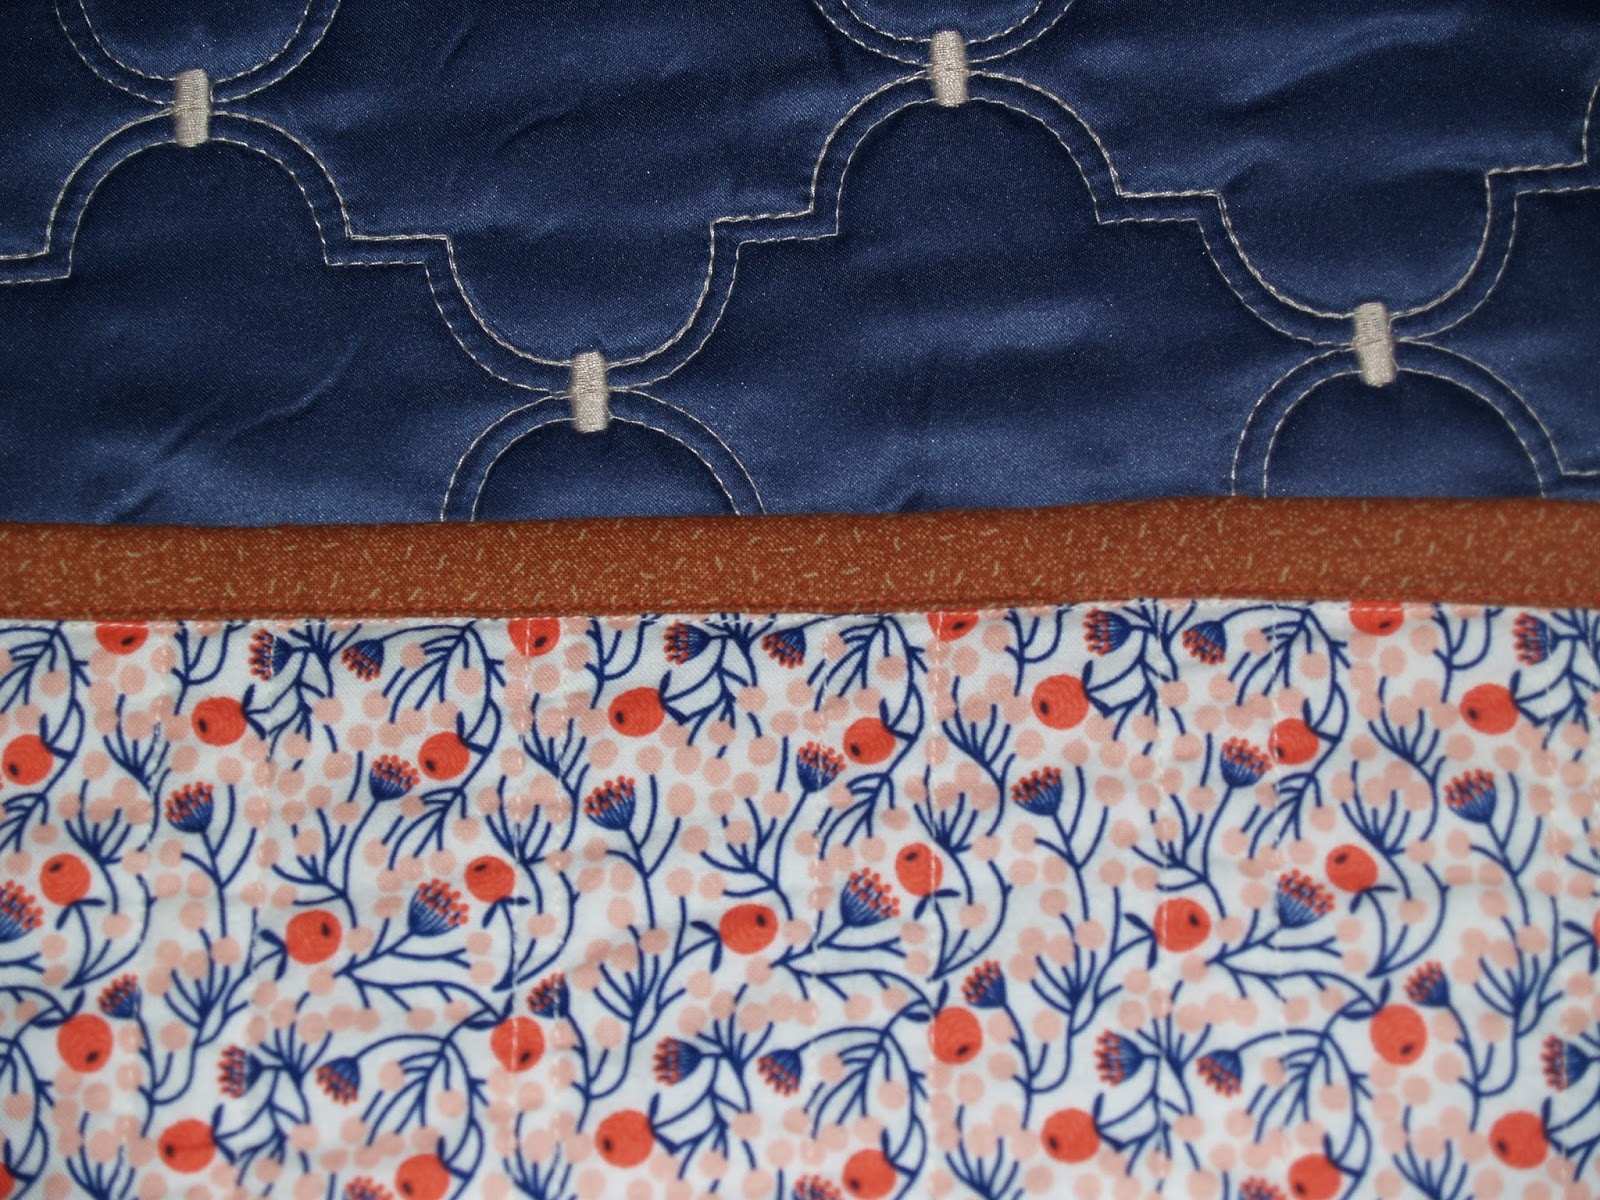 |
| Binding on the back (you can see the fake "in the ditch" line on the backing) |
Yesterday I very carefully laid out the bedspread on the floor and basted the border to it. I did not use any pins. After my problems with the polyester fabric in the border, I didn't want any more holes than necessary in the polyester bedpread. I am thrilled to say that the border fit just right. I marked a chalk line to help get the bedspread in just the right place. I used a very fine needle and some thin rayon thread for basting. Then I put the thinnest needle I could find in my machine and threaded the machine with thin blue thread to match the bedspread. I again used my walking foot to sew over the topstitching that was already on the binding of the bedspread to attach it to the border. Finally, I sewed a second line of stitching to the outer edge of the binding to strengthen the connection. Now the binding of the bedspread looks more like a ribbon. I'm just so happy with how it all turned out. Obviously, the bedspread is a higher quality polyester than that fabric that gave me so much trouble when I was making the border. It all feels really sturdy now, and I think it will hold up well in use.

Before I attached the binding, I cut the corners of the borders on an angle to reduce bulk and get rid of the "bad" fabric that had been there.

One more little detail. I used Hobbs 80/20 batting on this quilt. I gently soaked and dried it and prewashed the fabrics before using them so that they won't shrink up too much when the quilt gets washed.
This project was definitely one of the most challenging quilt related projects I've made. I have added a border to enlarge a quilt before to make it fit a bigger bed, but that project was entirely cotton (and based on my own quilt instead of a commercial one). Working with a polyester spread was really scary for me, and I doubt that I would take on such a task again. If I had had more experience with polyester, I probably would have known how to use a fusible interfacing (and been comfortable with it) to strengthen the polyester (and other gauzy fabrics) that I was first trying to use. But quality cotton is so sturdy and so much more satisfying to work with. So I'll stick to that in the future.
I don't regret this project, though. It was a labor of love, and I did learn a lot about designing on the fly, fixing problems, and finding creative solutions. I also learned that I love using the walking foot with my treadle. The stitch is gorgeous and the machine absolutely purrs while I'm working. (That's why I named her Kitty.) I also learned how to let the walking foot move the fabric instead of trying to push the fabric through. I didn't even have to use my quilting gloves, which is nice in the summer. I also learned how to puddle a large quilt to maneuver it on a domestic machine, which will certainly be helpful on my next quilting project. (Remember the Big Quilt? Yup. Time to get back to that one.)
After all this, I'm taking off from quilting for the weekend. I'm going to catch up on blog reading instead. Next week, I'm going to fool around with some ideas for quilting the Big Quilt. I still need to order thread for that project, too. And clean part of the basement so I can use the floor to baste the Big Quilt. Oh, and I'll try to put together some pictures of my binding technique.
I'm linking up with Crazy Mom Quilts, My Quilt Infatuation, Confessions of a Fabric Addict (Can I Get a Whoop Whoop), and Quilt Matters (TGIFF) to share my excitement about being done!! Buttons are on the right.
Have a wonderful weekend everyone!!
6 comments:
Yay, congratulations! You did a great job integrating the border to the bedspread. Very cool!
Congrats on finishing this really challenging project. You did a great job. I am curious to see the pictures of the binding process you used. I couldn't quite grasp it hen I read it today.
The bedspread looks gorgeous!
Congratulations! I have so admired how you have gone about this tricky job and it is great to see the finished quilt. It looks great!
Now that is a Magnum Opus indeed! Many many many congratulations on finishing it, it looks wonderful!
What a wonderful success! Well done, how satisfying to have it so beautifully completed!
Reading through all your posts...this came out fantastic!!
Post a Comment