Friday, August 18, 2023

Positivity Blooms Finish

This QAL for Positivity Blooms has been so satisfying. It is a collaboration between Bernie at Needle and Foot and Preeti from Sew Preeti Quilts to encourage quilt donations, specifically to Mercy Hospital in Sacramento, California for the Palliative Care Unit, but also to other organizations of our choice. Bernie is our encourager, and Preeti is the designer of two patterns: Positivity Grows (vines/leaves) and Positivity Blooms (flowers with leaves). 

I knew immediately that I needed to make the Blooms version. I'm keeping my donation closer to home. It will go to the Mother and Baby program at Pine Hospital near Grand Rapids, Michigan, to give mothers their own quilty hug during therapeutic treatment for overcoming post-partum depression and other mental health challenges surrounding childbirth. My quilt is smaller than Preeti's pattern to better fit the needs of the program. 

To fit my style and the sizes of my fabric pieces, I made my quilt a little differently than instructed in Preeti's pattern. Instead of using strips, I pieced my leaves with no-tear-off paper foundations, rearranged some of the seams of the blooms, used long strips of cloth for the stems instead of piecing parts of the stems into individual blocks, and widened the borders to the same size as the sashings.

It took me a long time to choose the reds for the blooms. I wanted a bit of contrast but not a lot. 

I had a fat quarter of the orangish red on the left and found the three others at a local shop. 

They were so close to the same color, but I couldn't decide, so I bought all three and then spent way too much time picking the best one using grayscale before finally choosing the viney print for the darker red. 

I had one little unexpected challenge when cutting out the background fabric. I discovered a line of fading through about a half-inch from the fold. It had apparently been on display for awhile near a window with strong light in the store. I needed to cut around those areas so there are some extra seams in the sashings and borders. I knew they'd pretty much disappear into the quilting, but it did take a little longer to cut and piece them. Despite this, the quilt went together fast. I was stuck indoors for several days due to wildfire smoke alerts, so sewing was a good way to pass the time.

I went back to the store when it was time to figure out the backing because i couldn't get a fabric out of my head that I had originally wanted for the background. There hadn't been enough on the bolt for the background, but I knew that addition of another strip of fabric would make it work perfectly well for the back. And then the shop owner brought out a wideback for that extra strip. Oh, yes!. Well, of course they went together--they were from the same designer. 

For the quilting, I made some templates to add detail to the blooms and drew around them with my Chakoner. 

                   Hard to see the chalk lines here unless you enlarge the photo.

Then I quilted them with my walking foot. 


I also drew on some guidelines for veins in the leaves and free-motioned them. After quilting in the ditch along the stems, I free-motion meandered the background. I'm thrilled with the texture. What a difference it makes in that solid fabric.

I had considered quilting the words Bee Balm in fancy cursive in the upper right area of the quilt, but then decided that someone else might associate a different flower name with these blooms so I left them out. Quilting went super fast thanks to two rainy afternoons in a row.

Here's the back.


The binding was made with the leftover reds in the blooms plus the two other red fat quarters. It looks solid, but the subtle patterns do show up nicely in person.


I was so taken with this quilt pattern that I just might have to make one (or a variation) for myself. My living room wall could use a new quilt to replace one that has faded over the years. We'll see....

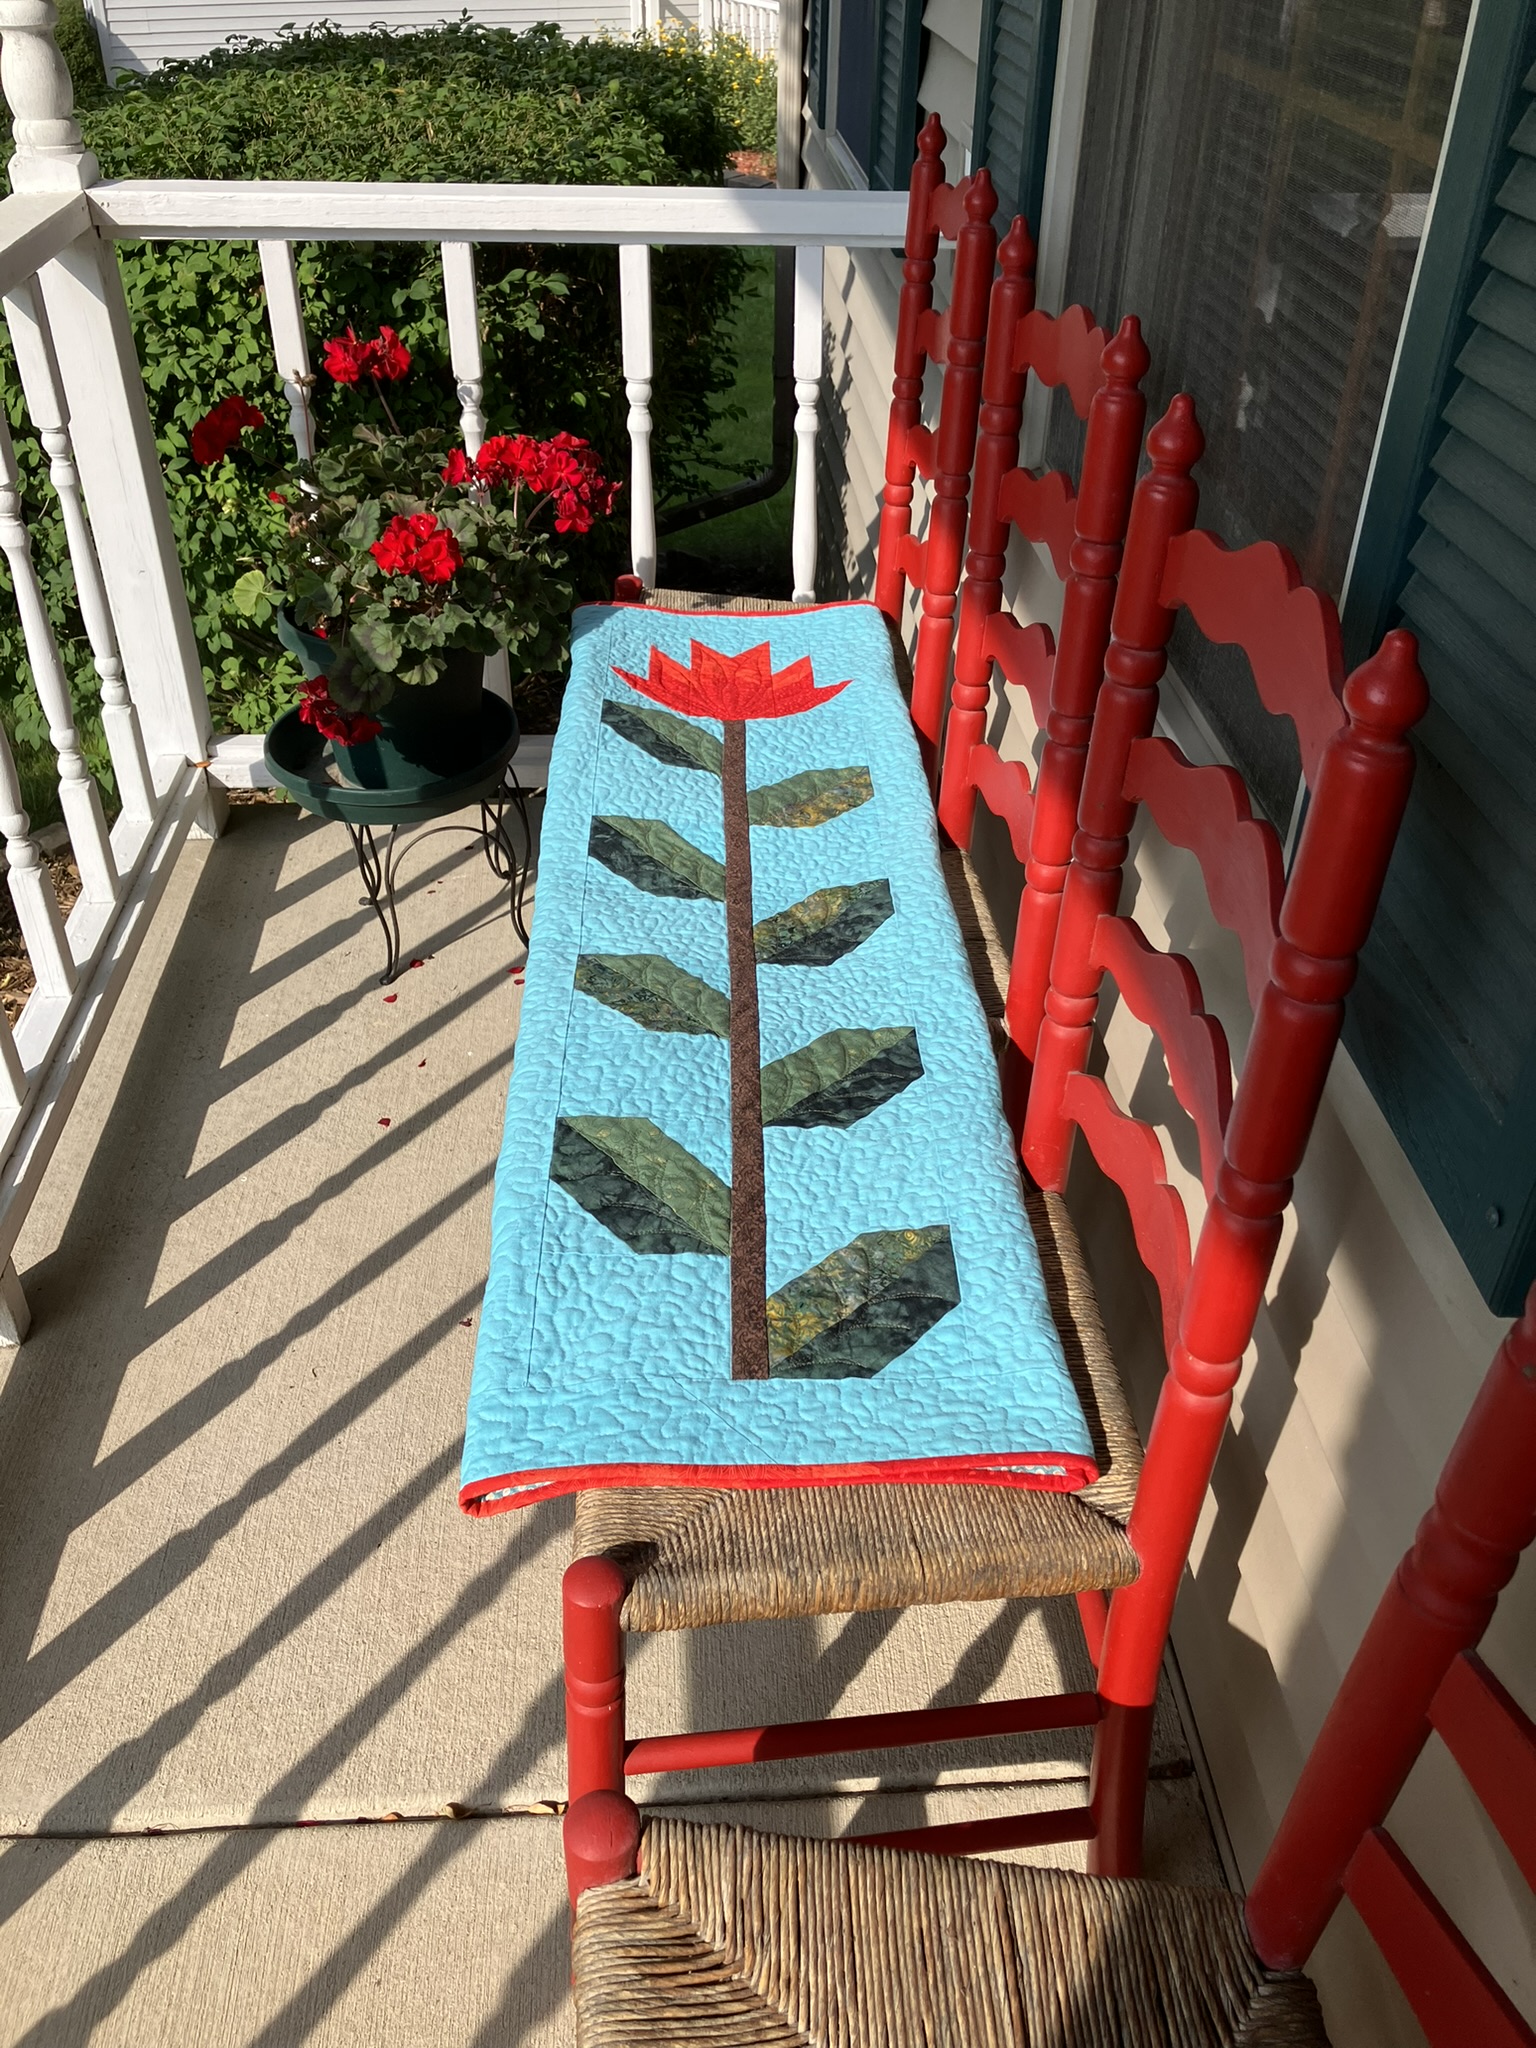
It turns out the finished quilt was challenge to photograph in the wild. My usual places didn't work well because if I draped it over something, the blooms were cut off. And when I photographed it from afar the color washed out. But I'll show you what I got anyway along with my usual driveway photos while I list the stats...

Cassie (I feel like Cassiopeia and I are on a nickname basis now since she's been my model several times) wasn't too sure about how I draped this.

Pattern Positivity Blooms by Preeti at Sew Preeti Quilts, with some re-sizing and my preferred techniques.

Fabrics Some random pieces and a fat quarter from my supply; the rest are likely from Lori Holt for Riley Blake.

Batting Fairfield 80/20

Thread Piecing: Superior Masterpiece in Granite. Top threads for quilting: Mettler 40/3 cotton quilting in a dark red (not sure of name/number), Mettler Silk Finish cotton in Burnt Olive, Coats and Clark Machine Quilting Cotton in Nugrey. Bobbin thread: Also Coats and Clark in Nugrey. Hand sewing on binding: J and P Coats Dual Duty Hand Quilting in red. 

(Sidenote: This is the first time I've ever used a different color in the bobbin from the top thread. I wasn't sure my machine would like quilting with two colors, but it did great. I wish I had done it before. I'm thinking particularly of a quilt I made earlier this year with a very dark front and light back. It would have looked so much better. Sigh.)


Binding Cut 2 1/2 inches and random scrap pieced. Folded and sewn to finish at 3/8 inch.

Quilt Size Pieced: 48 1/2 by 56 1/2 inches. 

                  Quilted: 47 1/4 by 55 inches.

                   Washed: approximately 45 by 53 inches.

Machines Singer Featherweight for piecing. Singer Treadle 115 for quilting and machine work on binding. 

Signature/date


Freshly laundered, dried and all crinkly on a perfectly sunny day:

I'll be sending this out soon. I'm linking up (on Sunday) with Bernie at Needle and Foot for the final link up for the Positivity QAL. Go check out the other quilts--and check out Preeti's quilts and instructions herehere and here. You just might decide that Positivity Blooms (or Positvity Grows) is in your future, too. Thanks to Bernie and Preeti for a great QAL. I'm also linking up with Kelly at My Quilt Infatuation for Needle and Thread Thursday and with Sarah at Confessions of a Fabric Addict for Can I Get a Whoop Whoop.

Just a reminder: I'm not affiliated with any company, so when I mention products, services, or stores, I'm just documenting what I used or liked.) 


Sunday, July 16, 2023

More Positivity Blooms

 Another one-photo post, but there is progress on my Positivity Blooms quilt for the QAL with Bernie at Needle and Foot and Preeti at Sew Preeti Quilts.

Yup, the bathroom was the best place for a photo of the quilt top. Too breezy outside to take one of a flimsy. Disregard all those wrinkles. The light showed every one. At least the towel kind of coordinates. And really, the quilt fits in that space just right. 

I was able to finish this top really quickly thanks to still being indoors because of poor air quality from wildfires way up north. I didn't take any in-progress photos, but if you look closely, you'll see that--again--I didn't quite follow the instructions. I just drew the flowers from the pattern onto a piece of graph paper and made my own draft to reduce a few seam lines.

As you might recall from my last post, this Quilt Along is for a collection of quilts for the palliative care unit of Mercy Hospital in Sacramento, California. The pattern was designed by Preeti, and Bernie is doing the promotions and link ups. My quilt is a bit smaller than Preeti's and I will likely be donating it closer to home. You can read more about the QAL and the collection on either of their websites (posted below). There are two versions of the quilt, one with just vines/leaves and one with flowers. 

I am so appreciative of Bernie and Preeti for encouraging us to make these quilts and spending the time to design and promote them and for giving us a relaxed schedule to make them. My summer has been full of all sorts of activities that don't quite fit with quilting mess, so this has worked well for me. 

Most of my other-than-quilting activities have been fun. But one activity this past week was getting at some long-overdue dusting. I absolutely hate dusting. The dust just comes right back, so it seems like such a waste of time. But the other day, I noticed that the dust lying around had a brown tinge and smelled pretty funky. That must be from all the smoke in the air a few weeks ago. So I got to work and dusted/vacuumed EVERYTHING. I was so proud of myself. The house seemed lighter and brighter--and cleaner! Well, guess what's back as I'm writing this. Needless to say, the house is closed up tight. I do not want to have to do that massive chore again before guests arrive later this week. Hopefully the smoke won't be as thick this time or as long-lasting. Really, it is a smallish thing for me to complain about. I know that weather-related concerns (and climate-change effects) are much worse in other parts of the country right now, and my heart goes out to all who are affected. 

Here's where to check out the links to the QAL:
Mercyful Quilts tab and current link-up for quilt progress this week at Needle and Foot. 
Tab for the schedule of the QAL (You could easily still start this quilt), sponsors, instructions, and Preeti's design and quilts here and here.

I already have the back pieced and the binding made for my quilt. I'll share those when the quilt is finished. Now I have to figure out how to quilt it. I was first thinking of poppies when I chose the colors, but now I think the flowers look more like bee balm. I part of me wants to quilt Bee Balm in fancy script in the big background area above the shortest flower, but maybe it's better to let the recipient decide what the flowers look like. I have a couple weeks to figure it all out before I get back to my machine. 

Time to go link up for the party. I'll be back (I hope) with the finish on August 20. In the meantime, I'm toying with another QAL, although it might be a Quilt Alone Later rather than a Quilt ALong as I'm going to be very late starting. 

If you are sewing a Positivity Quilt, and even if you aren't, I hope your summer sewing has you smiling. 

(Just a reminder: I'm not affiliated with any company, so when I mention products, services, or stores, I'm just documenting what I used or liked.)


Wednesday, June 28, 2023

Positivity Blooms

 Just one quick photo today. Here’s my progress on the QAL going on with Preeti at Sew Preeti Quilts and Bernie at Needle and Foot

If you know these women, you know they encourage us to make quilts to donate to special causes. This started as a collection for the Palliative Care Unit of Mercy Hospital in Sacramento, California, and for the last few years Preeti has designed a pattern and Bernie has done the promotion and link ups for the QAL. Quilters may also choose a different organization to donate to if they wish. You can read more about the QAL and collection on either of their websites. 

I’ve started my quilt just a bit late, but as we are having really bad air quality this week from wildfires in our neighbor to the north, I’m making good progress staying indoors and sewing. My quilt will be a bit smaller for a donation to an organization closer to home. I’ve also revised the sewing technique to suit my own style (foundation piecing) but I love the design. There is a choice of just leaves (Positivity Grows) or leaves and flowers (Positivity Blooms--the one I'm making) and even a bonus quilt if you make the quilt following Preeti's technique. 

My leaves are all done. Today I’ll make the stems and sew the blocks together. Maybe even the flowers—it’s that easy! In a later post during the QAL I’ll share how I made my blocks. Right now I need to get back to sewing. 

In the meantime, check out these links to learn more:

Merciful Quilts tab and the link-up for quilt progress this week at Needle and Foot.

The tab at Sew Preeti Quilts for the schedule of the QAL (it goes on most of the summer for nice, easy sewing), sponsors, and instructions, and Preeti's design and quilts here and here

Have fun sewing this week and I hope you can breathe easy!

(Just a reminder: I'm not affiliated with any company, so when I mention products, services, or stores I'm just documenting what I used or liked.) 

Friday, June 23, 2023

Rainbow Bear Paws

 This quilt has been a long time coming. 


It all started with a block I made during the Quilter's Color Quest workshop led by Rachel Hauser during the pandemic in 2020 (that seems SO long ago) following her Quilter's Field Guide to Color book. 

At the time I didn't have a clear plan for the block. It was supposed to be inspired by a personal story. (You can read about it here.) I knew I wanted to make more of this style block eventually. 

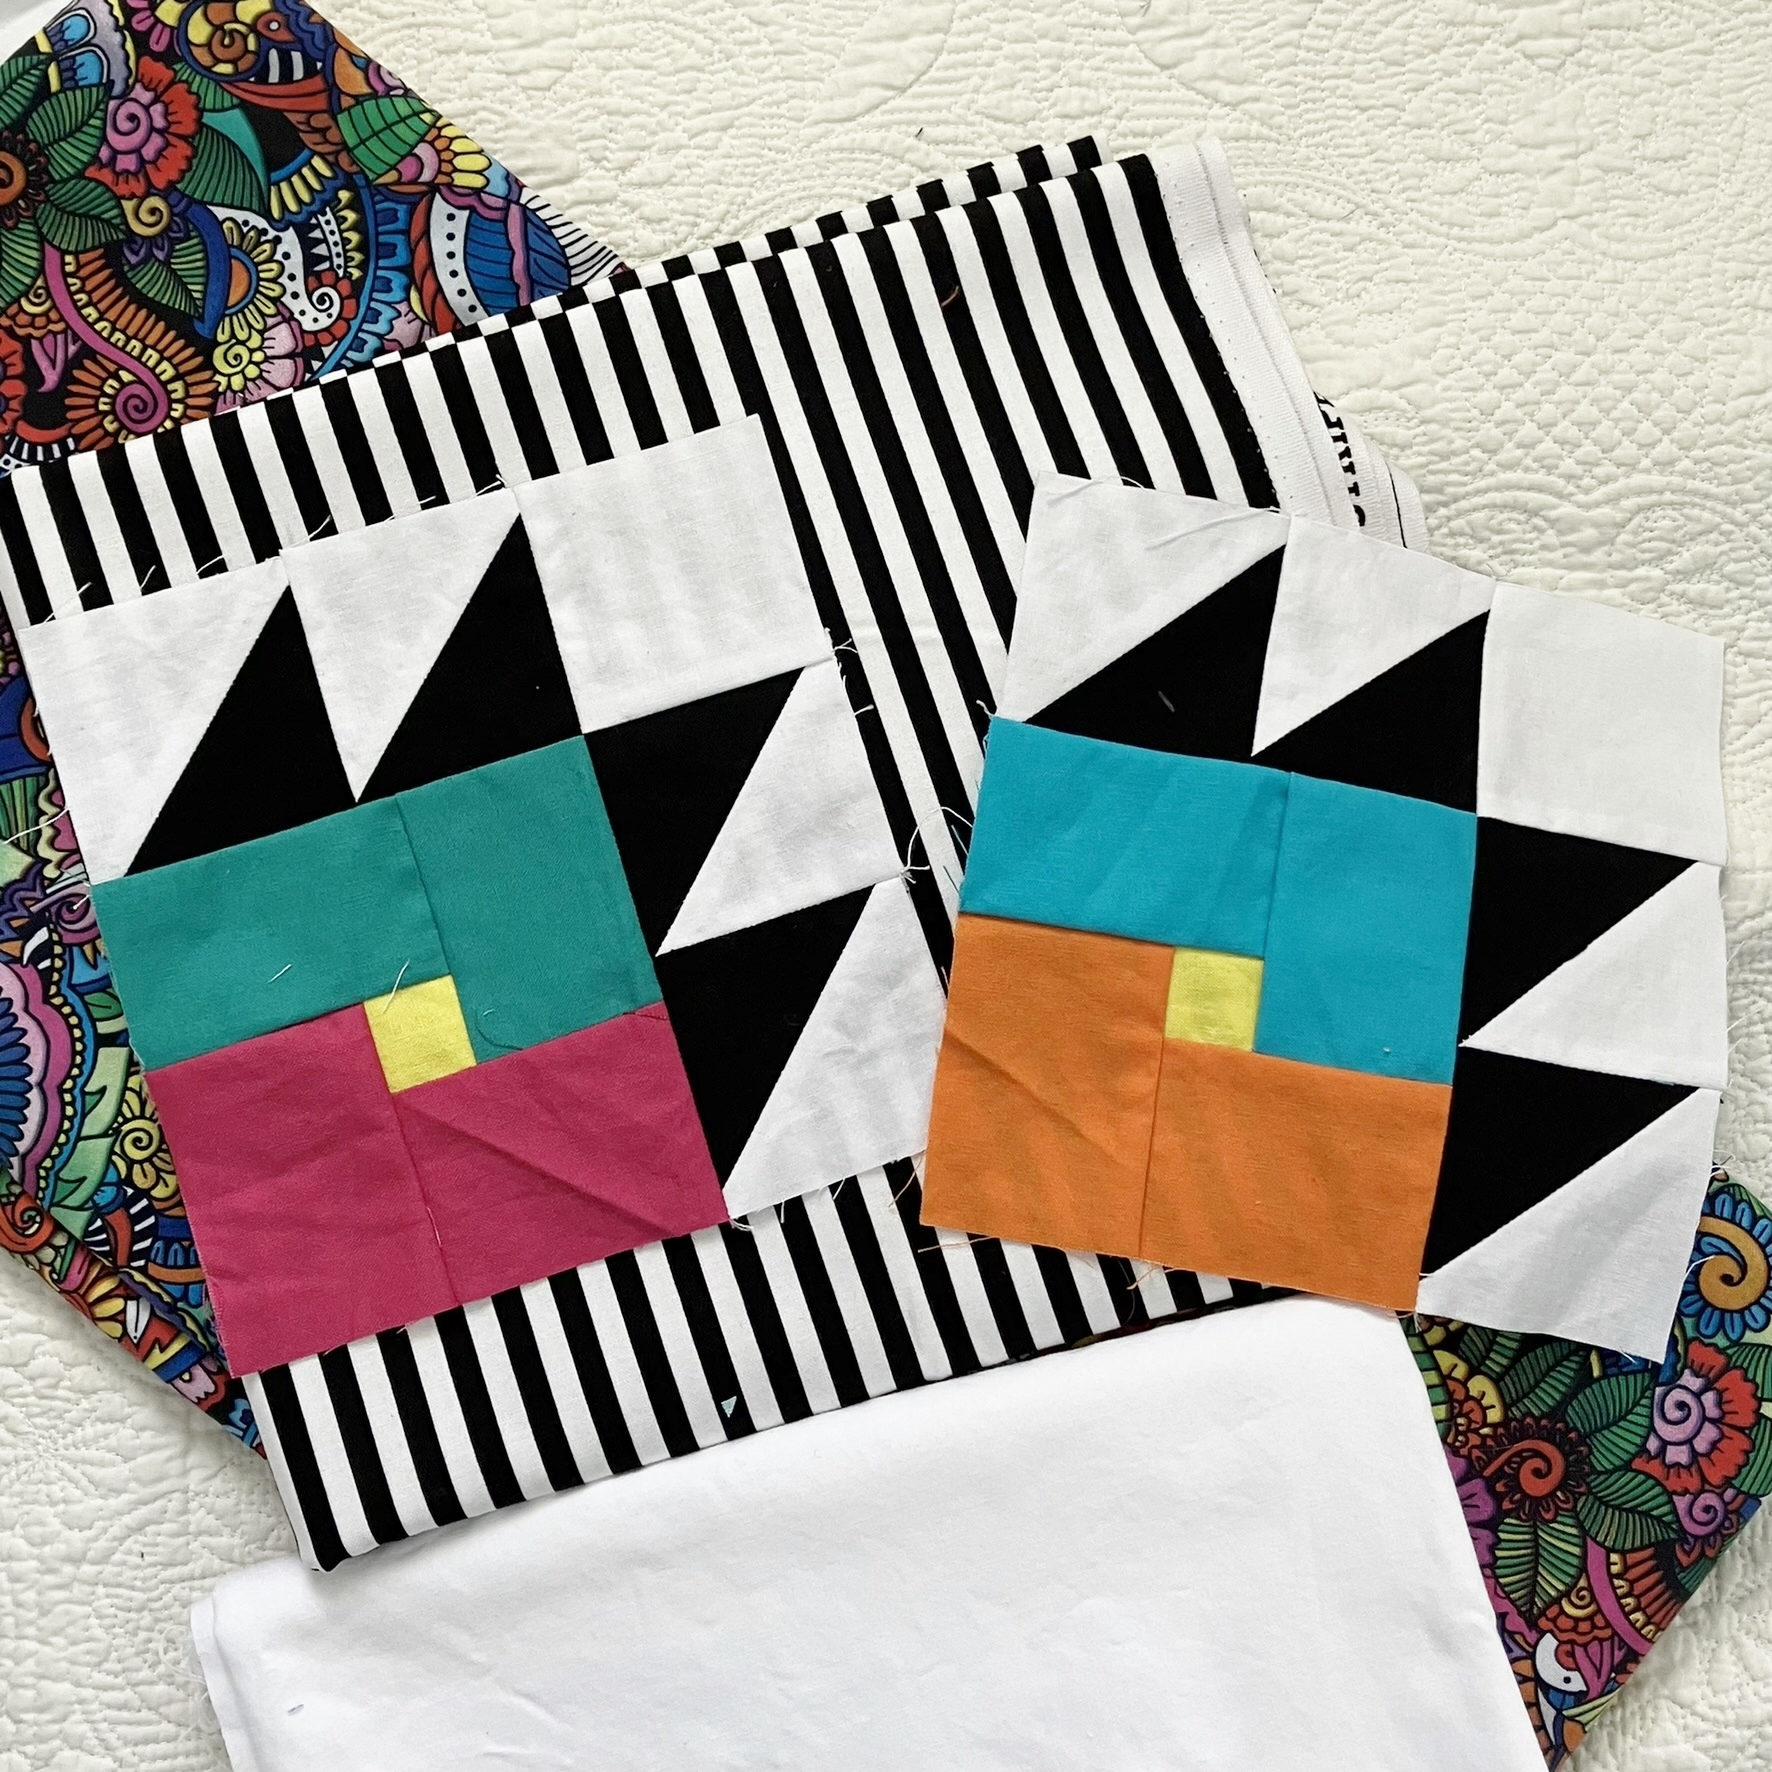
During 2022, I made lots more blocks following the colors of the Rainbow Scrap Challenge hosted by Angela at SoScrappy. I chose yellow for the centers and each month paired the designated color with a variety of other colors from my rainbow solids bin. I bought some Kona cotton in white for the backgrounds. Then I discovered that I had actually made the original block with Kona Snow, so I had to do a little surgery to replace it. By the end of the year, I had enough blocks for a quilt and knew I wanted to use a black and white stripe in some way with more solid white to make a quilt. I already had a fun retro 60s/70s print for the backing that I had bought in February 2021 as an option for another Bear Paw quilt. I chose a 1/4 inch stripe to make sashing strips 1 1/4 inch wide. 


I put the blocks up on my design wall pretty randomly. I may have made a couple of changes after taking this photo, but it's about how the layout ended up. 


Then I cut about 24 sashing strips 6 1/2 inches by 1 3/4 inches (to finish at 6 by 1 1/4) and sprinkled them around here and there. A "rule" I set for myself was to not place any striped fabric at the outer edge because I wanted a white border with a striped binding. I ended up using 22 of the strips. I didn't want to go crazy with the stripes and detract from the blocks. This seemed like the right amount. 


To plan the rest of the sashings I drew the quilt blocks out on graph paper.


After making the drawing, I decided I wanted the outer sashings to be a little wider for the border. (I avoid long pieces for borders when I can. I prefer to incorporate them into the blocks.) I drew a rectangle around the interior blocks and then marked out the sashes for those: 6 1/2 by 1 3/4 inches (to finish at 6 by 1 1/4 inches) and 7 3/4 by 1 3/4 inches (to finish at 7 1/4 by 1 1/4 inches). I needed to resize some of the sashes on the edges making them extra long, extra wide or both. Some were cut 8 3/4 by 2 1/2 inches, some 8 3/4 by 1 3/4 inches, some 7 3/4 by 2 1/2 inches and some 6 1/2 by 2 1/2 inches. It sounds complicated but I just calculated them from my drawing and scribbled the sizes and how many I needed along the edge of the page. This is truly my kind of improv (hard to explain): precise in numbers but plan-as-I-go. Anyway, it all turned out well when I laid it out.


Then it was just a matter of making the blocks, each with two or three sashings around them and sewing all the blocks together. No borders needed.

One little tip I have about cutting the striped fabric: I made sure that my seam lines landed somewhere in the middle of the black stripe so that there was always black at the seam--even if only a smidge--to set it off from the white sashing.


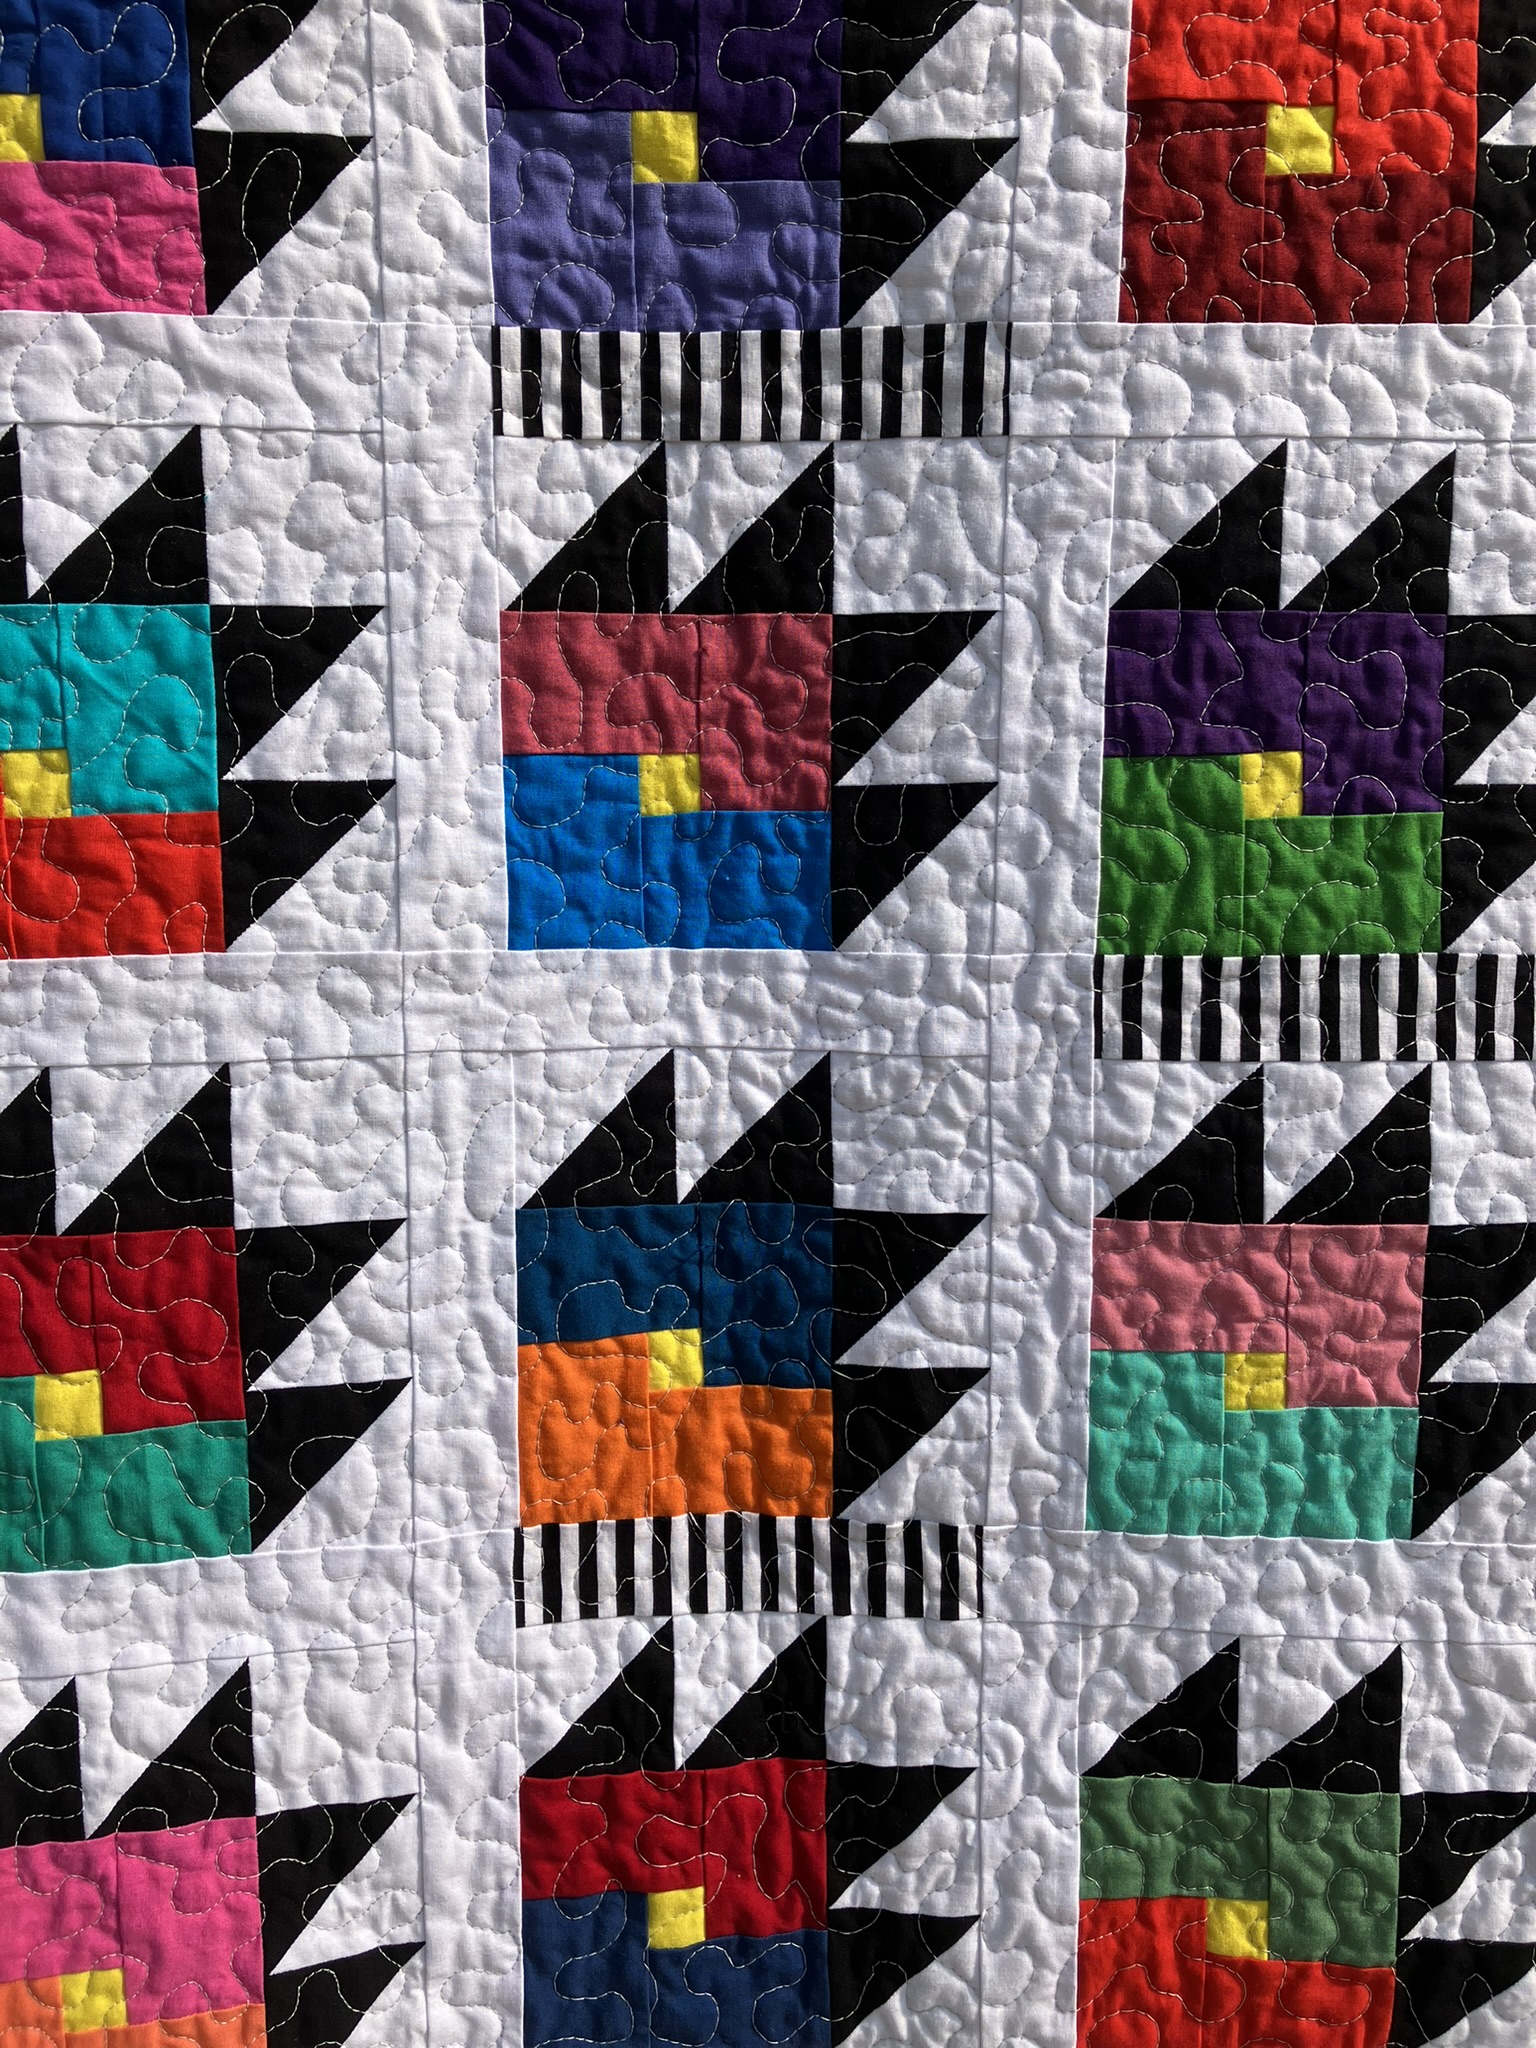
I did a meander for the quilting. There was already so much going on both on the front and the back that it seemed easiest. Then the fun of the striped binding...

I love it against that retro back. 

And just like that it was done and ready for the garage.

I'm always amazed how a pattern appears on the backing from the repeat of a large print. I'm glad I took the time to pattern-match the seam because it would have bothered me if it was off in the photo--even though that would not be noticeable any other time. 

Close up.

Here's the block that started it all...

And my initials and date...

On the driveway...

But we really need some glamour shots. We took a walk to the gardens at our Veteran's park and were surprised at how fast the flowers have come out, even with the pretty awful drought we have going on. (We have some great flower volunteers to make this happen in our township.) So here are some pretties along with the Stats.

Pattern: My own spin on the Bear Paw block, with a little square in the paw made with partial seams, and sashes around it. 

Block size 6 inches finished, and varies in size with the attached 1 1/4 inch finished width of the sashes in the interior and a 2 1/4 inch finished width on the outer edges of the quilt. 

Fabrics Variety of solids (mostly Kona, but some others, including maybe a few solid backsides of some prints), Kona white (background), Stripes by Riley Blake, and retro print fabric from Joann.

Thread Piecing: Superior Masterpiece in Granite; Quilting: Coats and Clark Machine Quilting Cotton Thread in Nugrey; Handsewing on binding: Superior Treasure in Antique.

Quilt size 54 by 61 1/4 inches pieced; 53 1/2 by 60 1/2 quilted; 51 by 57 3/4 washed.

Machines Singer Featherweight for piecing; Singer Treadle 115 for quilting and machine work on binding. 
This quilt will be donated, but I haven't decided where yet. 


I hope you've been tickled by a finish this month. I'm going with quick and easy this summer, so I'm not tied to my machine (unless I want to be). Having said that, it looks like I might be doing at least one (maybe two!) QALs. I'm starting behind on one, but I think it will be easy to catch up. Stay tuned.


(Just a reminder: I'm not affiliated with any company, so when I mention products, services, or stores I'm just documenting what I used or liked.) 


Friday, May 26, 2023

Ipad Case

I had every intention of finishing a quilt this month, but the squirrels are active this time of year. Now I do have a quilt top almost finished (three seams to go), so I've done okay, but that project got set aside for an afternoon because after I made the grocery bags, I was in a bag mood and just had to make a protective case for my new Ipad. This new device replaced my Ipad mini that bit the dust awhile back. That one had a nice case and fit in my purse just right. But the new one doesn't fit in my purse. Also, I bought a cheapy vinyl cover for it which doesn't seem highly protective. I use the Ipad mostly at home but thought it needed something more cushy and protective for packing to travel. 


So here's how I made it--

I still had some "batting" aka cut-up blanket from the grocery bag project, so I cut a piece about 11 3/4 by 16 1/4 inches based on the measurement of my pad plus a bit more and seam allowance. 

I layered a piece of fabric of the same size on top and quilted them together with wavy lines. (That fabric is leftover from the backs of two quilts I made a few years ago. I bought it from Bernie of Needle and Foot when she had her Etsy shop, and I remember at the time that it was a shame no one would see the backs since they were wall quilts. So now this fabric has its time to shine.)

For the main part of the case, I folded the quilted piece in half right sides together with short edges matching and sewed along the sides with about 1/2 inch seam allowance. I cut the lining from the same fabric and and sewed it together with about 1/4 inch seam allowance. 

Next, I cut "batting" for a flap at 10 1/2 inches by 7 1/2 inches and another piece of fabric 10 1/2 by 15 inches to make both the outside and lining of the flap. I folded the fabric in half right sides together (short edges matching up), laid the batting on one side, and sewed the side seams with 1/4 inch seam allowance, rounding the corner just a bit at the fold. 

I'm not sure what I'm trying to show here, but I took the photo, so there it is. You can see I also tried to make some notes. but I quit halfway through. Squirrels don't like quilters to stop and take photos or notes. 

After turning the flap right sides out, I topstitched about a quarter inch around leaving the raw edge open as it would be in the seam of the case in the end. Then I quilted the flap with wavy lines.

I popped the outer case into the lining right sides together, inserting the flap between the layers (centering it between the side seams) and sewed around the raw edge leaving enough of an opening along the side without the flap so that I could "birth" the case. After turning the whole thing right side out, I topstitched close to the edge of the opening to close it and then topstitched 1/4 inch around the edge. 

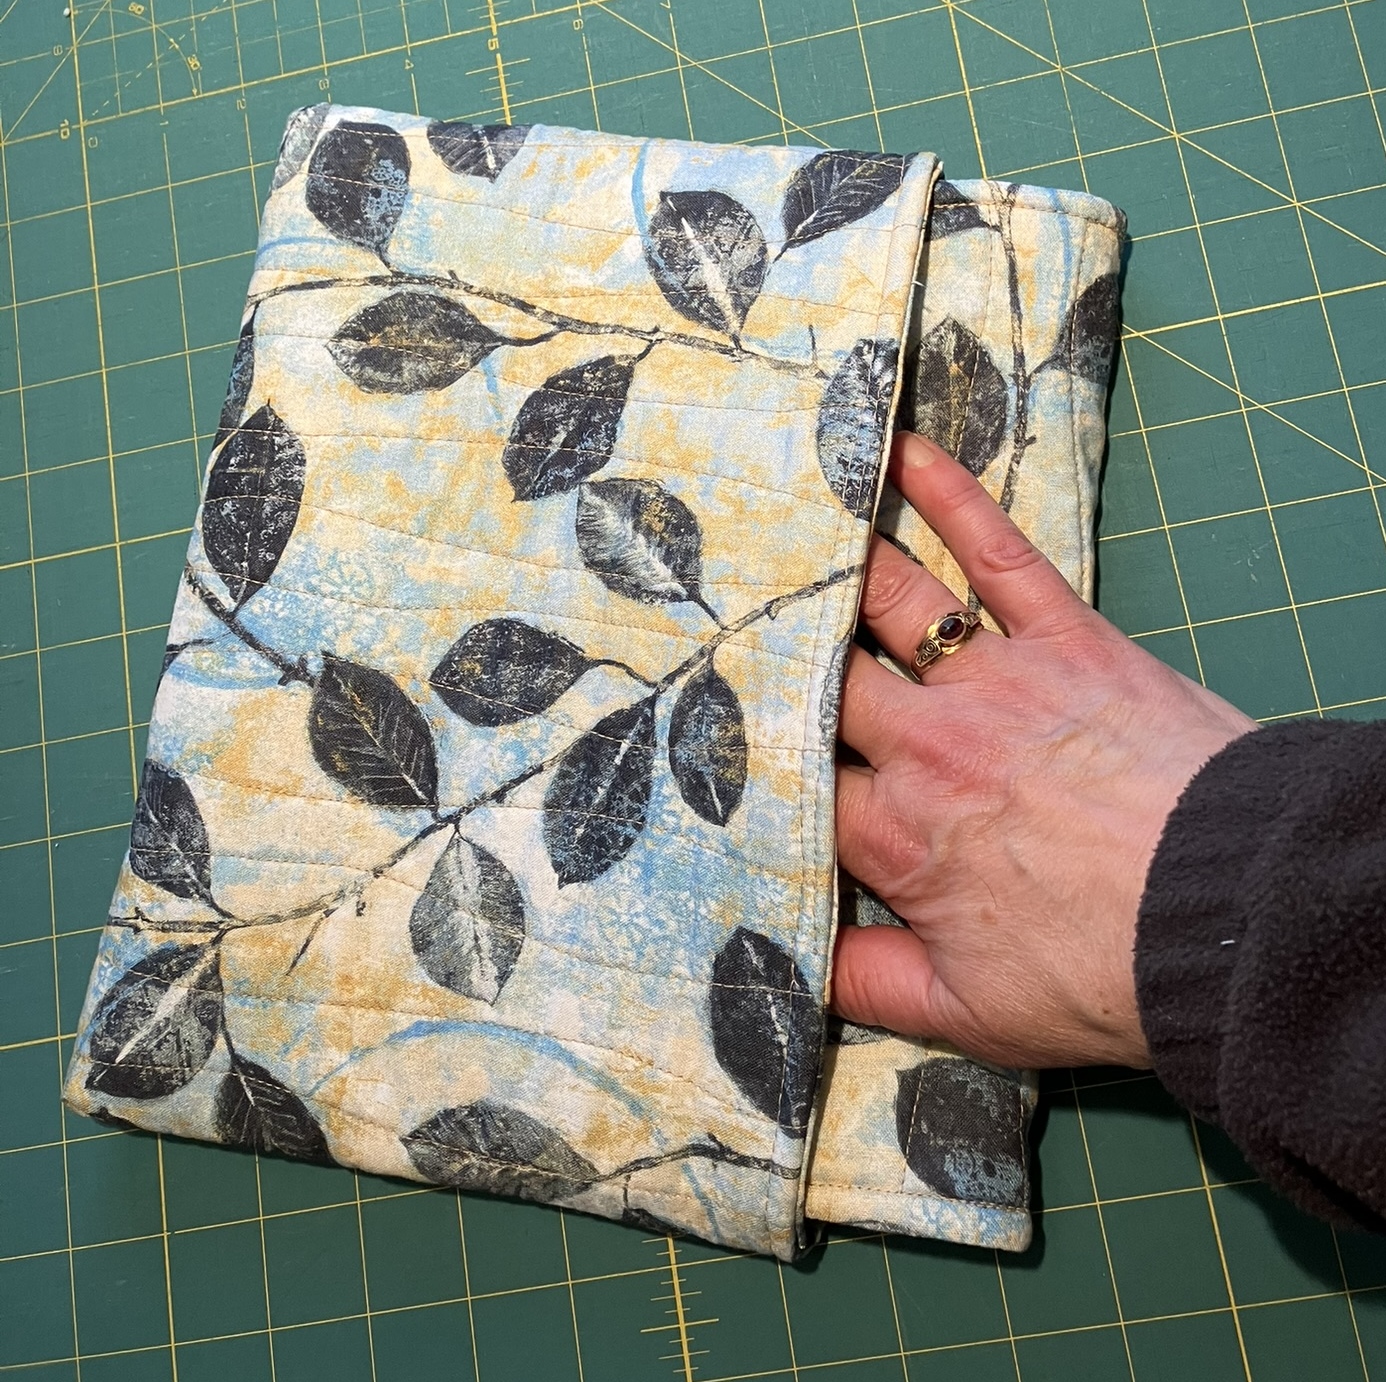
I was going to put some kind of closure (button or velcro) on the flap, but decided to just tuck the flap into the case. It's neat and adds a nice bit of cushion. 

The ipad slips in just right.


This project was so easy--less than an hour start to finish. Maybe just a baby squirrel. And I can report that it went on its first little trip in my suitcase this past week (so we could watch some of our Grands play baseball and volleyball) and stayed cozy and safe. 

I'm linking up this Saturday with Sandra at mmmquilts for DrEAMI (Drop Everything and Make it). 

If we don't keep having beautiful weather for playing in the flowers
and bike riding
(Hey those are squirrels, too!),  I should have another quilt finished soon. Until then, keep chasing whatever squirrels you see at this time of year.

(Just a reminder: I'm not affiliated with any company, so when I mention products, services, or stores I'm just documenting what I used or liked.)